If you want to learn to screen print, you can use our materials and our vinyl cutter to print designs onto fabrics and papers! Please keep our space clean from ink by putting down paper on tables and wiping our furniture and materials clean after using them.
Text in blue boxes are steps you should actively be taking to practice these skills.
Screen printing with vinyl
While photo emulsion is a typical way to screen print, you can also use a vinyl cut design instead to make your negative. This is a faster method and is much less messy than setting up photo emulsions, UV lights, and clearing out emulsions afterwards. Please complete our DIY training for the vinyl cutter before using these screen printing trainings.
Screen Printing Materials
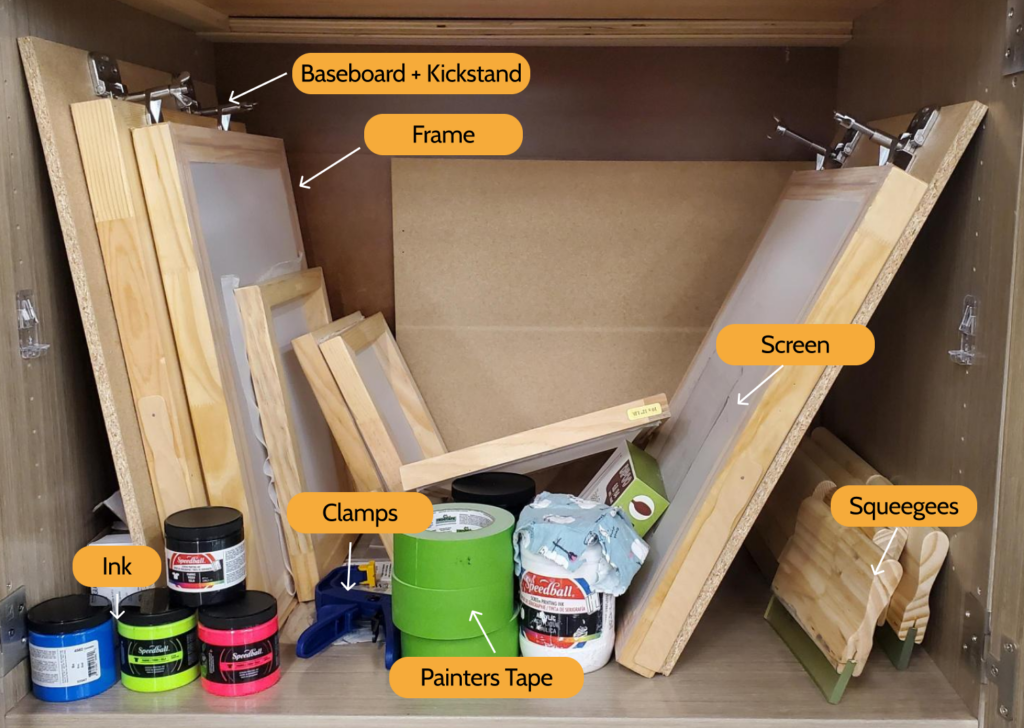
- Screen: These screens are made of a thin, mesh fabric. They are reusable as long as the person before your made sure to wash out all the ink.
- Frame, baseboard and kickstand: The frames hold your screen taut. Frames are screwed onto a baseboard with a kickstand, so all three parts can be taken apart for storage and put together for when you’re printing.
- Squeegee: These are used for pushing your ink through the design in your screens.
- Clamps: Clamp the baseboard of the frame to a table when you’re ready to print.
- Screen Printing Ink: The makerspace keeps a few different colors and types of ink in stock. You are more than welcome to bring your own ink into the makerspace if we don’t have certain types or colors. If you are printing with fabric ink onto fabric, please read the instructions on the container on how to cure the ink, otherwise your design will come off when you wash it and stain your other clothing.
- Painters Tape: Used for putting
- Vinyl cut design and transfer paper: Please read our vinyl DIY training to make your own designs for screen printing!
Prepping your design
- Select or create the artwork to be reproduced. Letters should be backwards, since the design goes on the underside of the screen!
- Weed your vinyl before it’s on the screen– we don’t need any extra holes in the screen. Make sure you have a border of vinyl on your design, this will make it easier to prevent ink from going in the wrong places.
- Clamp the baseboard to the table to prevent it from moving later on.
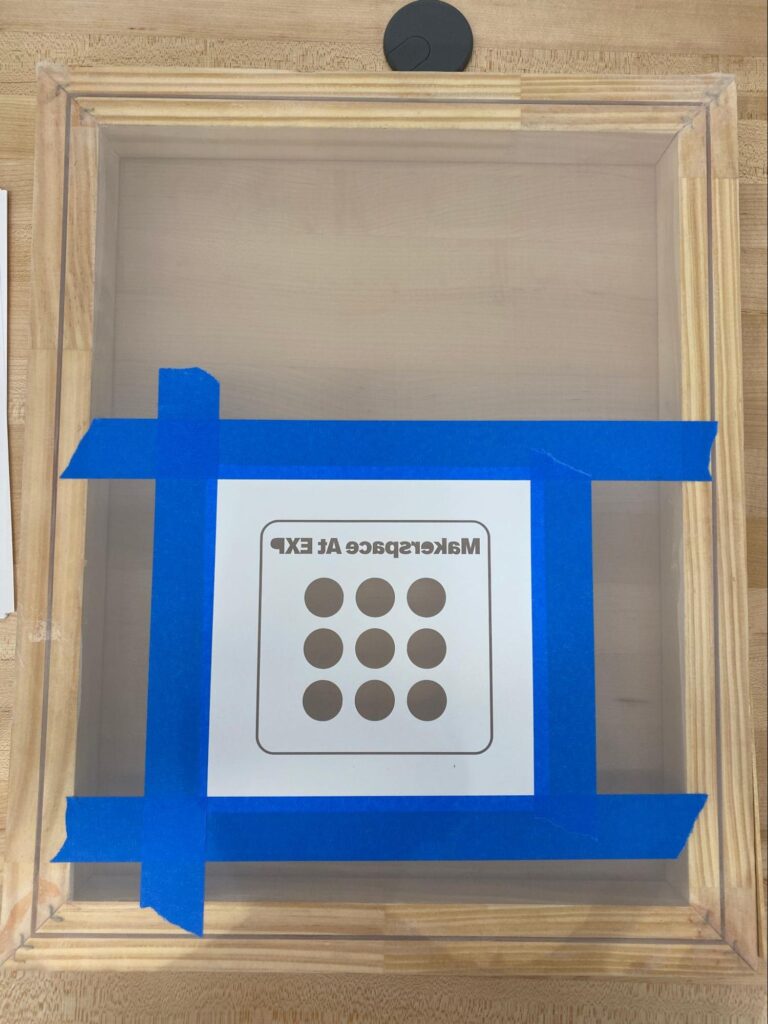
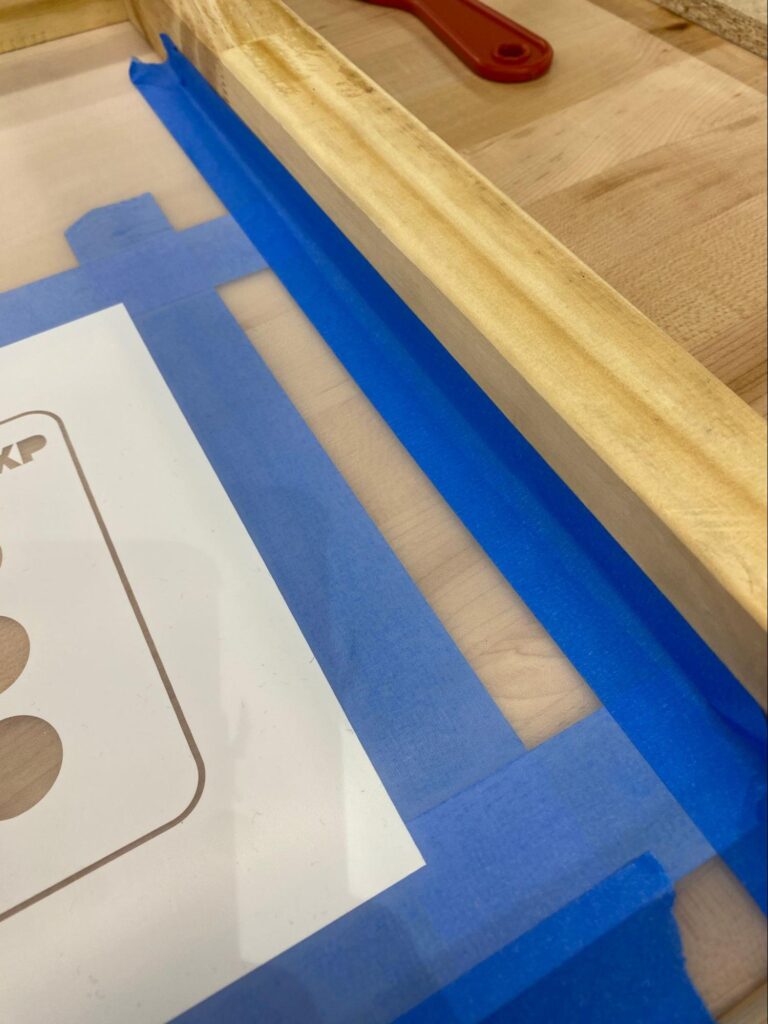
- Place the image to be printed on the bottom of the screen using transfer paper. Those areas of the frame that are left open permit ink penetration, while the rest of the screen is sealed so that ink does not pass through the mesh (see left photo).
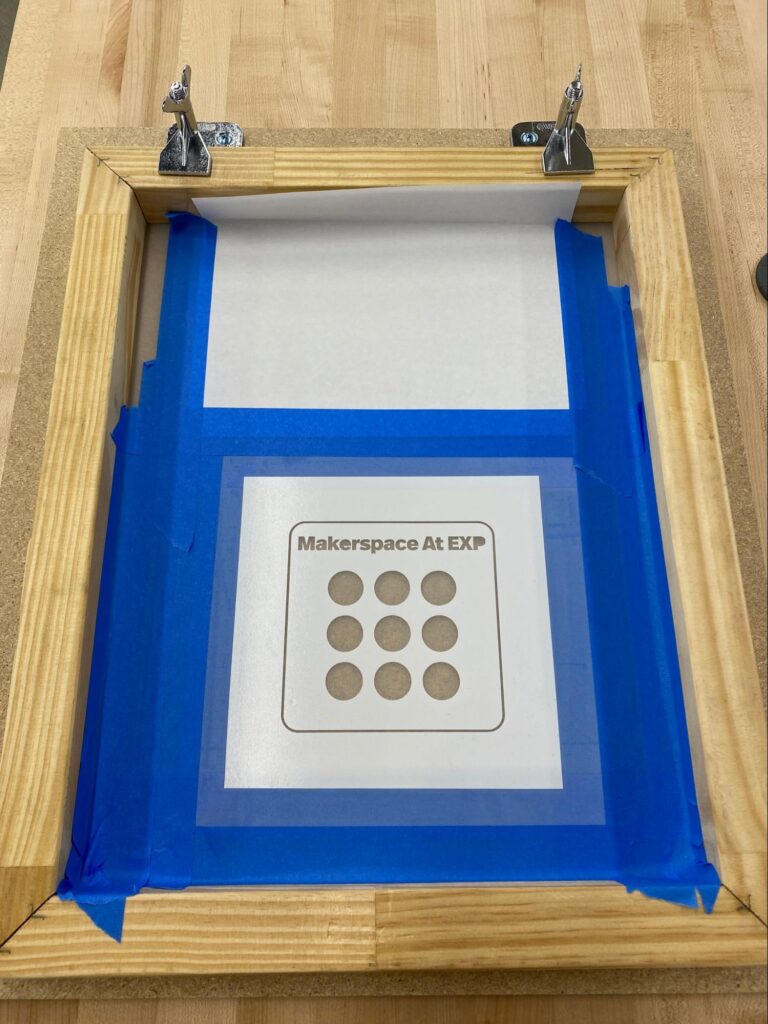
- Use painter’s tape to cover the rest of the screen to prevent ink from unwanted areas. Keep any tape or vinyl on the screen as flat as possible to make sure the ink can print evenly. Paper can also be used to block off larger areas of open space (see middle photo).
- Place tape on the edges of the screen for easier cleaning later on (see right photo).
Setting up your screen
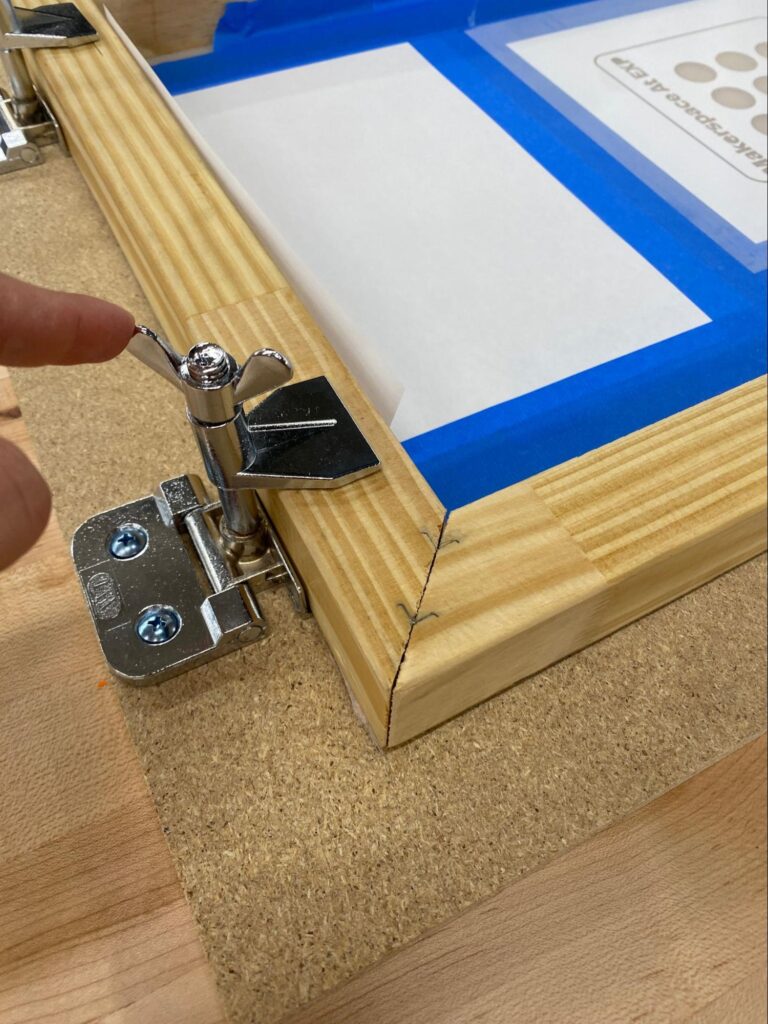
- After prepping, flip the screen so that the design lays flat on the board. Place frame and screen into the hinges and tighten them down.
- Lift the frame into a raised position and support it with a kickstand.
- Without any ink, test where your stock needs to go to make sure everything lines up and add tape to the corners of your stock to the baseboard.

Inking your design
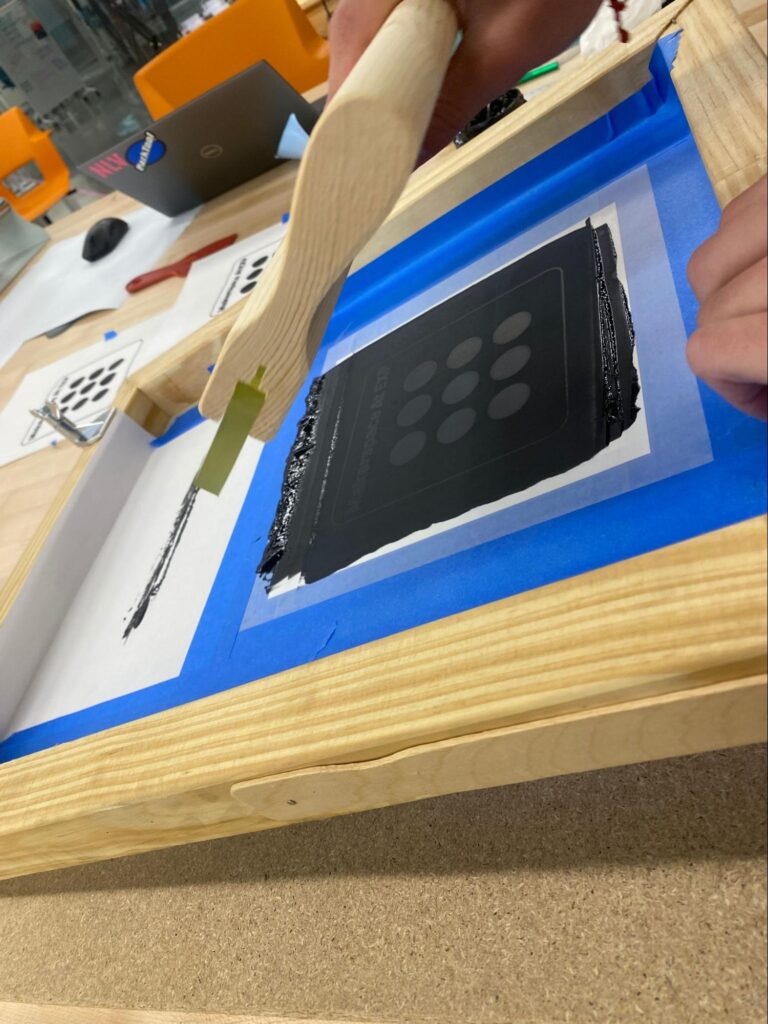
- Use a palette knife or spoon to spread ink across the top of the screen above the design (see left photo).
- Squeeze the ink over your design to “flood” the screen with ink before printing. This will ensure even ink coverage when printing (see middle photo).
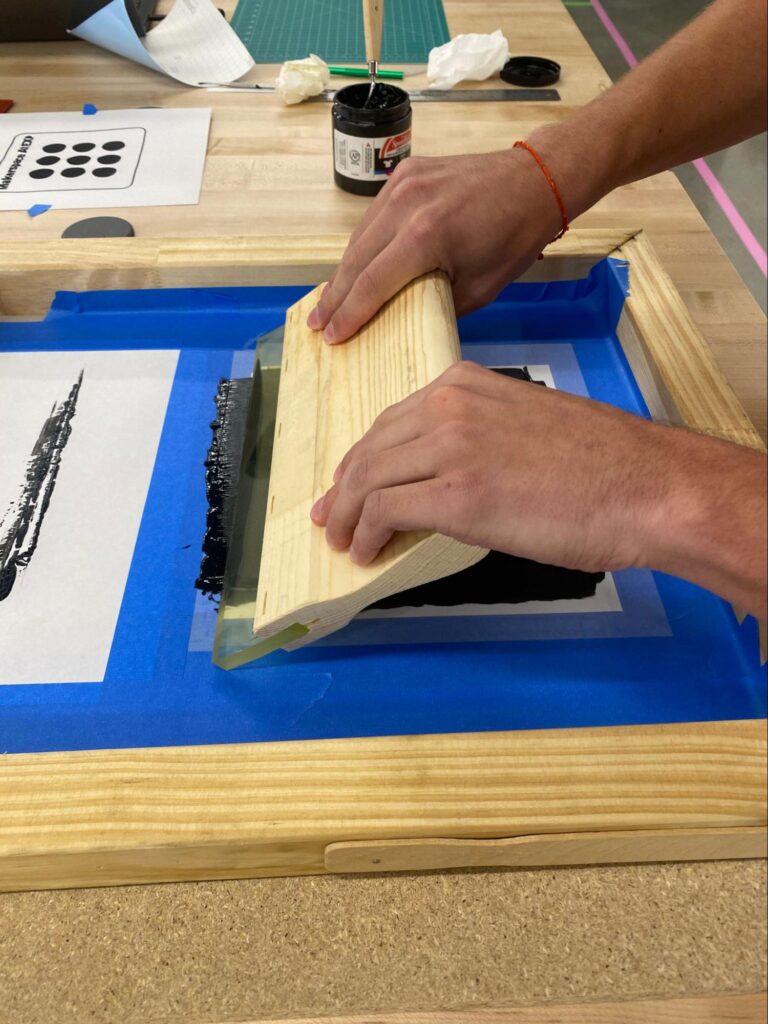
- You’re ready to print! Place your stock in the proper place on the baseboard. Tiny pieces of tape on the edge of your design can help smaller pieces of stock from moving. Drag the squeegee over your flooded screen 2-3 times with even pressure to press the ink through the screen (see bottom photo).
- Lift the screen off your design.

Cleaning your work station
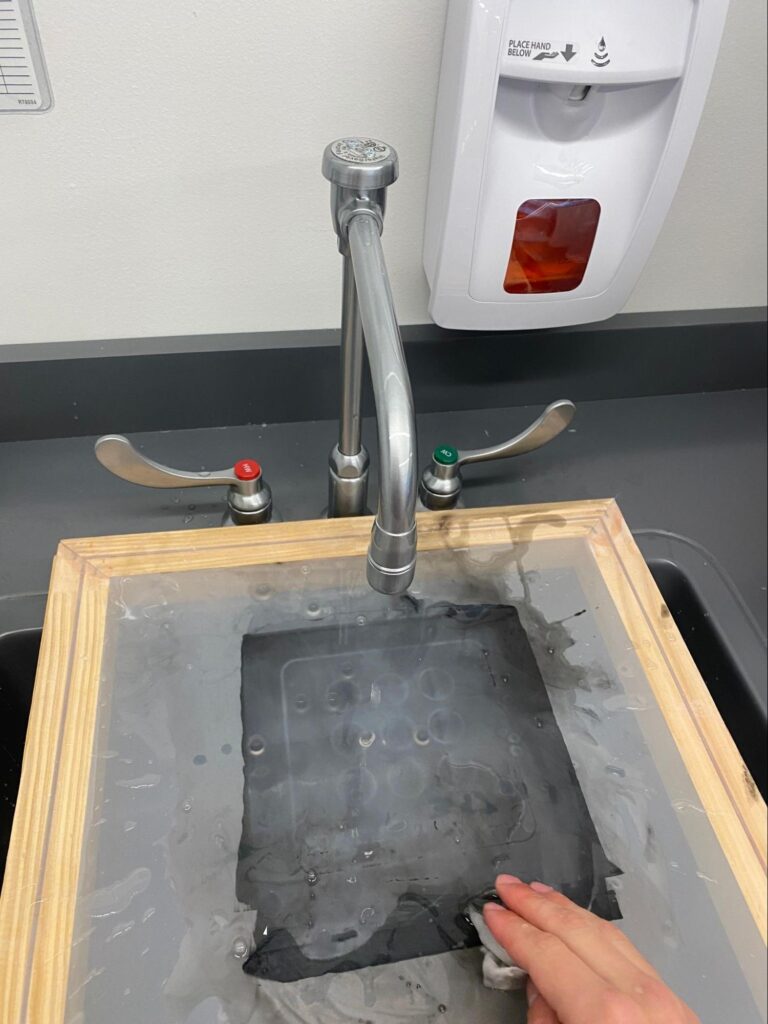
- When you are done printing, scrape any extra ink back into its jar then wash the screen and the squeegee. If ink colors are mixed, discard all the ink. Please wash the screen thoroughly, since dried ink left in the screen will ruin the design for the next person.
- Read the instructions on your ink for curing instructions. If you’re printing on fabrics, use a heat gun on your fabric to evaporate the water from the ink. This prevents ink from washing out.
- Clean up your work station, wiping off ink and water left on tools or furniture.