This training is for the Elegoo OrangeStorm Giga printer.
If you are looking for Ultimaker printers, you can find that here.
If you are looking for the Prusa printers, you can find that here.
If you want to train yourself on this FDM 3D Printer, you will need to have a thorough understanding of what is covered in this user guide. A staff member can provide you with a credential that allows you to use our FDM 3D printers independently, provided you demonstrate an understanding of the 3D printing process. This includes:
- A walkthrough of how you would set up a print on Elegoo Slicer, including a brief explanation of the core settings (I.e., walls, infill, materials)
- What are some safety precautions you should take when operating a 3D printer?
- What is the anatomy of a 3D printer?
This document will walk you through the basics of FDM printing. Text in black explains certain concepts.
Text in blue boxes are steps you should actively be taking to practice these skills.
What is an FDM 3D Printer?
FDM stands for “fused deposition modeling”. An FDM printer melts plastic and extrudes it in a pattern—basically, depositing layers of fused plastic to make a 3D model. The pattern is determined by a digital 3D model, which a printing software will “slice” into layers.
Safety Considerations
EXP Makerspace 3D Printing Policies
- Large-format FDM Printers (including this one) have a flat fee of $25 per print.
- Stay around to watch the first few layers of your print, as most prints fail early on. If we notice a print started and you are not there, we will stop your print for you and you will not get notified that we’ve stopped it.
- The laundry machine model:
- If you are not here to pick up your print when it’s done, someone may move it for you and start their own print job (just like if you don’t pick your clothes out of a washing machine, the next person can remove your clothes and run their own laundry).
- If you remove someone’s print to put your own on, please put it in the corresponding blue bin. Each printer has its own bin. Write down the previous patron’s contact info on the card in front of the bin.
- Card access:
- Upon completion of an FDM printer DIY training OR the SLA printing training, you will get card access to the 3D printer room. Wait a few days for it to update.
Advanced credential policies:
Upon completion of the Advanced 3D Printing canvas quiz, you may bring your own filament.
The makerspace is not responsible for other people using your filament. Get an Explorer to remove it for you when your print is done.
Explorers will load/unload filament for you. Patrons cannot change out the filament.
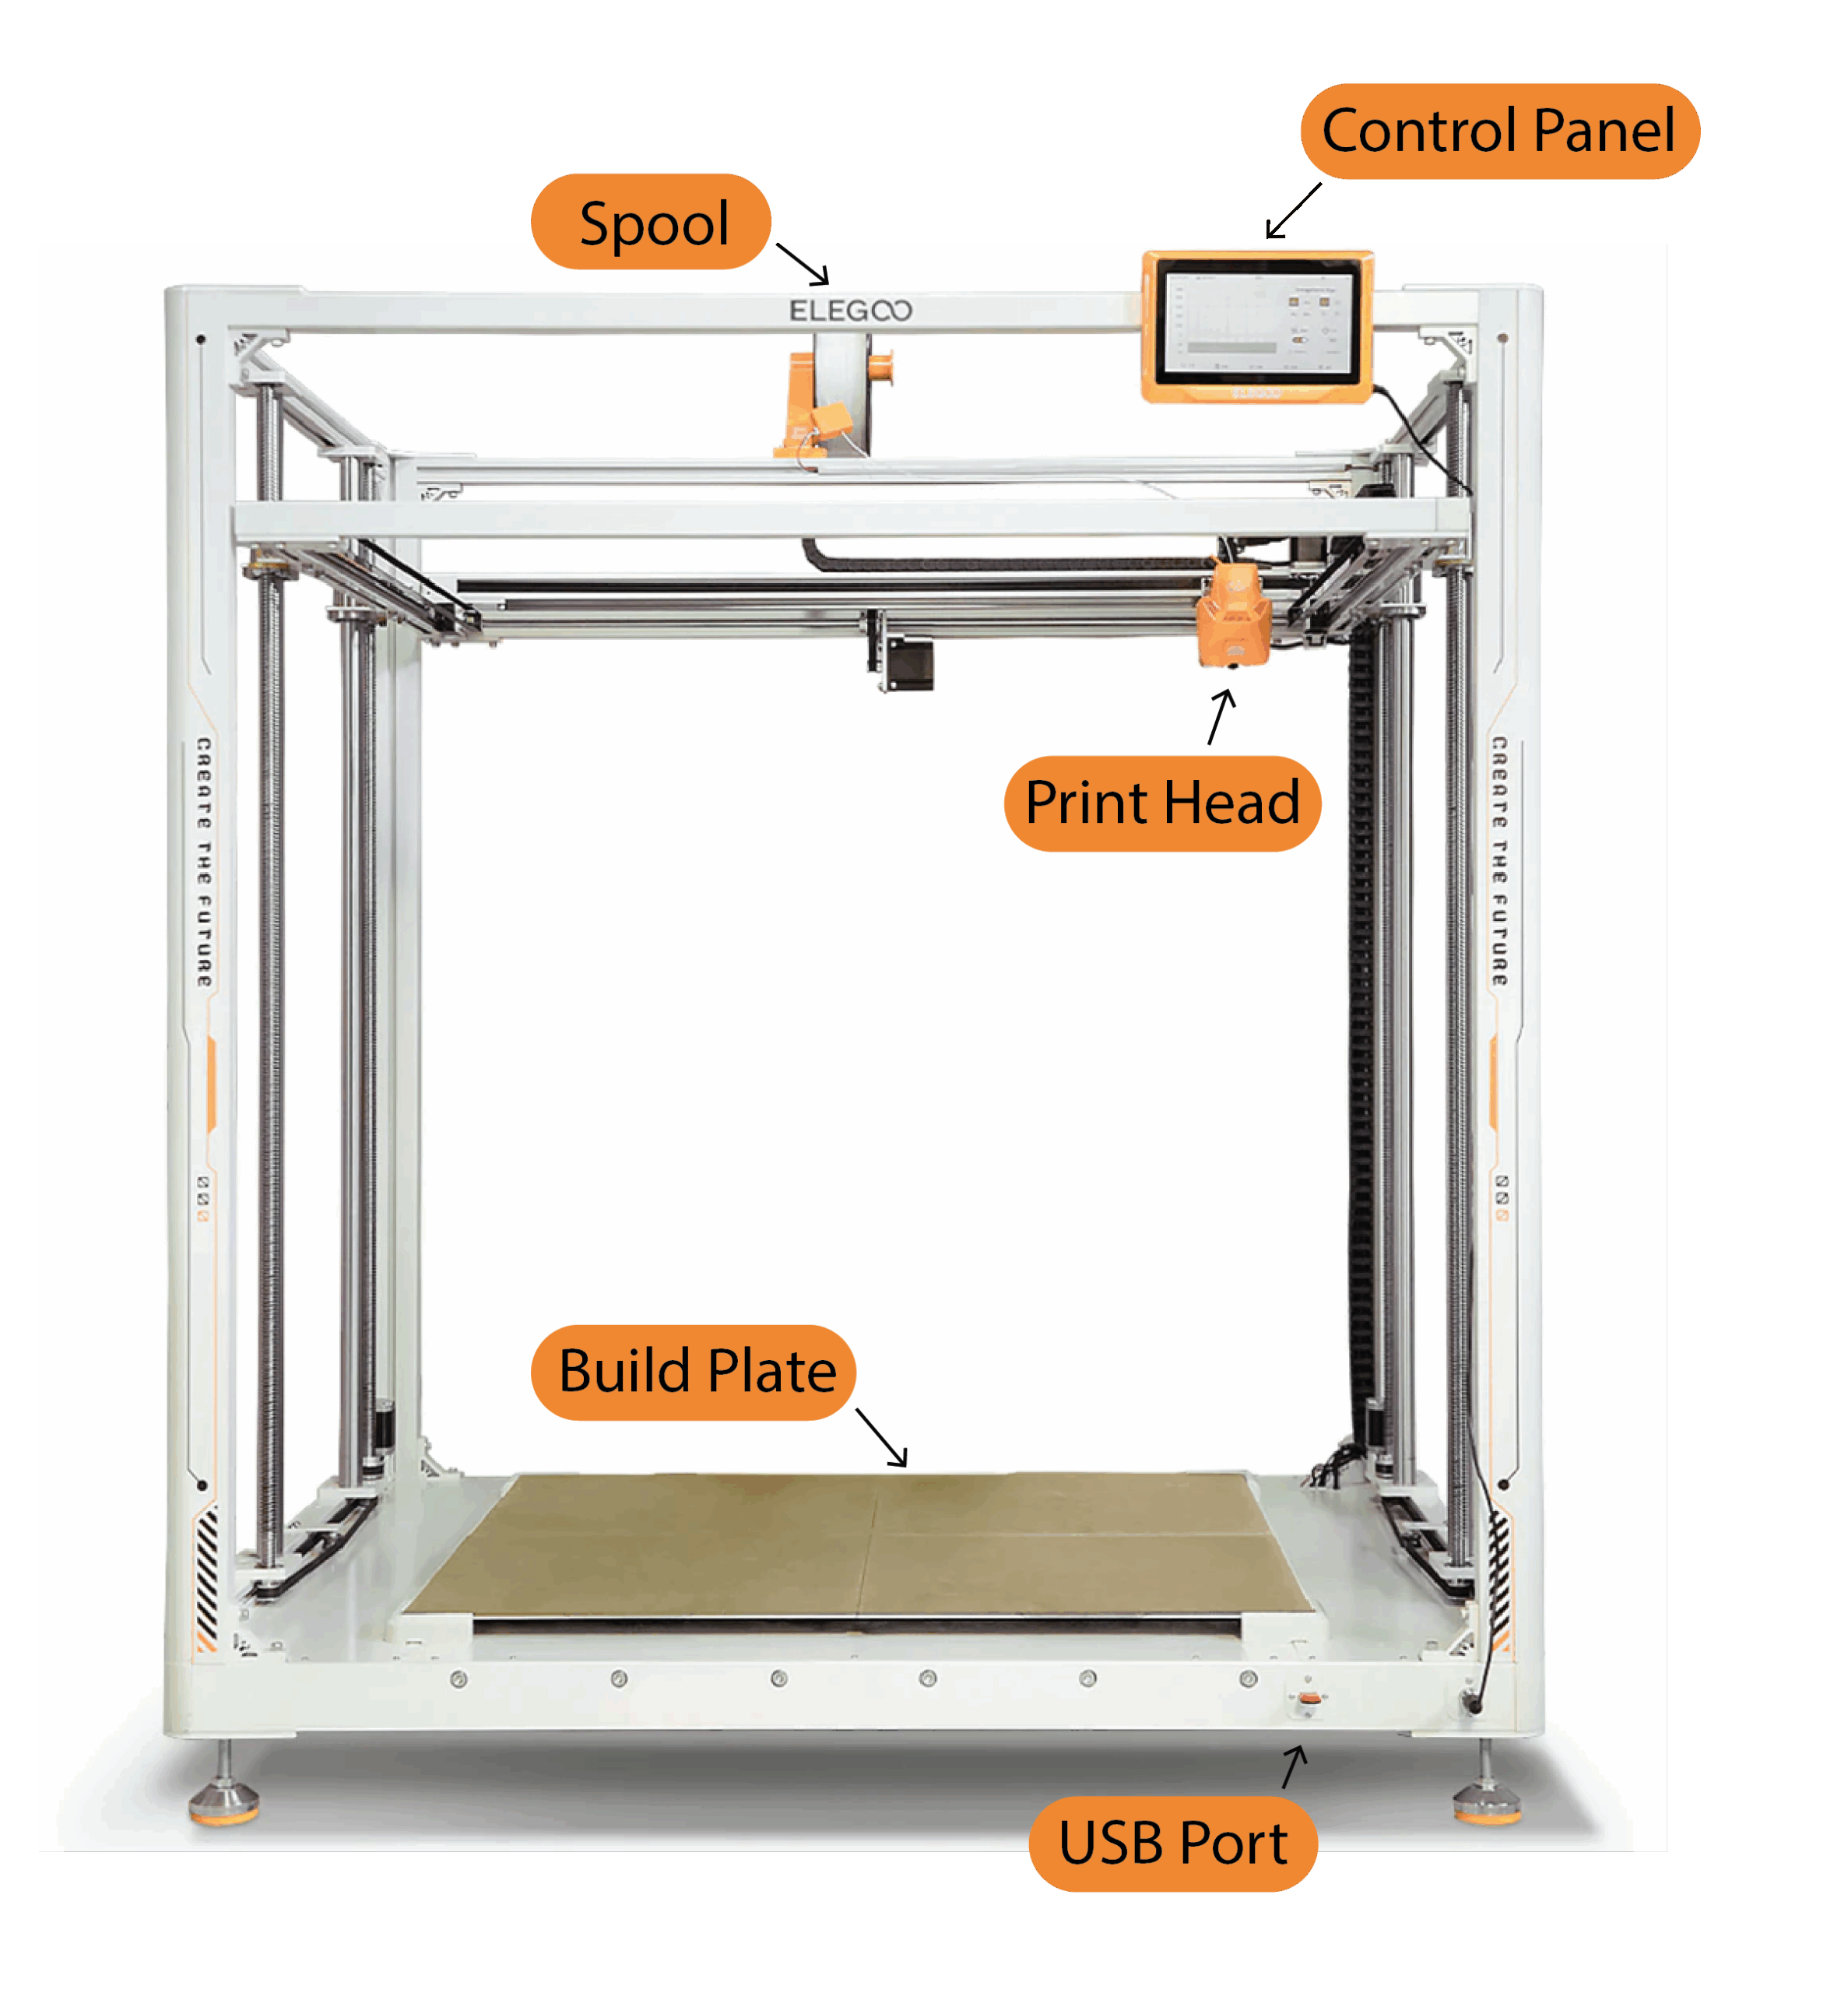
Printer Anatomy
This printer is the Elegoo OrangeStorm Giga. It has a build volume of 800 x 800 x 1000 mm (31.5 x 31.5 x 39.3 in).
Downloading Software + STLs
Elegoo slicer can be downloaded here. In this training, we’ll be using the example of Benchy. Benchy is a popular 3D print testing file, since it has enough detail and overhanging parts to demonstrate what works best for your print settings. If you have something else in mind you would like to print on this printer, you can also use that to get your credential, as long as you present it to an explorer when you are done.
Here is the link to the Benchy file if you would like to use it for this training.
Download ElegooSlicer
- Download the Elegoo slicer here
- Slice your STL file. Our example images show a big benchy. You are welcome to print it, but like any print on this printer, it will cost $25.
- Select File, then Import
- Make sure Nozzle is set to 1.0
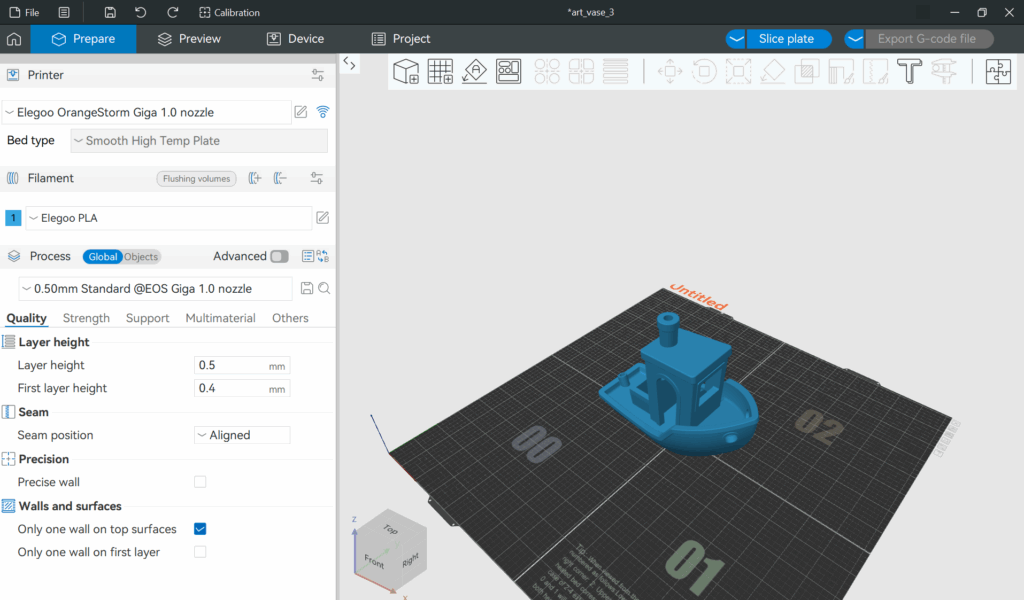
- Your part will appear in the workspace window. If it does not fit on the print bed, an error will pop up saying so.
- Hover over each symbol to see what it does. The most important options are:
- Move will let you reposition your piece.
- Scale will change the size of your piece. If you are making a functional rather than a decorative piece, be careful: this will also resize things like bolt holes.
- Rotate will change your piece’s angle, which is the most important placement setting to get right. Rotate your piece so it sits securely, and won’t need too many or too tall supports.
- Lay on face will place a face of the part directly onto the print bed.
- Support Painting paint supports on certain parts that you believe need supports– think overhanging pieces or delicate details.
- Seam painting can help with the seams that happen when each layer completes and the print head moves up. The process of moving up the print head for each layer can sometimes cause a seam, or a scar, up the side of your part.
Select print settings
- Material: Select the material you’re using. At the makerspace, we only stock PLA, as it’s a good “all-around” printing material that has higher success rates than other materials. Some makers prefer to print with advanced polymers like ABS; however, printing with these filaments produces toxic fumes, and so we do not permit their use in this space. PLA should be the default when you open the slicer.

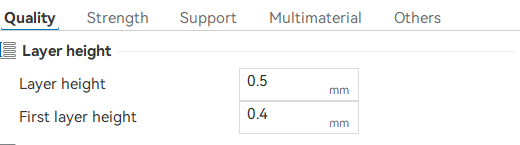
- Layer Height is how thick the slices are. Smaller layers will mean the print is of higher quality, but it will also take longer since there will be more layers. The default for this printer is 0.5 mm, this is a good setting to keep it at.
- Shell thickness (wall loops) is the outside of the piece. Printed parts are semi-hollow, but the shell is solid up to a small depth. The default is 2 (2mm with a 1mm nozzle), this should be thick enough for most prints.
- Infill is the inside of a 3D-printed part. We recommend using gyroid infil, but this can be changed depending on the application. Some patterns provide strength in different directions. You can also change infill density. 15% infill is the default, but infil as low as 10%, a piece will still be fairly strong. Higher infills will extend the print time and use more filament, so don’t make it higher than you have to.
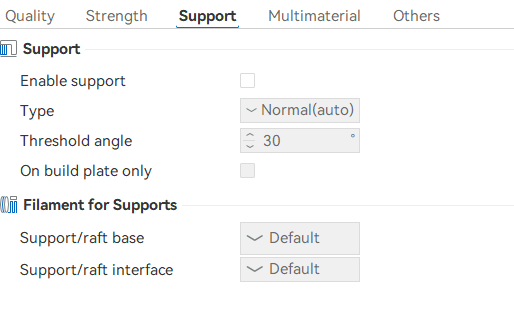
- Supports are printed scaffolding that support any overhanging or curved parts of your piece to prevent it from collapsing. Supports are made to break away easily, so you can remove them after you print. We recomend using tree supports.
- Best practices for supports: While supports do break off easily, you shouldn’t have supports on important features of your project (parts requiring highly precise dimensions, the most aesthetically critical parts of your print, etc). This is because the supports will slightly warp whatever they’re attached to and could also chip your part when you remove them. While of course you can sand away imperfections, that might mess up any important features.
- Build Plate Adhesion Under “Others” you will see skirt and brim, these options can help your print stick to the bed better.
- A Skirt is a thin line of filament that outlines your piece but doesn’t touch it. This gives the extruder a chance to warm up first, making it slightly less likely to jam.
- A Brim is a thin sheet printed beneath your part. A brim helps your piece adhere to the build plate, holds the bottom flat during the early stages of the print when the piece is thin, and gives the piece protection against scratches when you remove the piece from the printer. Brims are usually the best option.
- Rafts Under “Support,” you can find the option to add a raft
- A Raft is a much thicker version of a brim, and it serves the same benefits but is much better at preventing warping. It has the downside of increasing the print time and using extra filament, so it should only be used when warping is a concern.

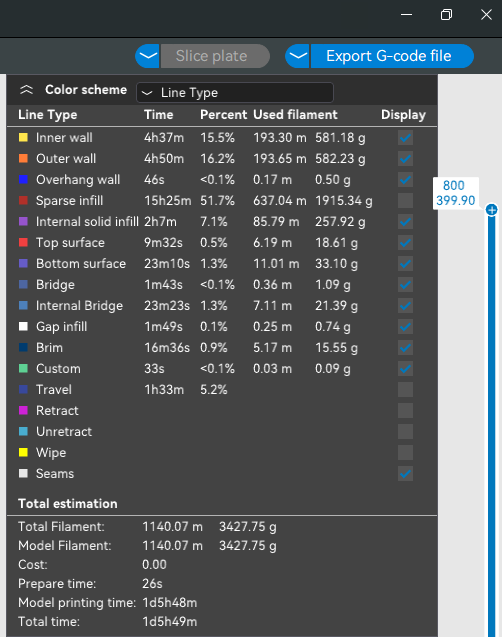
Once your settings are ready, click “slice” in the top right corner. This will generate a “gcode” of your part – instructions for the printer. It will also tell you how long your print will take, how many grams of material it will use, and how many meters of filament it will use up.
- Parts on this large printer often take a day or more so be aware of the time.
Congratulations! Now that you have finished your print, you can bring it to the front desk and get the credential!