To gain the Plastic Forming credential, you need to successfully complete this DIY training guide and have your completion verified by makerspace shop staff.
This document will walk you through the basics of vacuum forming, and at the end you’ll leave with a vacuum formed item. Text in black explains certain concepts.
Text in blue boxes are steps you should actively be taking to practice these skills.
What is Vacuum Forming?
Vacuum forming is a type of thermoforming (thermoforming is the process of heating up a piece of plastic to change its shape). A sheet of plastic is heated up, stretched onto a single surface mold, and then pulled against that mold with a vacuum. It’s for parts that only need to be formed on one side, and is used often in packaging for food, electronics, or medicine.
The vacuum former at EXP Makerspace uses a thin sheet of PETG (polyethylene terephthlate glycol), which is a type of plastic that can change shape at high temperatures.
Safety Considerations
Vacuum Former Parts
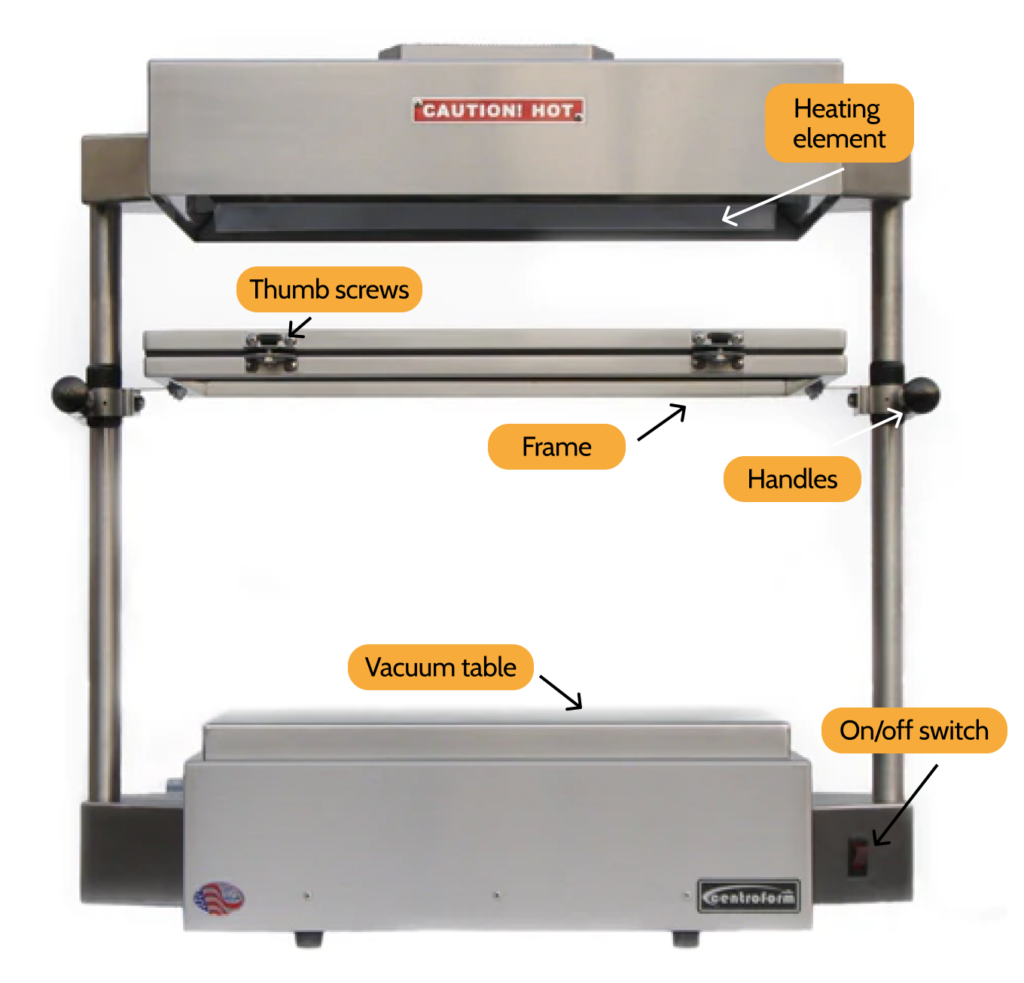
- Heating Element: This is the part that heats your sheet of plastic. Do not touch it once the machine is on– it gets hot!
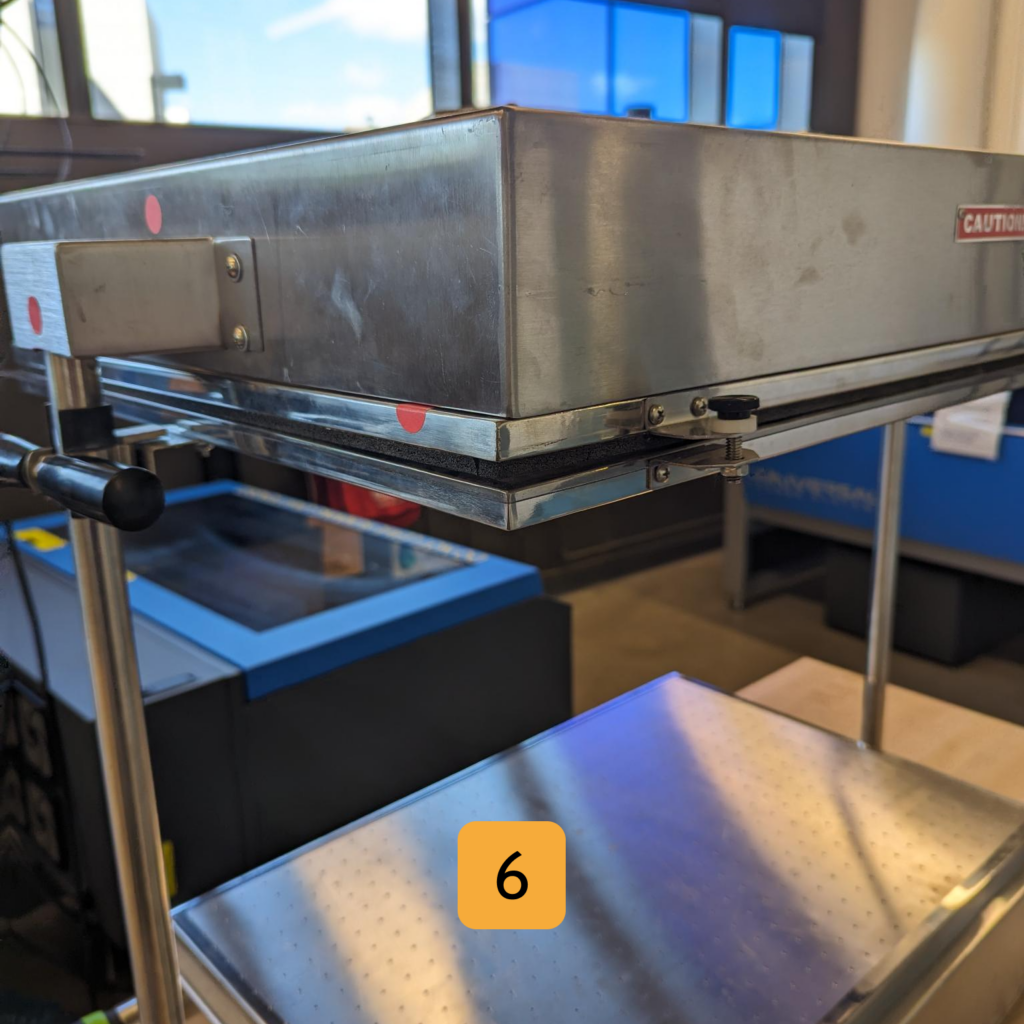
- Thumb screws: Tighten these to secure your sheet of plastic in the frame.
- Frame: The metal frame that holds your sheet of plastic.
- Handles: Control the frame up and down. They can tighten along the railings on the sides of the machine.
- Vacuum table: Sucks the heated sheet of plastic downwards with a vacuum. Your part that you are forming plastic will lie on top of this table.
- On/off switch: These will glow red when the vacuum former is on. Even when you turn off the machine, the metal on the top needs time to cool down.
Loading PETG

- Make sure you take any protective coating off of your PETG before starting.
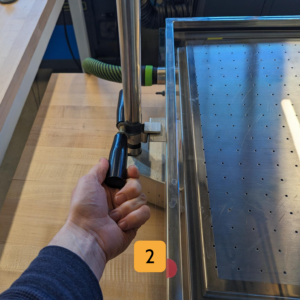
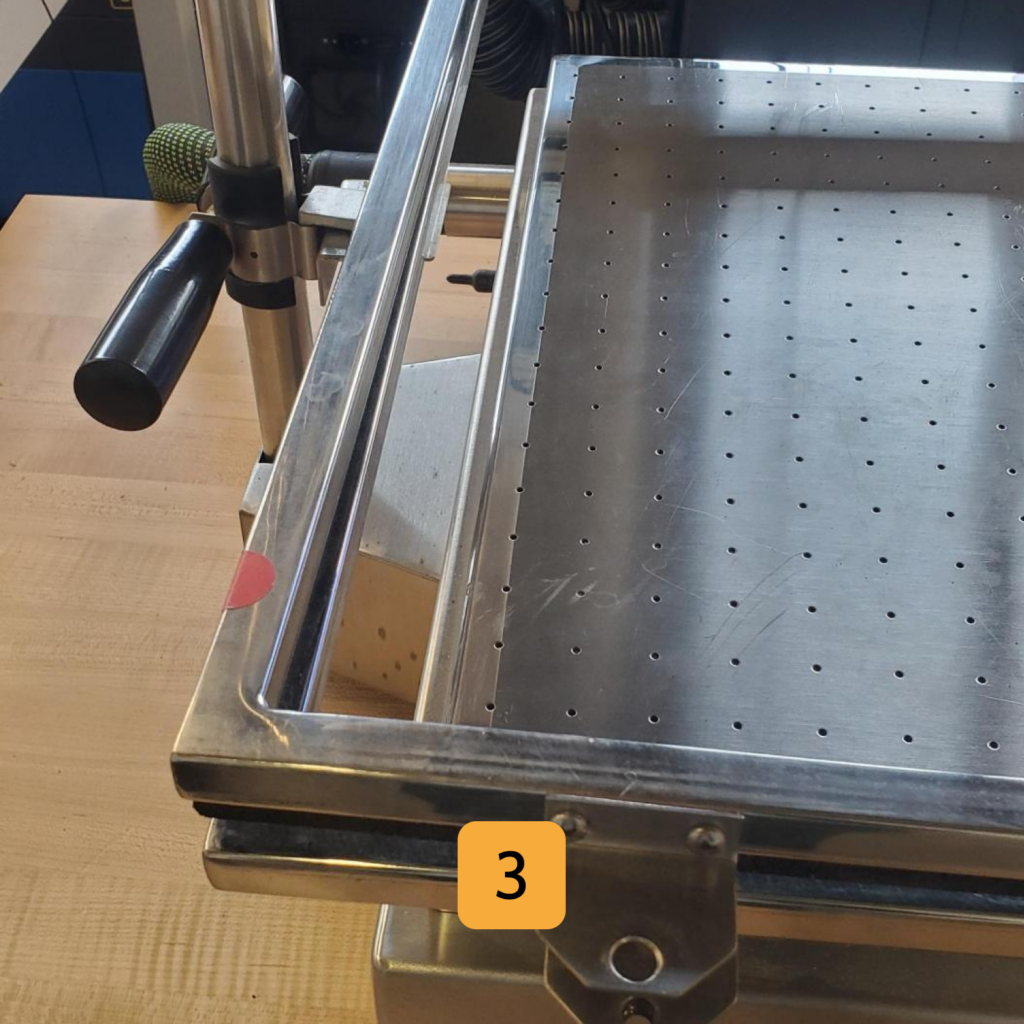
- Turn the front handles on the right and left arms of the vacuum former counterclockwise to loosen the frame.
- Lift the frame slightly above the vacuum bed, so that you have enough room to load the PETG. Retighten the front handles on both sides of the machine until they are snug– you’ll be moving the frame later.
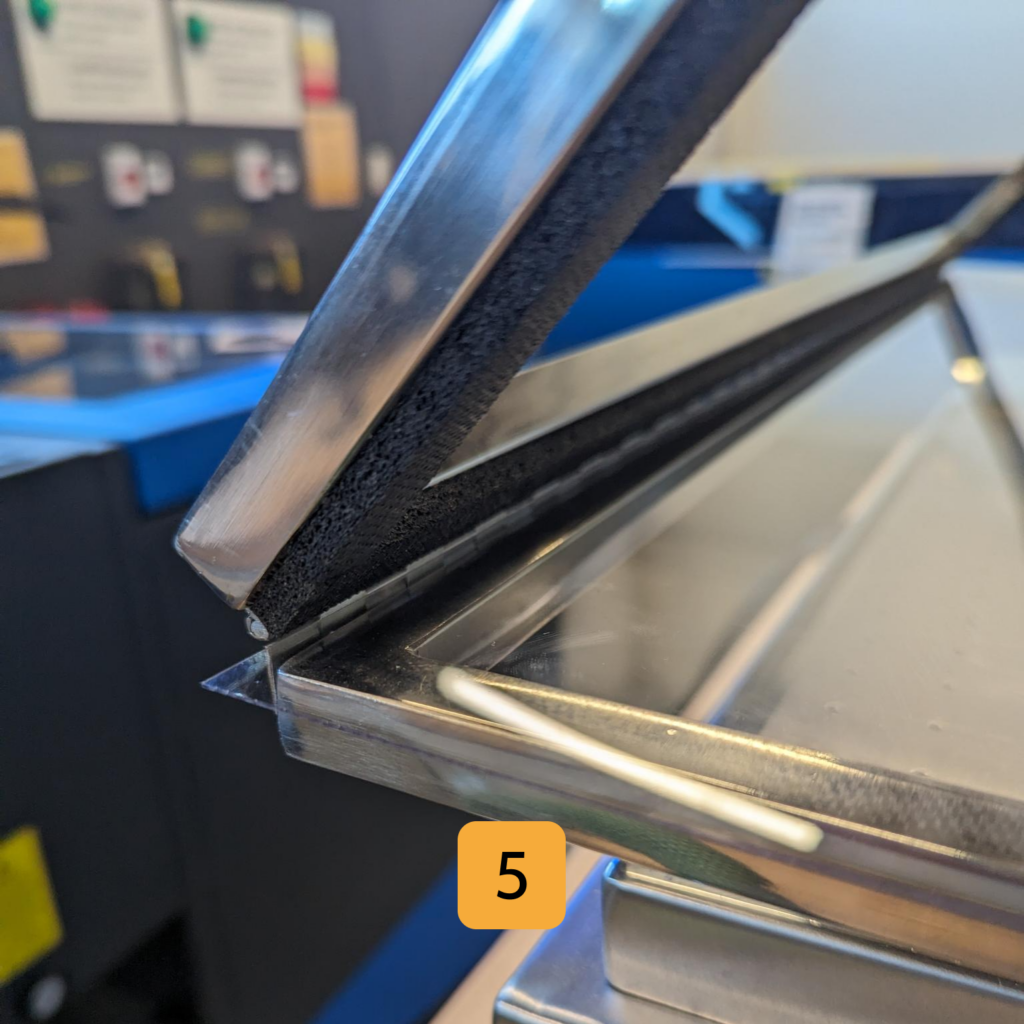
- Loosen and remove the two thumb screws on the front of the frame and open the frame.
- Place your PETG in the frame, ensuring that it is sitting fully on the lower part of the frame
- Close the frame and replace the thumb screws. Loosen the handles and raise the frame all the way to the top of the machine
Preparing Item to Be Formed
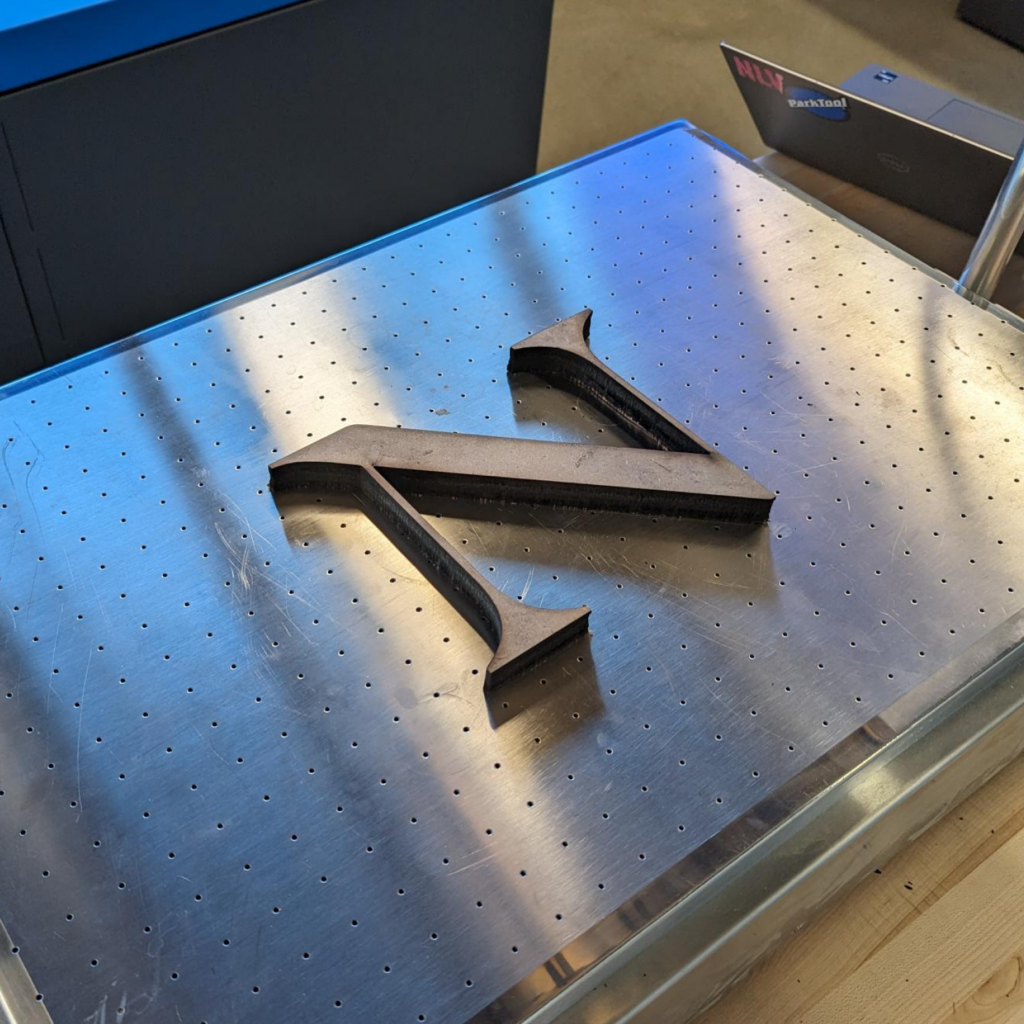
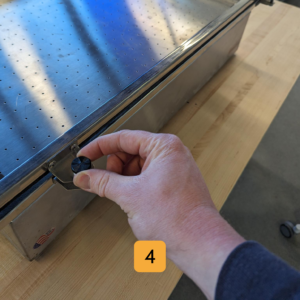
Place your item on the vacuum table. We have some objects for thermoforming practice next to our thermoformer.
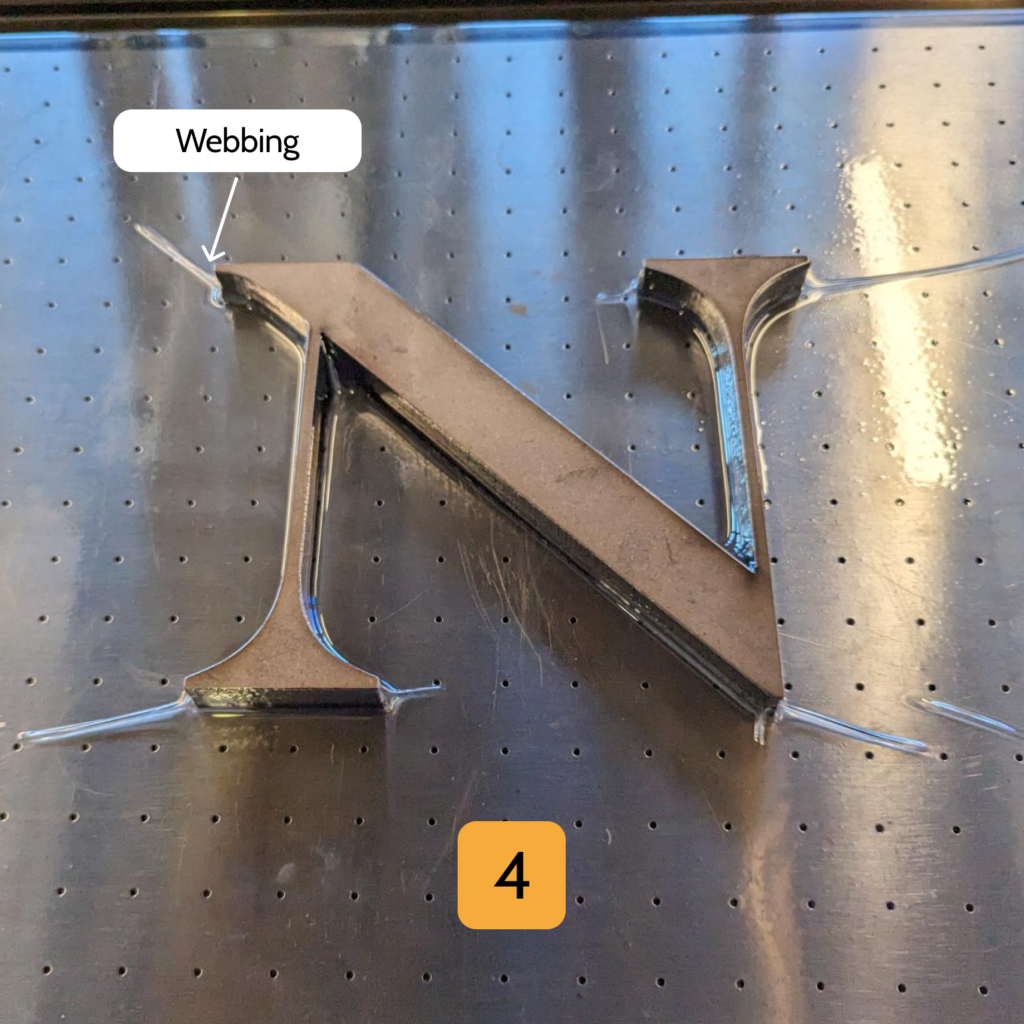
Items with sharp corners or shallow interior angles like this N will form poorly. Webbing will form on these sharp corners and the shallow interior angles will not form completely. Consider adding material underneath your item that will ease the PETG into the vacuum bed at a shallow angle.
If the second or third laser cutter are available, open one of their lids and turn on the ventilation for this. This will help vent out any smells from heated plastic.
Forming Item
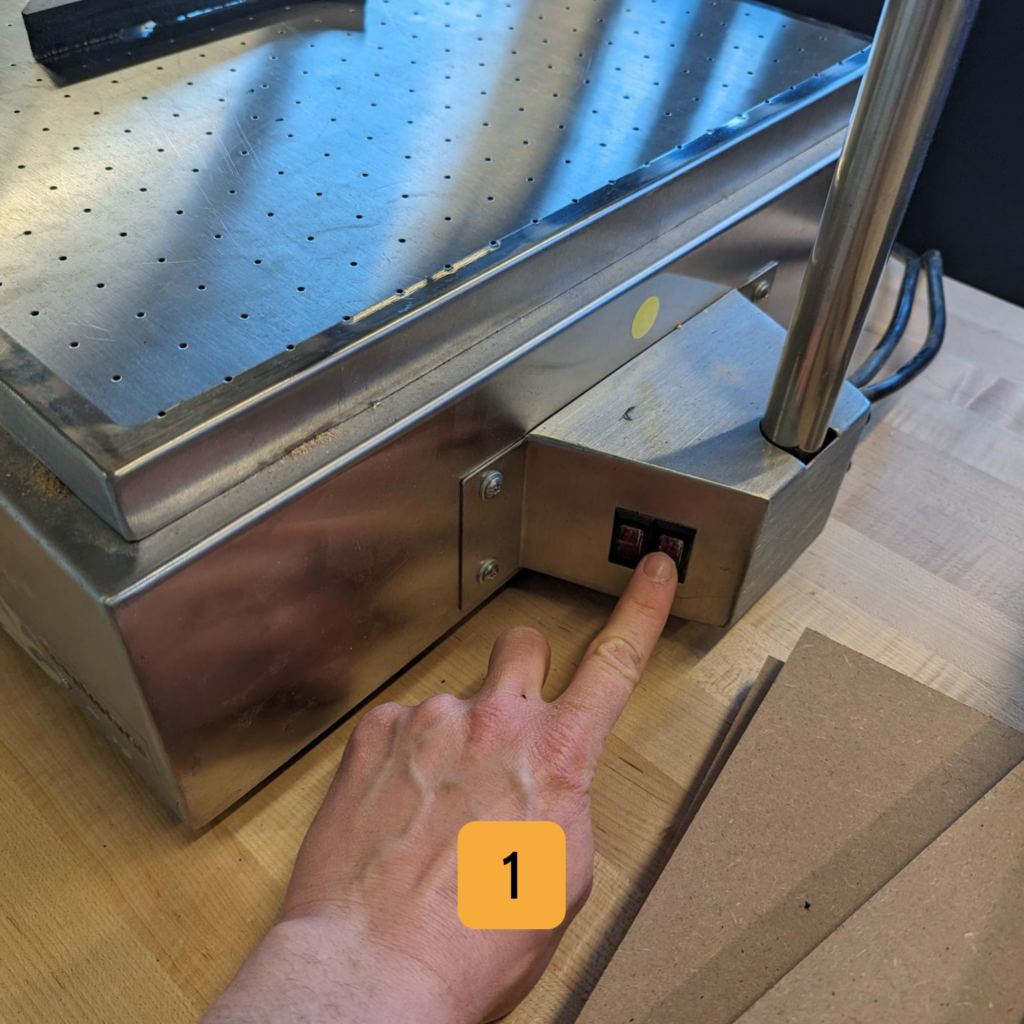
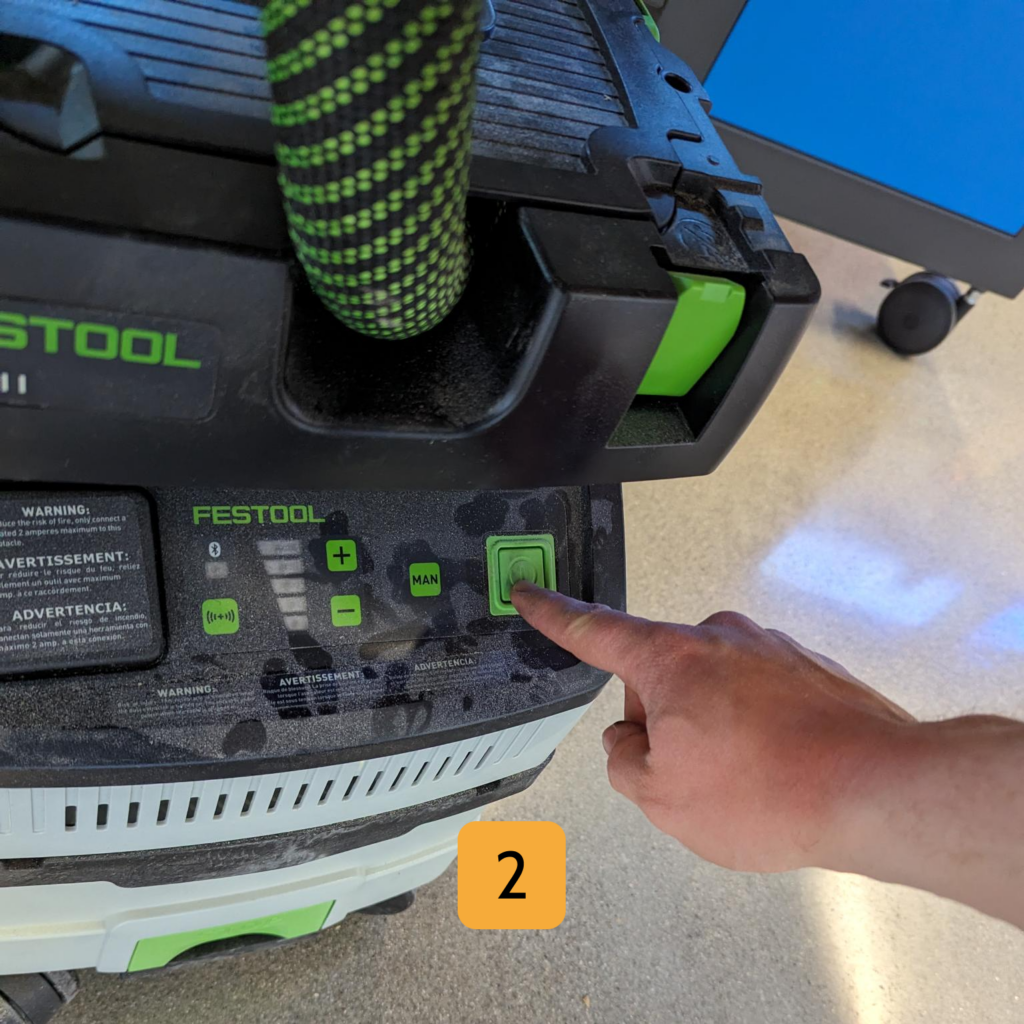
- Flip both switches on the right hand of the machine up (they will glow red).
- Turn on the vacuum. You will need to hit the power button followed by the MAN button on this particular vacuum.
- You will see your PETG start to warp. You want the plastic to start to sag uniformly.
- There are timers on the bottom of the machine. The PETG timer on the left stays at 3 minutes and 30 seconds, which is how long it typically takes for plastic to sag uniformly. (See the photos on the bottom for clarification on what this means.)
- When the PETG is sagging about two inches turn the switches off, loosen the handles on both sides of the machine, and in a quick, firm motion, bring the frame down as low as it will go.
- This is easier to do with a friend! Have one person hold the other handle, and you should both pull the handles down at the same time.
- Wait thirty seconds to allow the PETG to cool. Use the cooling timer on the right for this.
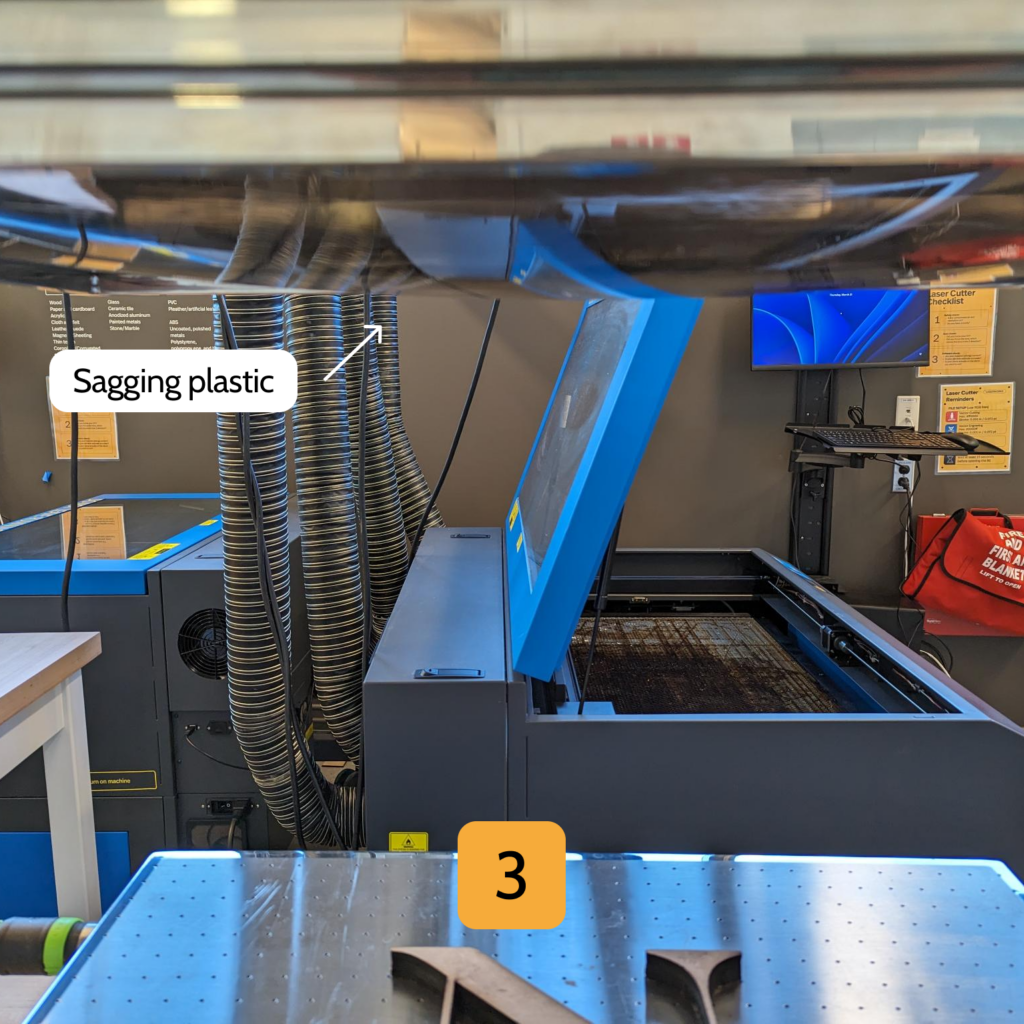
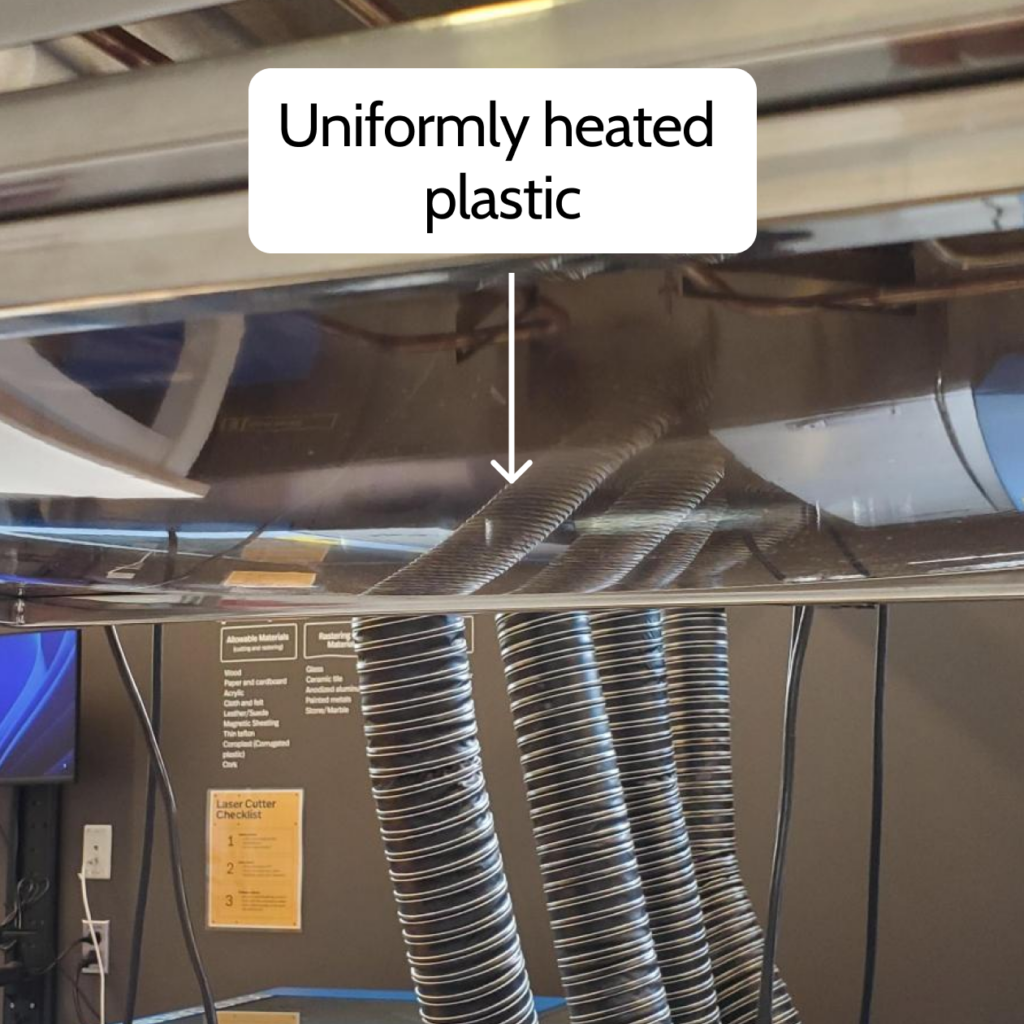
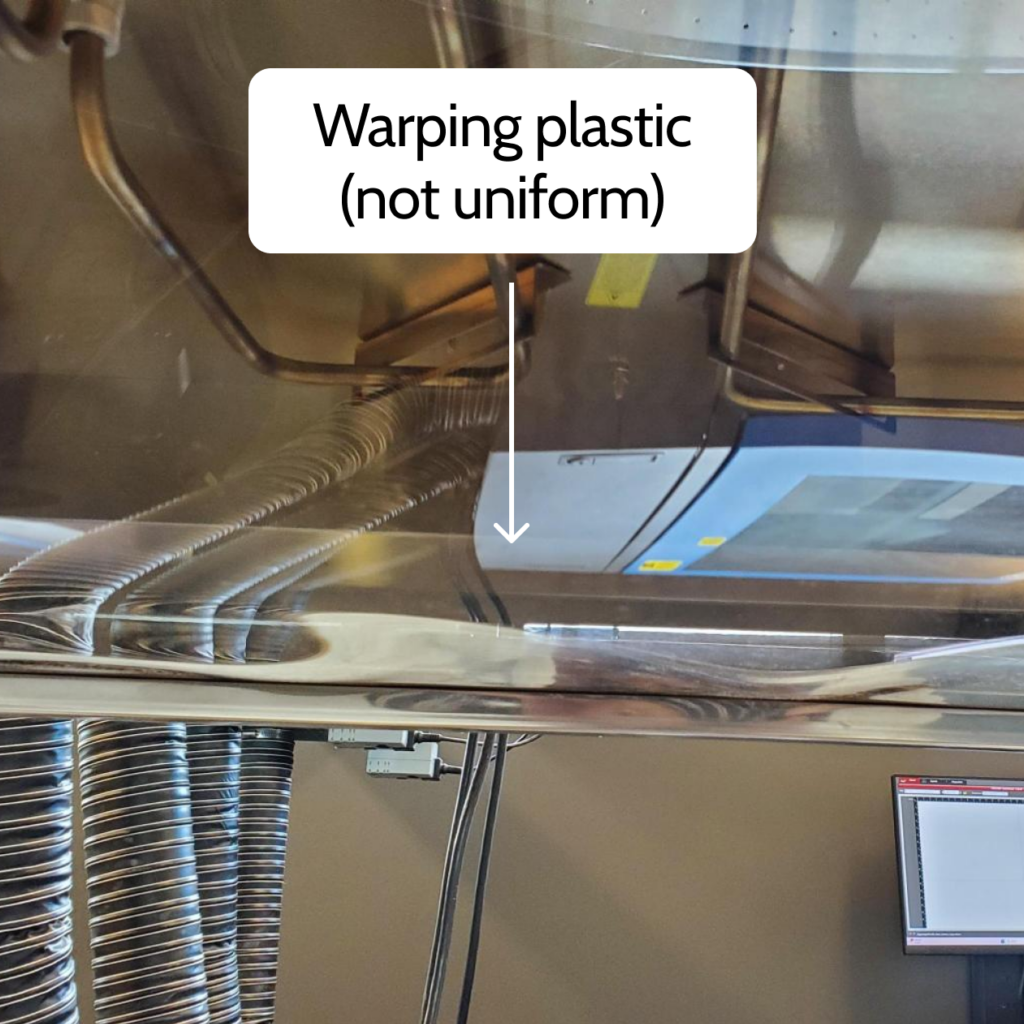
Warping versus sagging:
If you try to form plastic when it isn’t uniformly heated, your plastic won’t vacuum properly! The photo on the right is an unevenly warping piece of plastic; the one on the left is uniformly heated. Click on the photos to enlarge them.
Removing your item
- Now that your item is done vacuum forming, we need to complete all the steps in reverse to clean up. Start by turning off the vacuum (press MAN and the off switch).
- Use the handles to bring the frame slightly above the vacuum table. Loosen the screws, remove your PETG, and press your item out.
