To gain the Soldering credential, you need to successfully complete this DIY training guide and have your completion verified by makerspace shop staff.
This document will walk you through the basics of soldering and you will solder together a very simple circuit. Text in black explains certain concepts.
Text in blue boxes are steps you should actively be taking to practice these skills.
Soldering
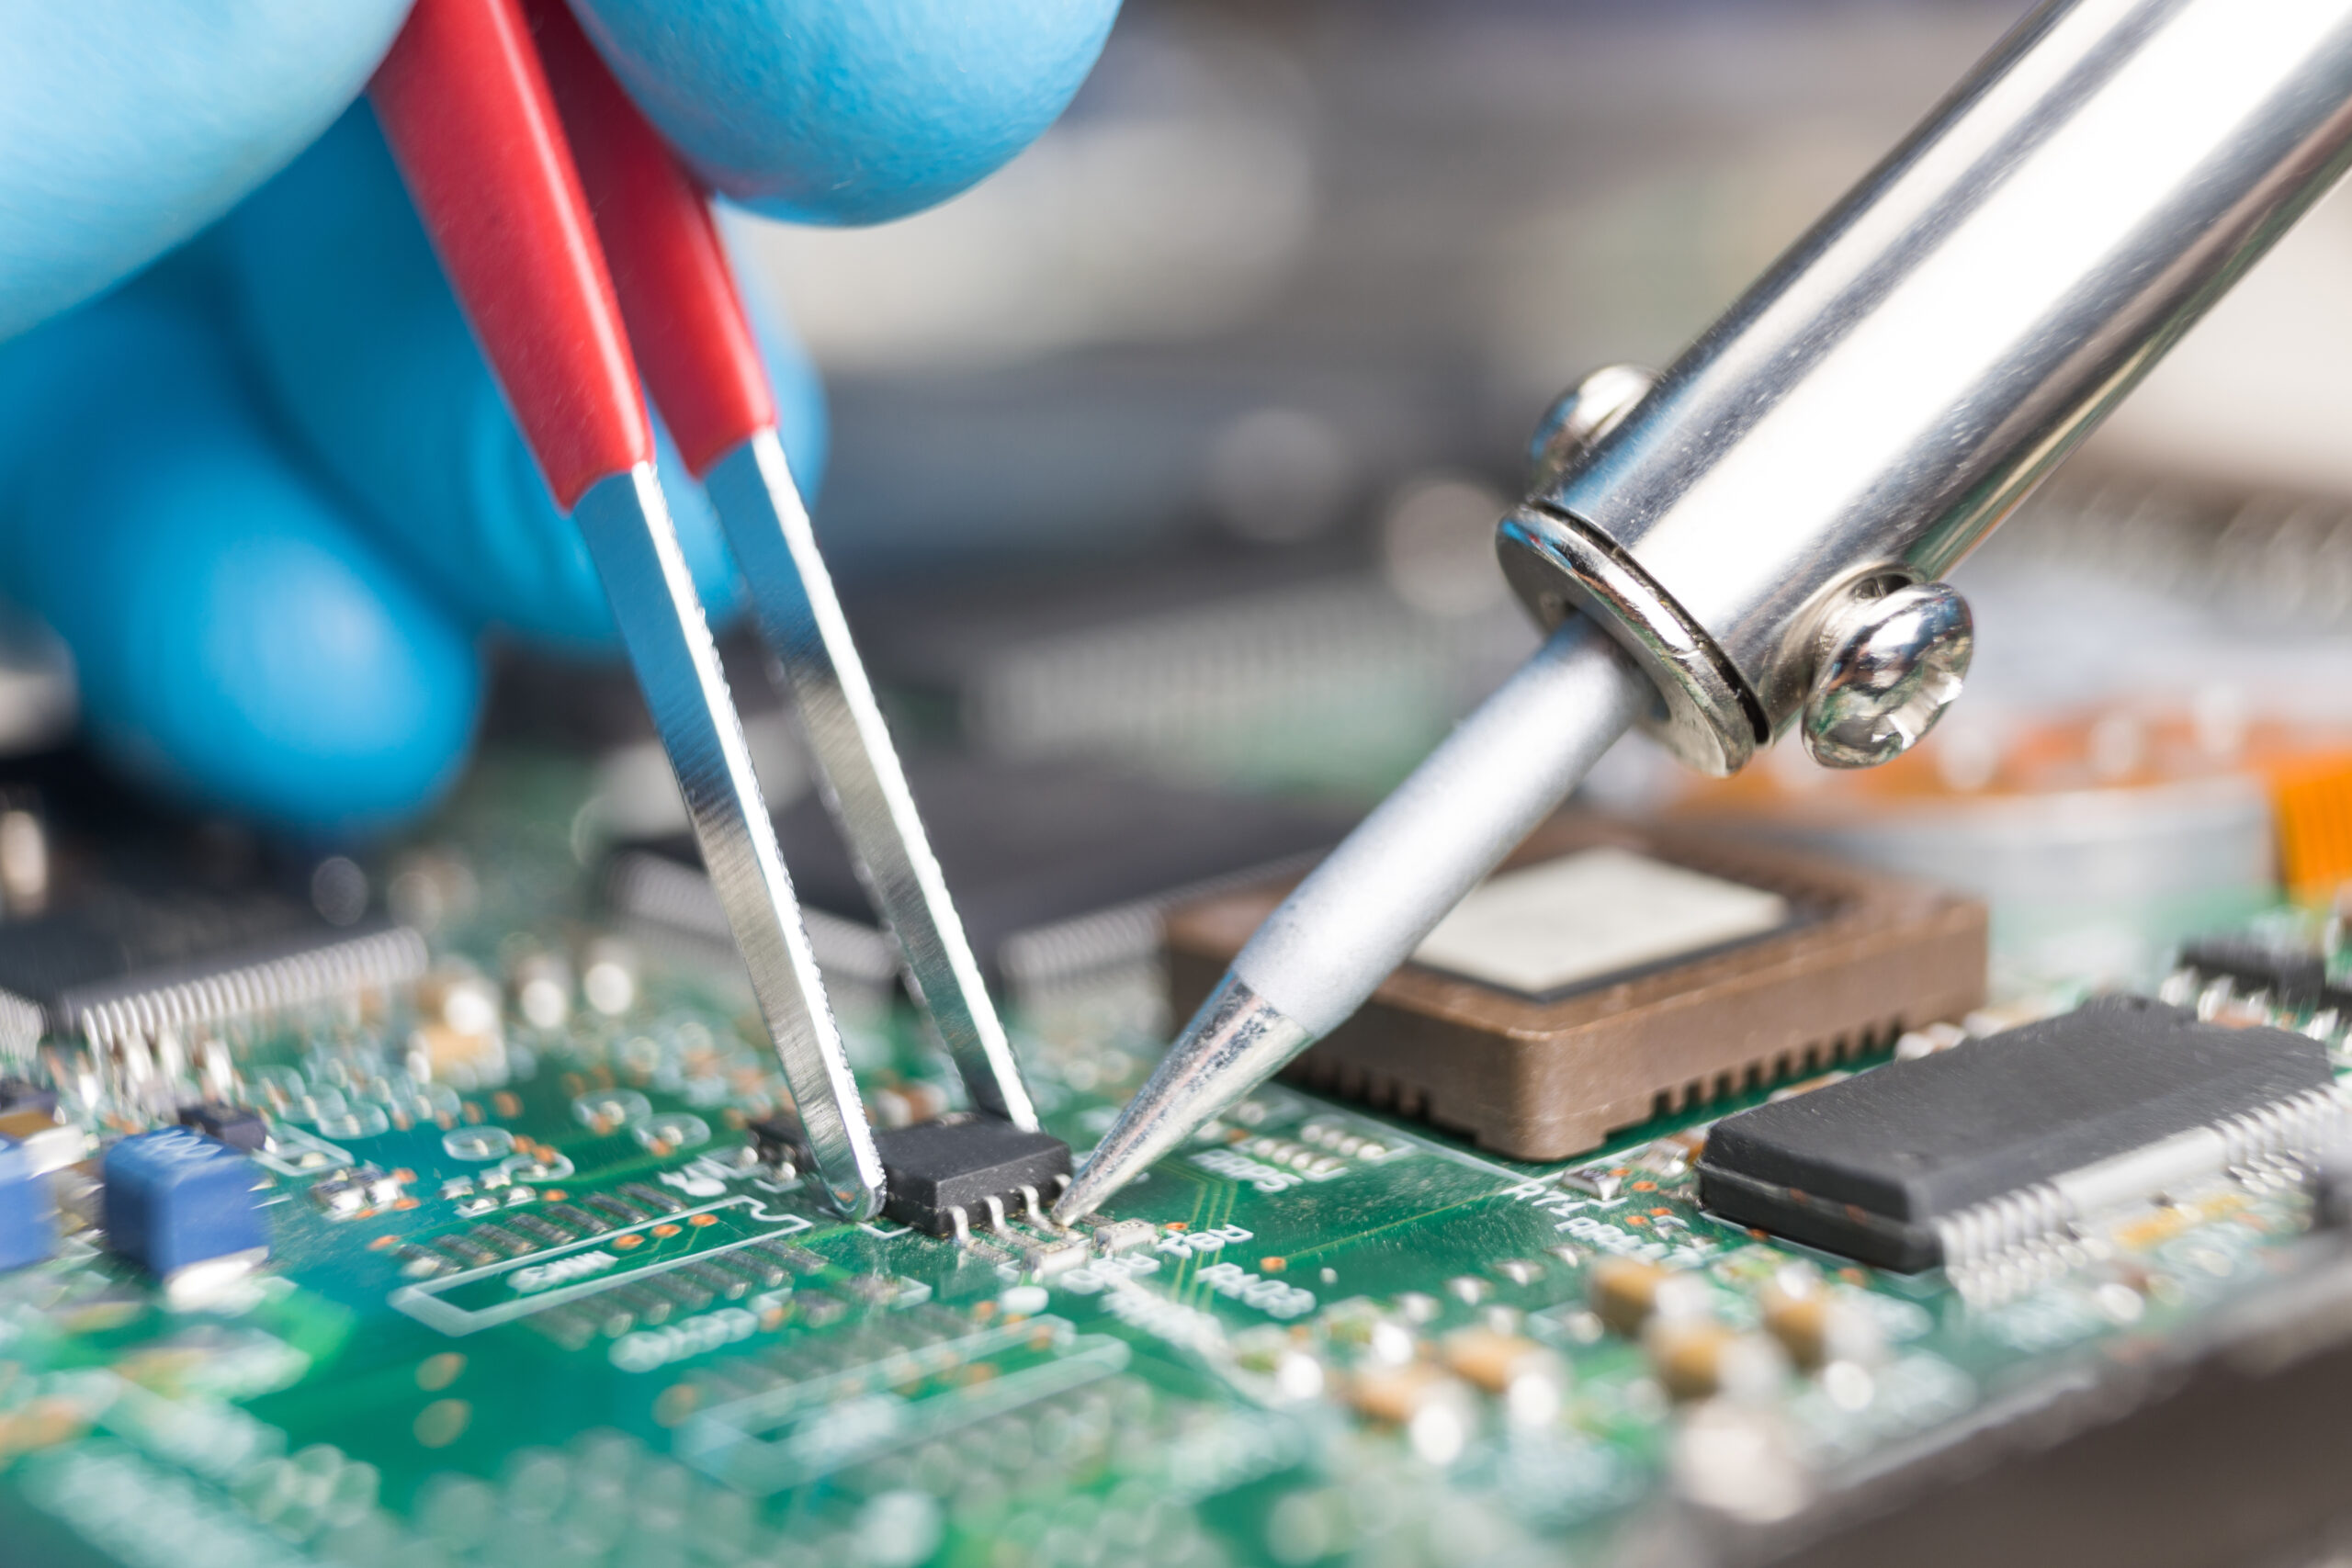
Soldering is a process that makes connections between wires and electrical components. Soldering involves the use of several tools, primarily the soldering iron, to melt and apply solder, a quick-melting alloy of tin (in our makerspace). Solder is a very conductive material and can be used to connect wires and create electrical circuits.
Safety Considerations
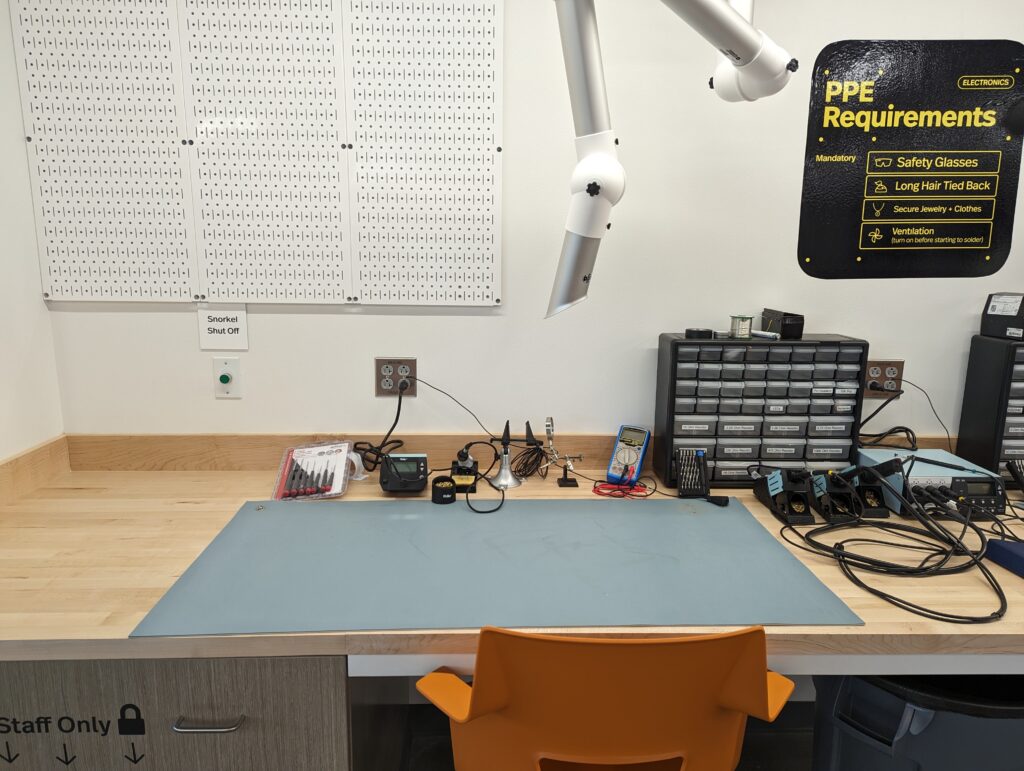
Electronics Bench Components
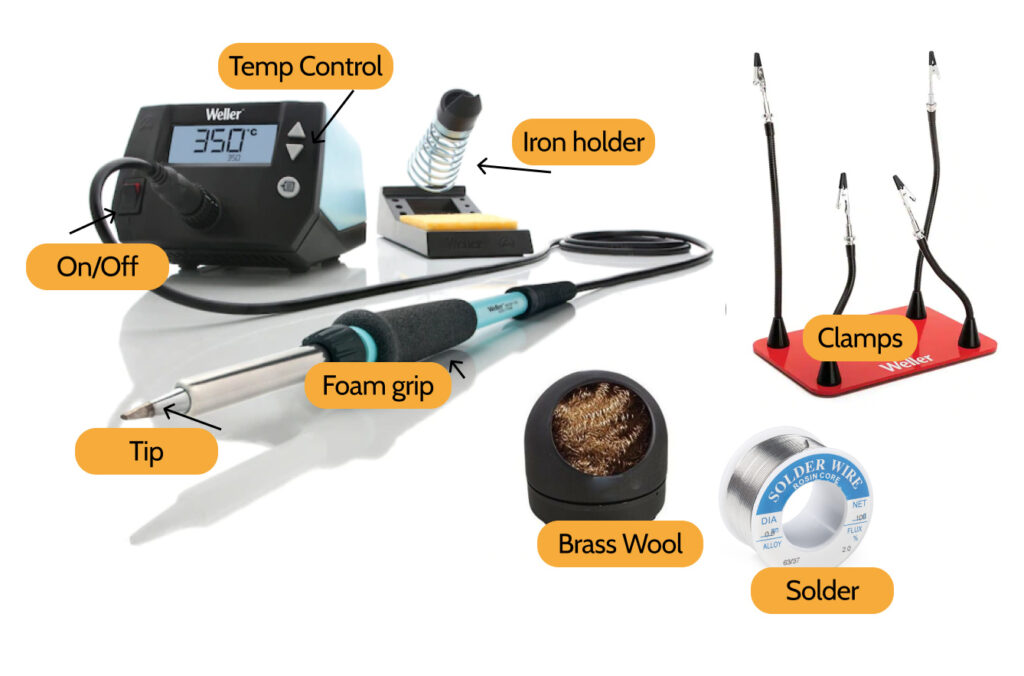
- The soldering iron: The tip of the iron gets VERY hot and you should never, never touch it.
- Soldering iron holder: Always put the soldering iron back in here! Never leave it on a table, especially if it’s hot!
- Tip: The end of the wand and the easiest part to control. The only part that should be touched to the circuit.
- Solder: The solder is the spool of tin-lead wire that melts and hardens quickly.
- On/Off switch: Turns the heat on and off. After you flip the switch, it will take a minute to heat up or cool down.
- Temperature control knob: Changes the temperature of the iron.
- Foam Grip: The foam is insulated, so you can hold it by this part without getting burned.
- Iron holder: Made to keep the iron out of reach with anything that can burn.
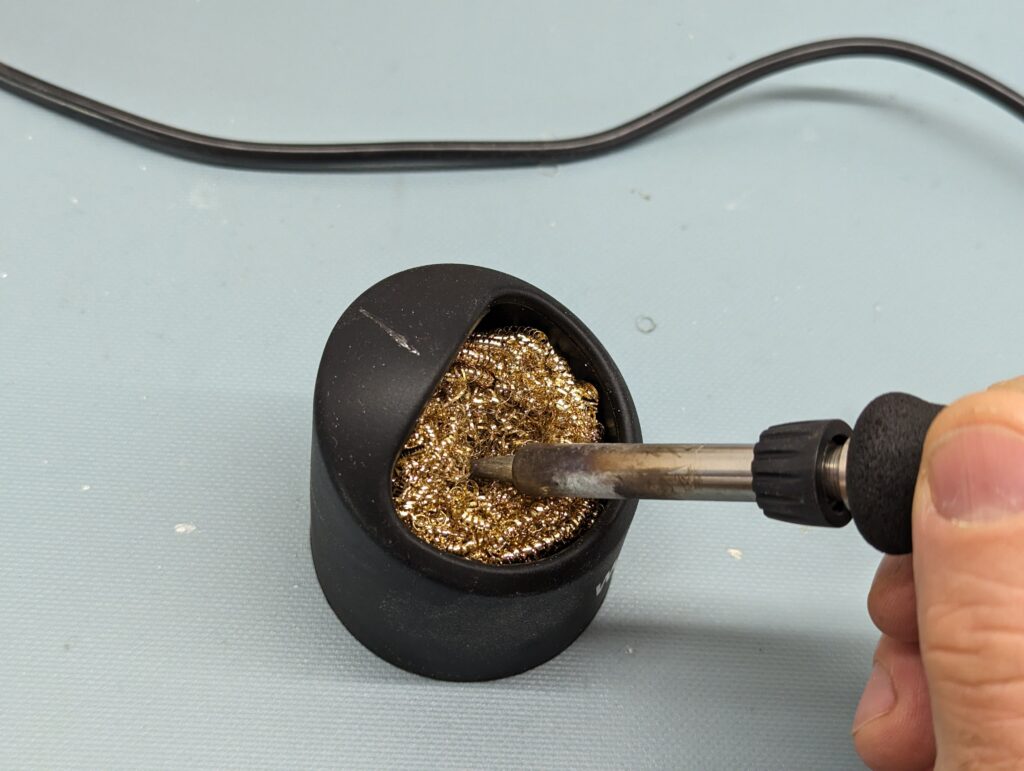
- Brass wool: Dip the iron in this to clean any solder off the wand.
- Fume extractor: Sucks away the toxic fumes. Always turn this on before you solder.
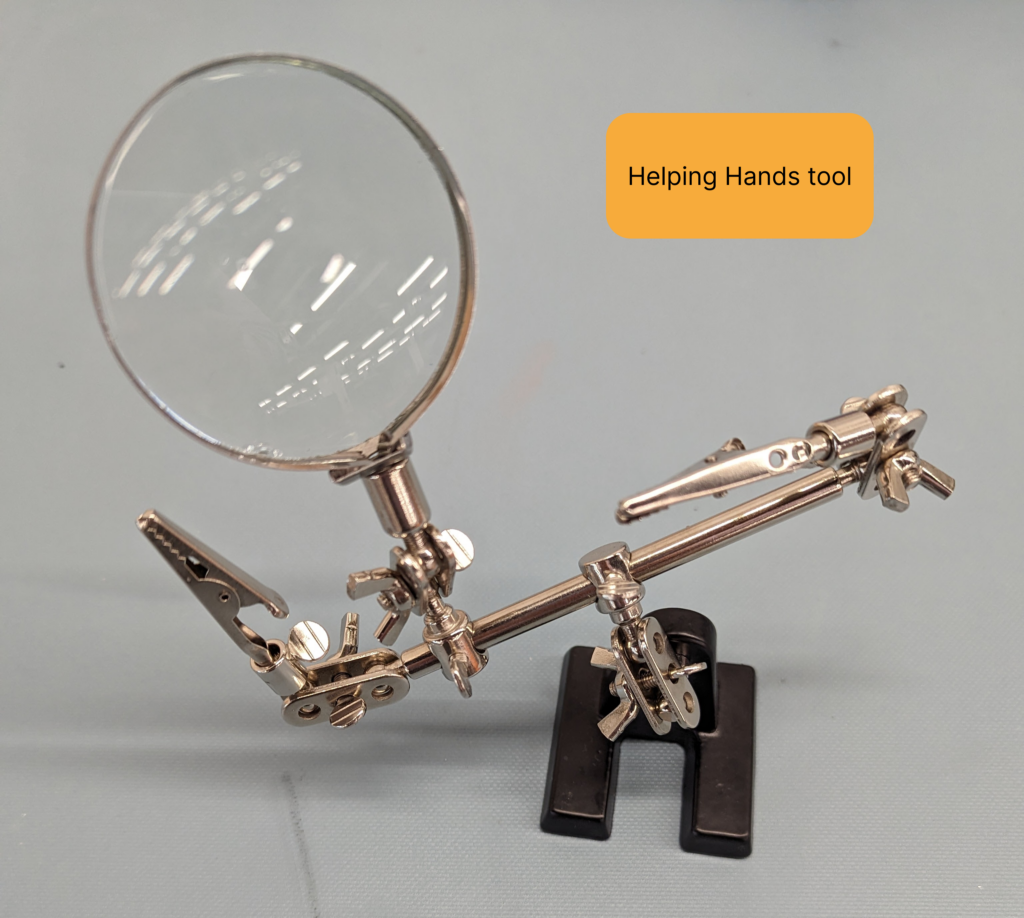
- Clamps (aka “helping hands”): Used to hold up a wire so you can use one hand for the solder and one for the iron.
- Tip tinner: Once the tip is hot, you can put your hot ironing tip into this to “tin” the tip. You should only do this if the tip has become ineffective at melting the solder.
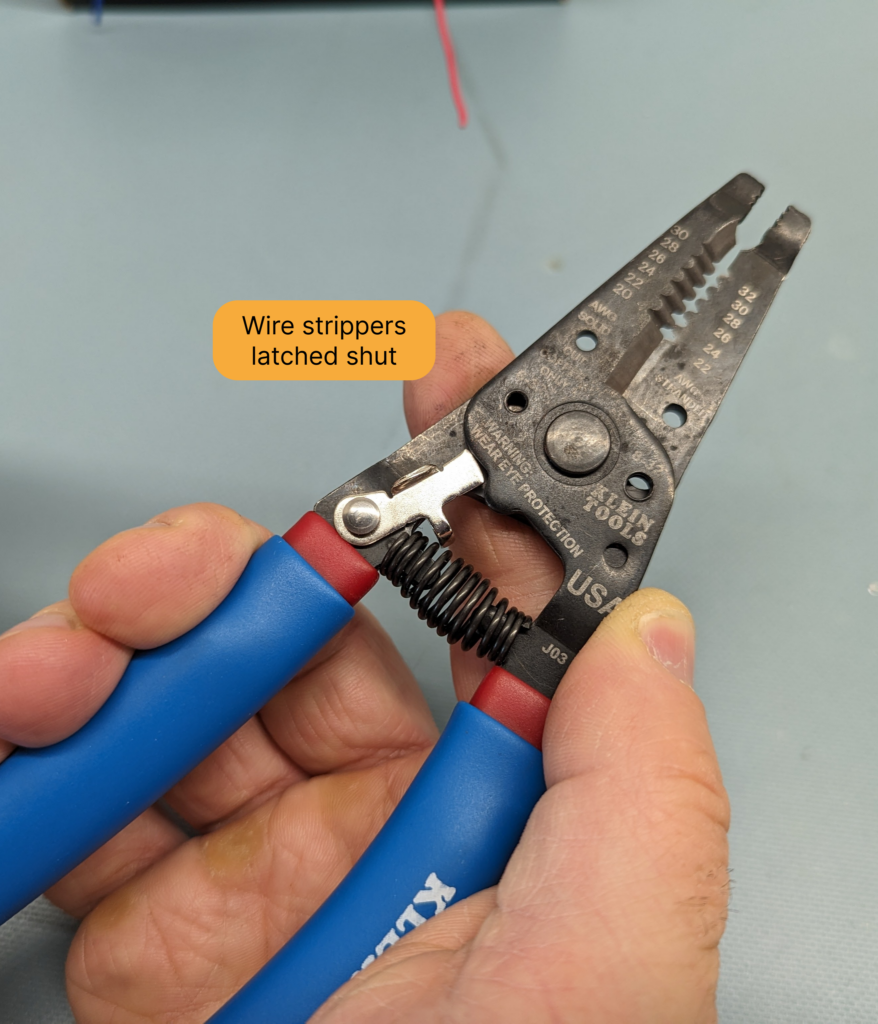
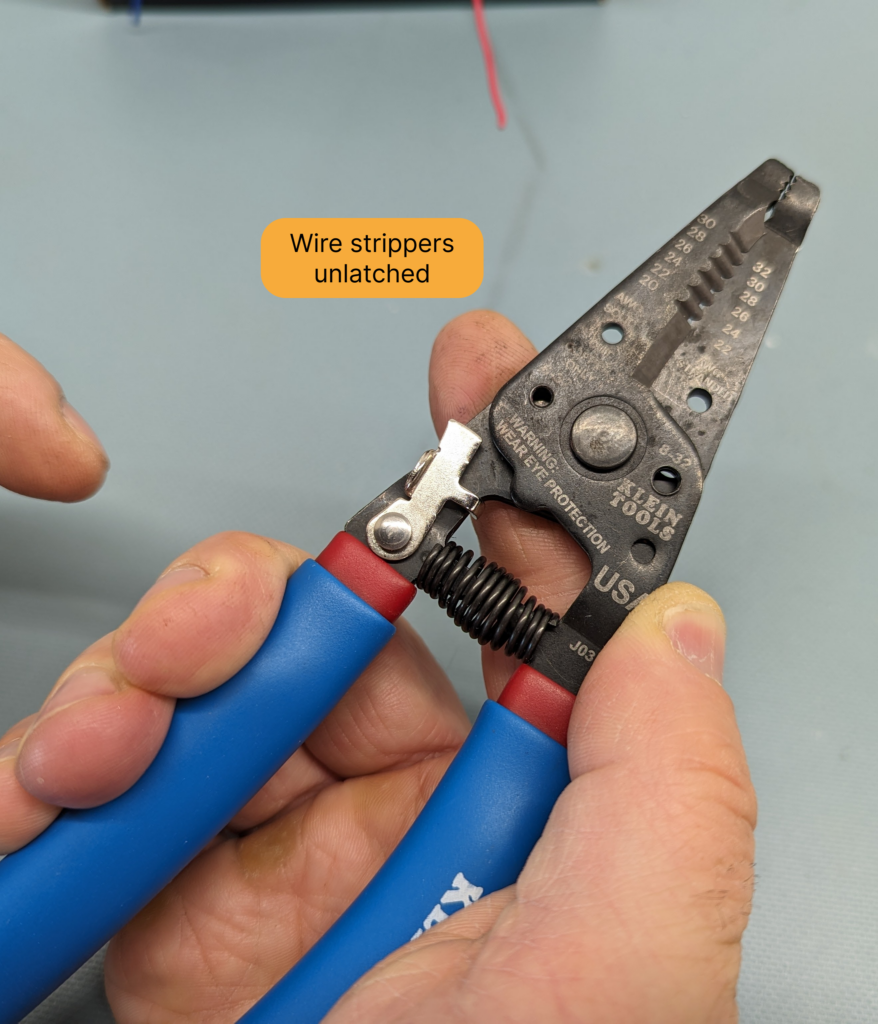
- Wire stripper: Strips the protective casing from wires to expose the wire to soldering.
Setup (for the iron)
- Make sure you are wearing safety glasses.
- Make sure the table is clear. All the tools you will use should be accessible, you should have a clear workspace in front of you, and there shouldn’t be any flammable materials close by.
- Make sure you turn on the fume extractor, which will vacuum up any toxic fumes.

- Flip the switch to turn the soldering iron on, and wait for it to heat up.
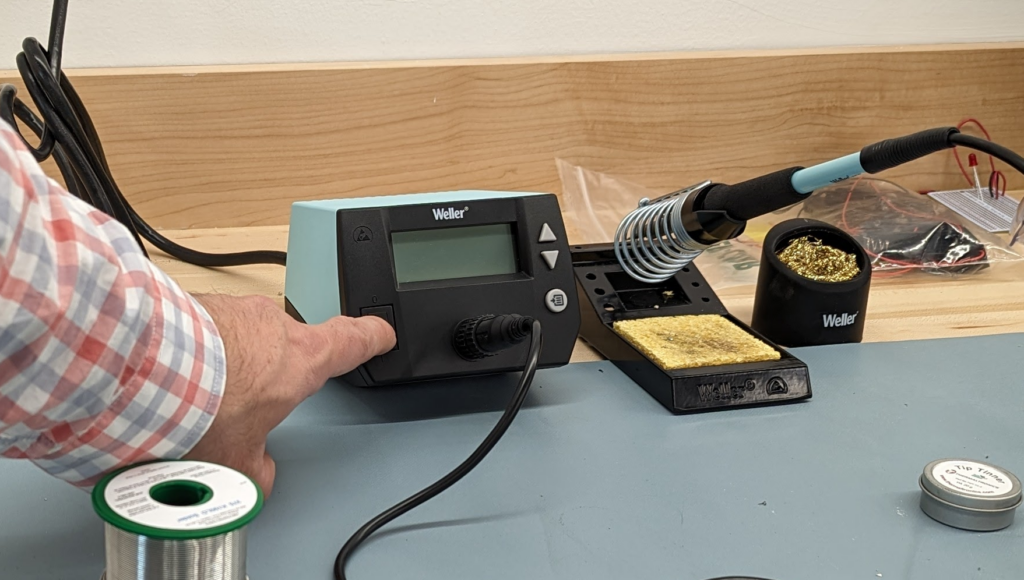
- Set the temperature based on the solder you are using. 400C is a good choice for the solder we stock.
Gather your materials:
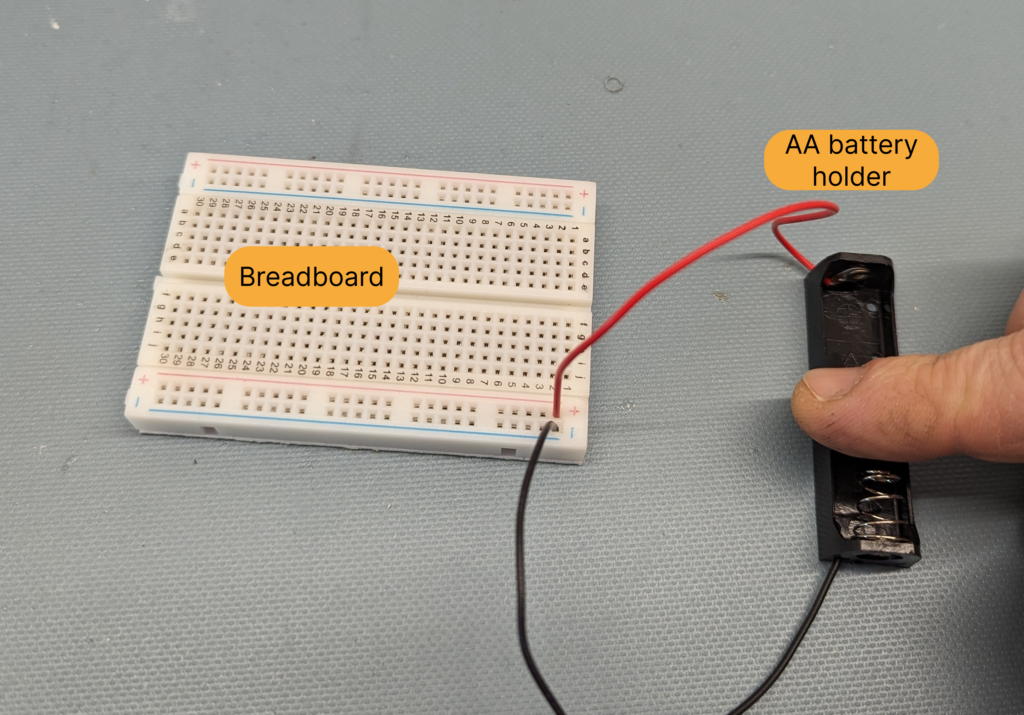
- AA battery pack + battery
- Breadboard
- Red LED
- Red and black 22awg wire (the ones in the spools)
- Wire Strippers
- Diagonal Cutters
- Breadboard

Setup (for the wires)
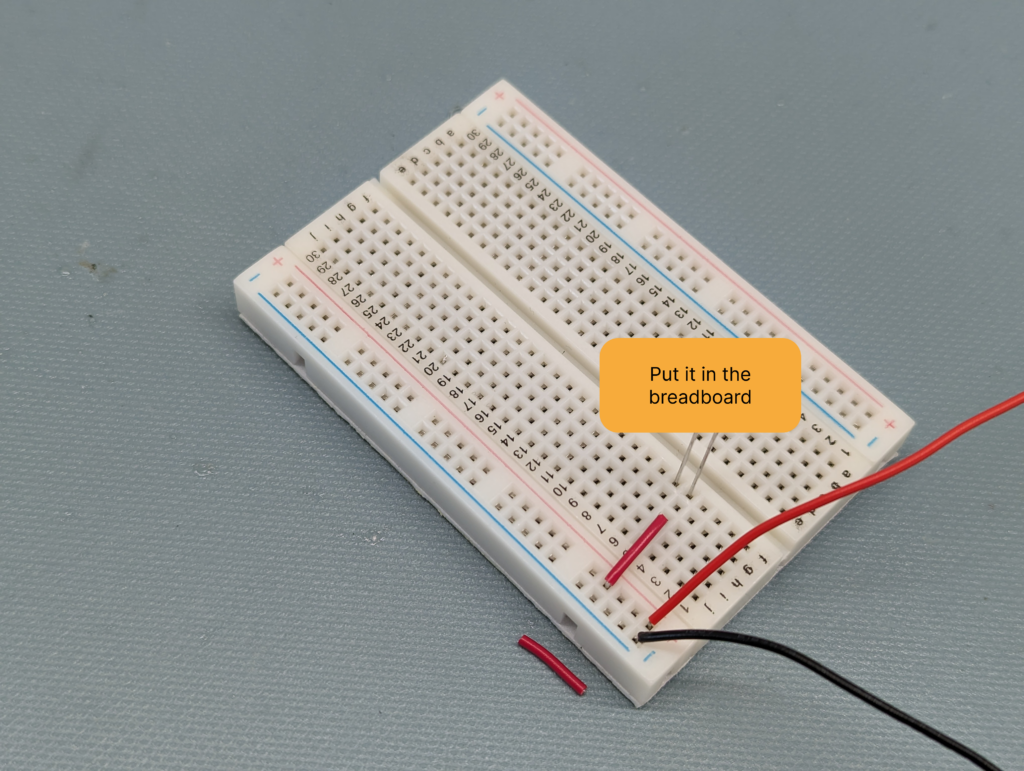
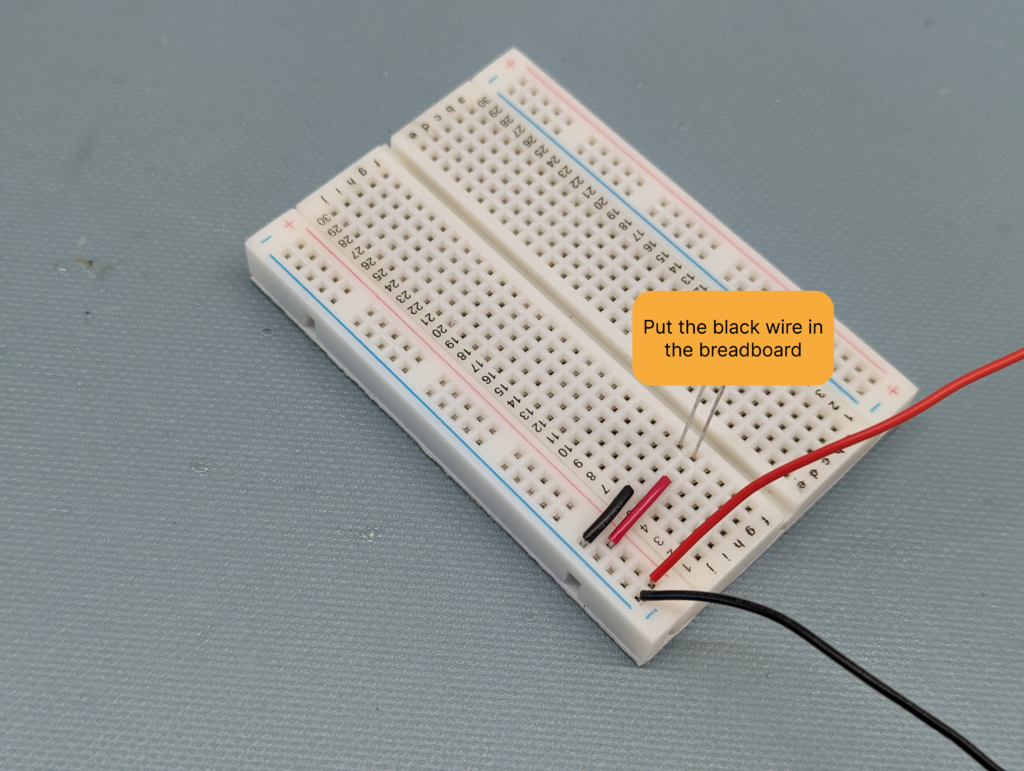
- Plug the red end of the battery pack into the breadboard’s into the + strip, and the black end on the – strip underneath the +. Make sure that the +/- are on different rows.
- This is because breadboards are connected horizontally, and having them on the same row would short your circuit.
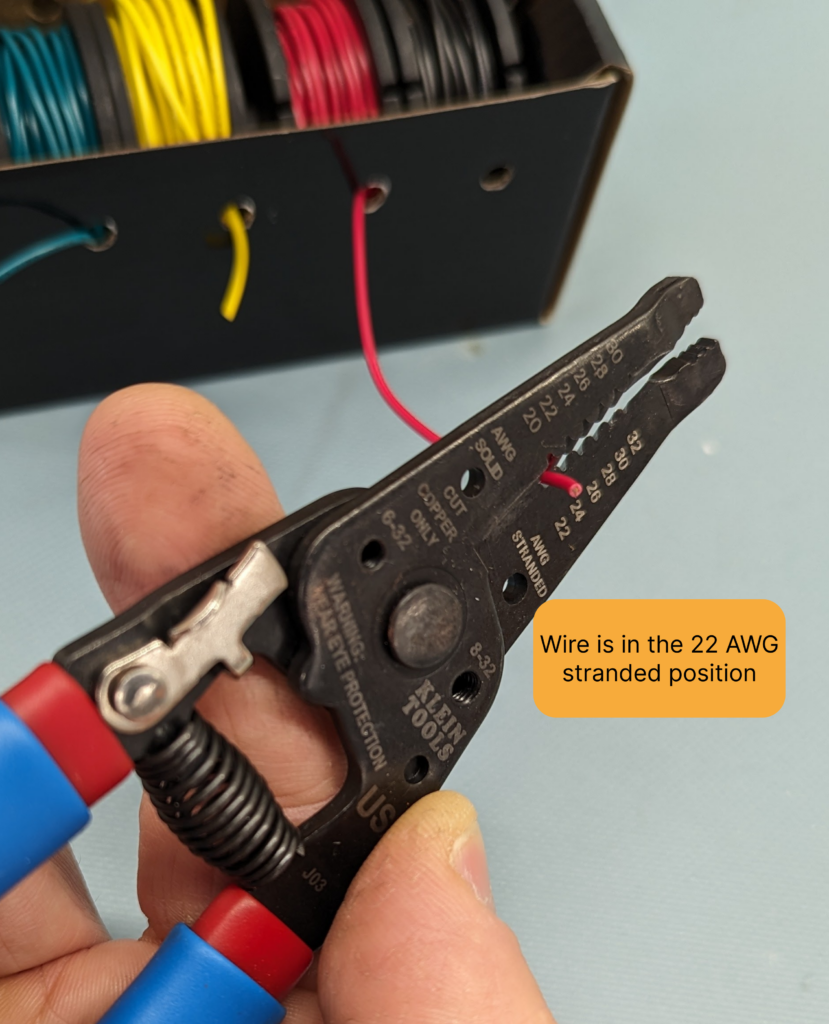
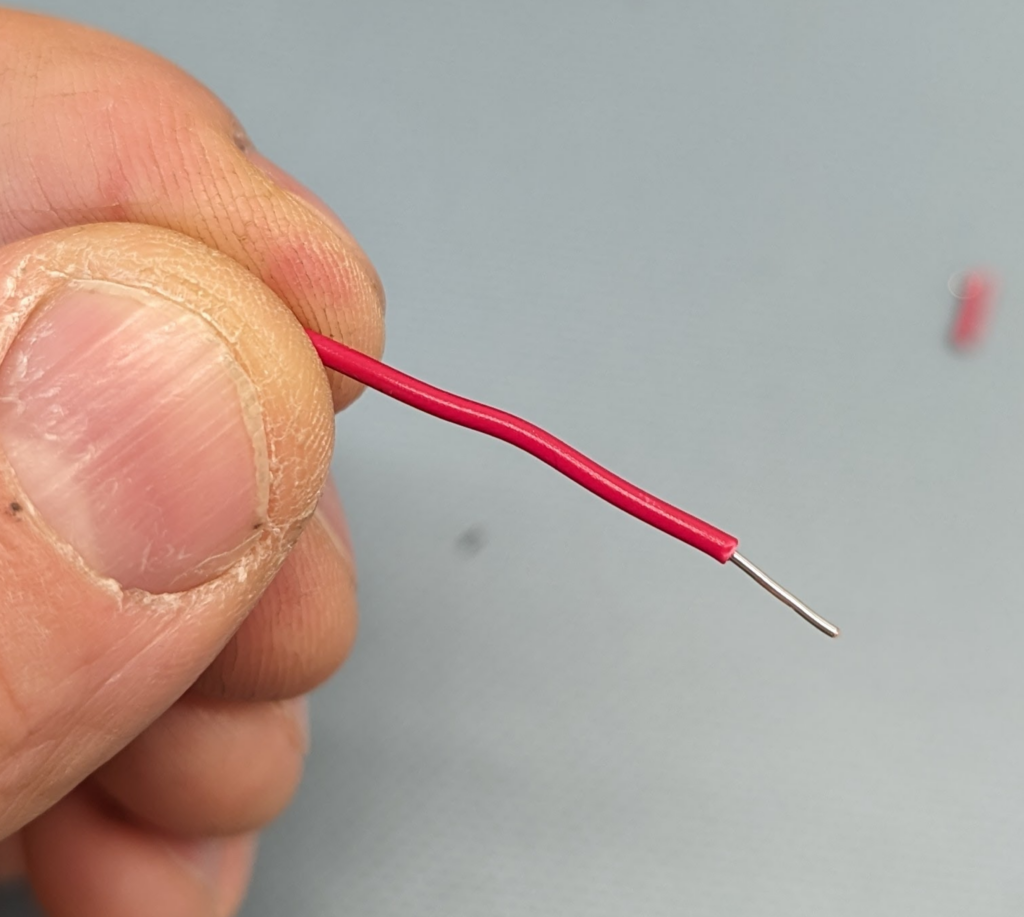
- Cut about 1 inch of red and 1 inch of black wire.
Note: the wire strippers have a latch. They must be unlatched to use. Please store them latched.
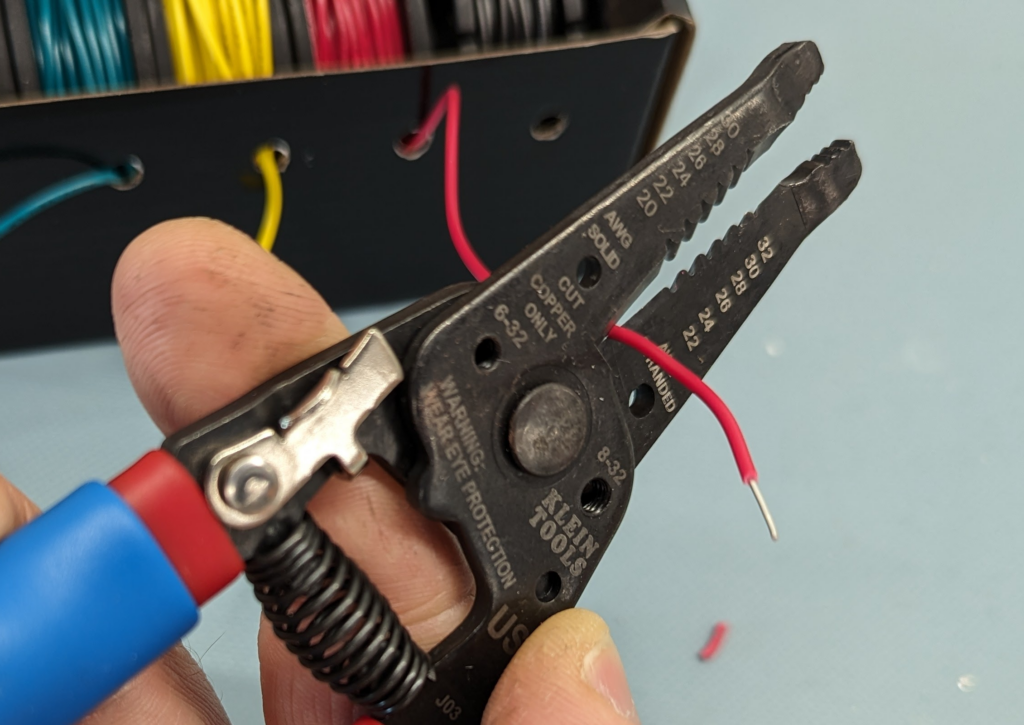
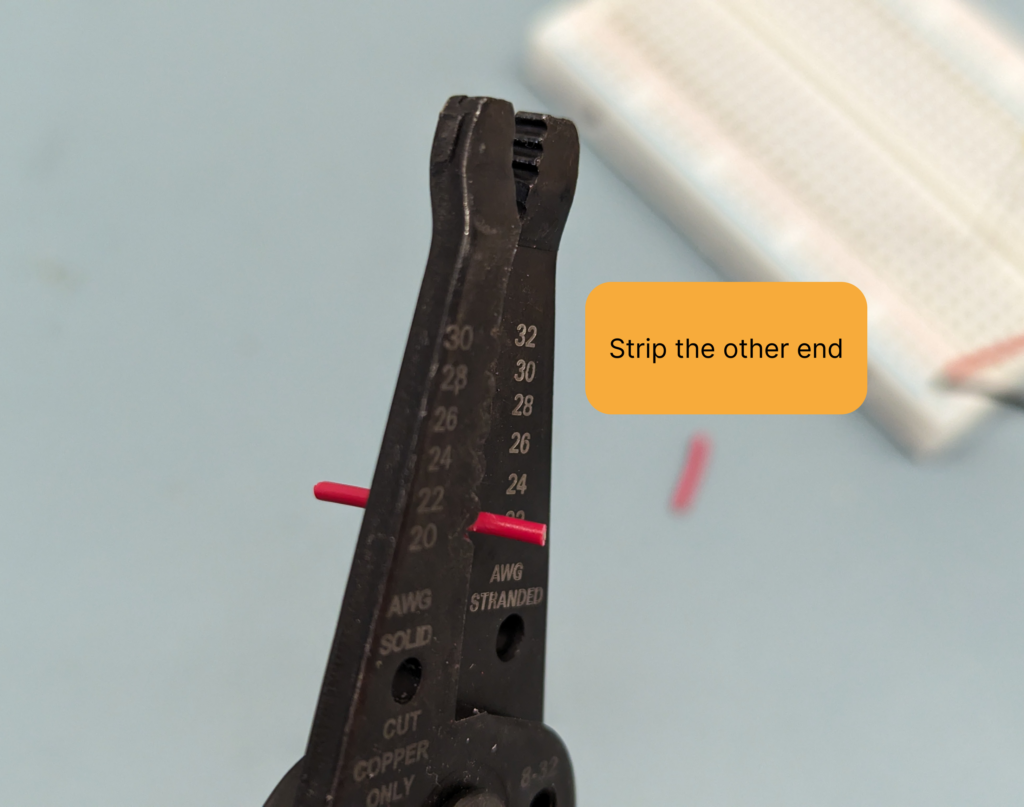
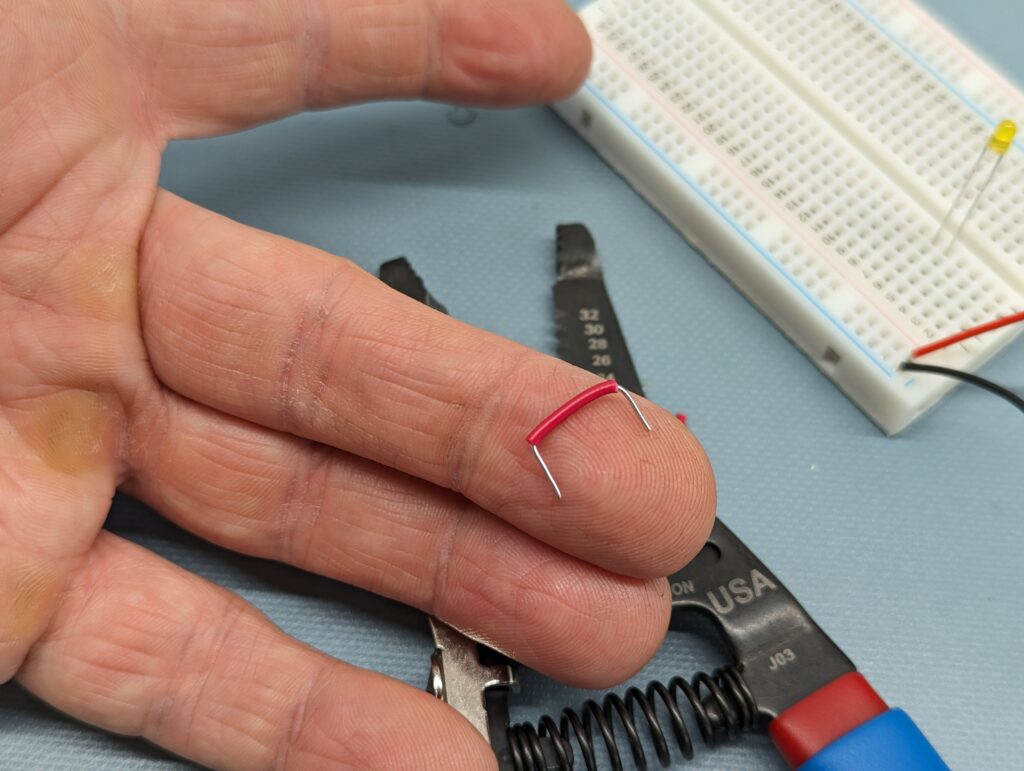
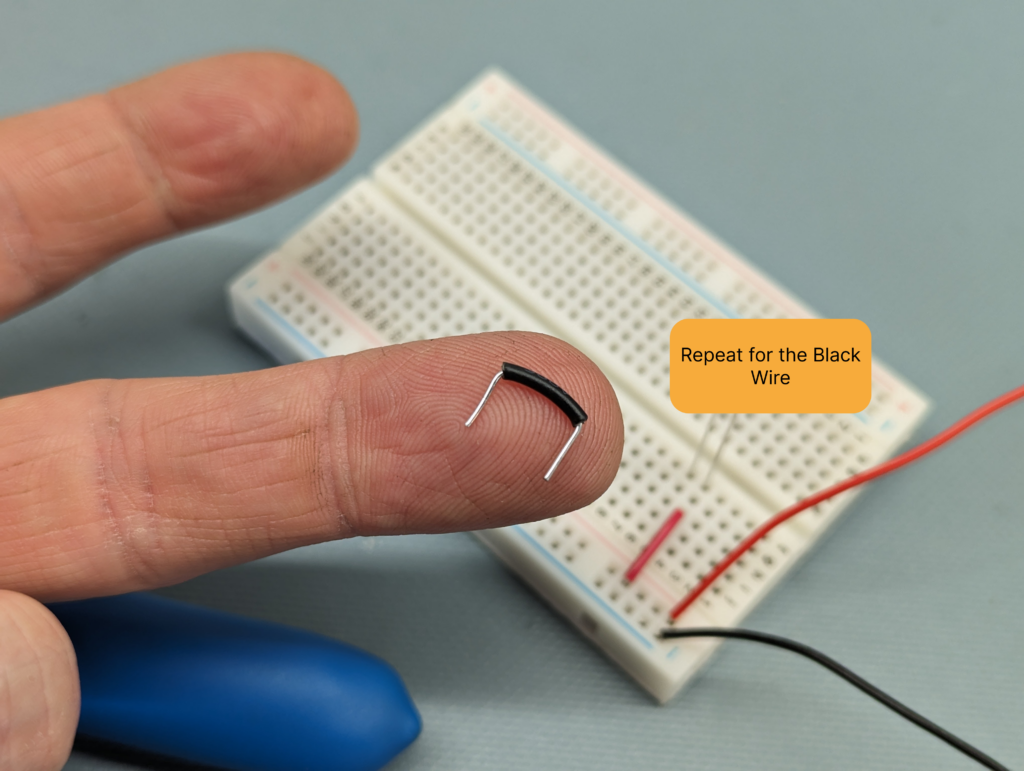
- Strip about one quarter of an inch from one end
- Fit it into the breadboard, gauge the length to the breadboard terminals, trim it to length, strip the other end and fit to the breadboard as pictured.

- Repeat for the black wire ( negative).
- Repeat for the black wire ( negative).
- The color of wire does not matter. Best practices for designing circuits are to use red for power and black for ground.
- Put the LED into the breadboard as pictured. The long terminal of the LED goes to the Positive.


- The LED should light up! It might blink if the battery can’t supply enough current. That’s OK.

Soldering
- Preheat the soldering iron. 400C is a good choice for the solder that we stock.

- Check that the ventilation is on. The button is lit when the ventilation is on.
- Now that your circuit is proven out, it’s time to transfer it to a perf board. (it’s laid out just like breadboard, but you solder the connections.) Gather your tools and materials.
- Board Vise
- Tip Tinner
- Solder
- Battery Holder and Battery
- Perforated Board – The available ones may be smaller than the pictured one. That’s OK.
- Breadboard with circuit
- Pre-Kitted 2 pin screw terminals
- Precision Screwdriver, Slotted
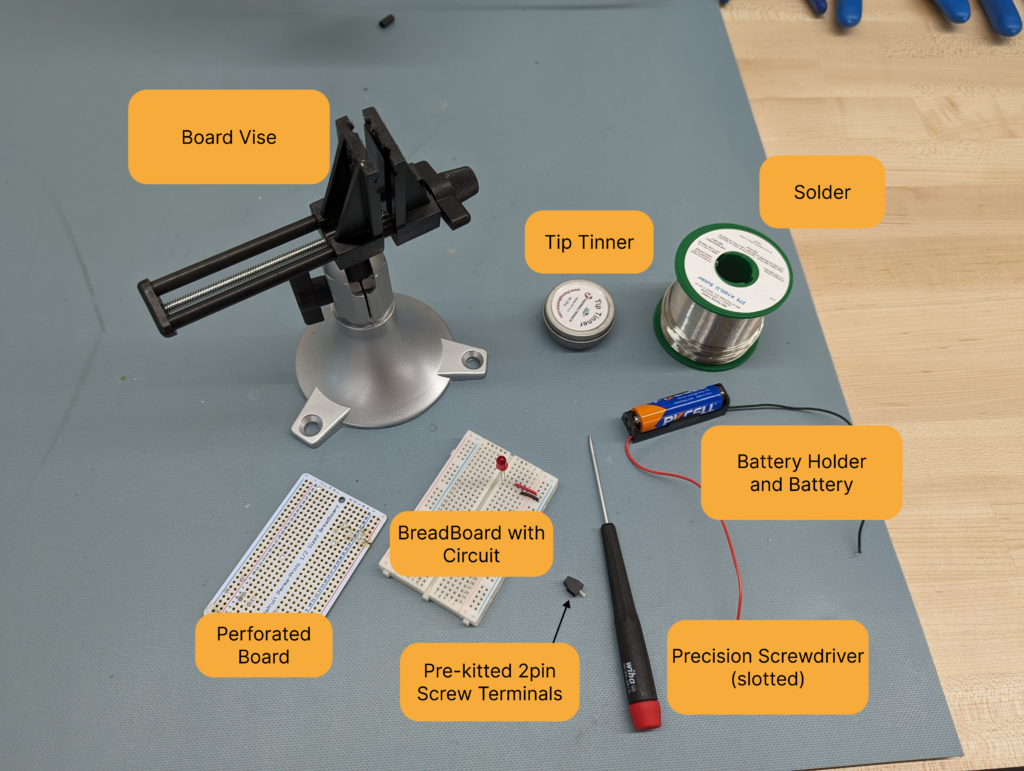
- You may also want the Helping hands tool. Use the spring clips to hold components or wires in place.
- When soldering, store the soldering iron in its stand. .
- Tin the tip with the tip tinner.

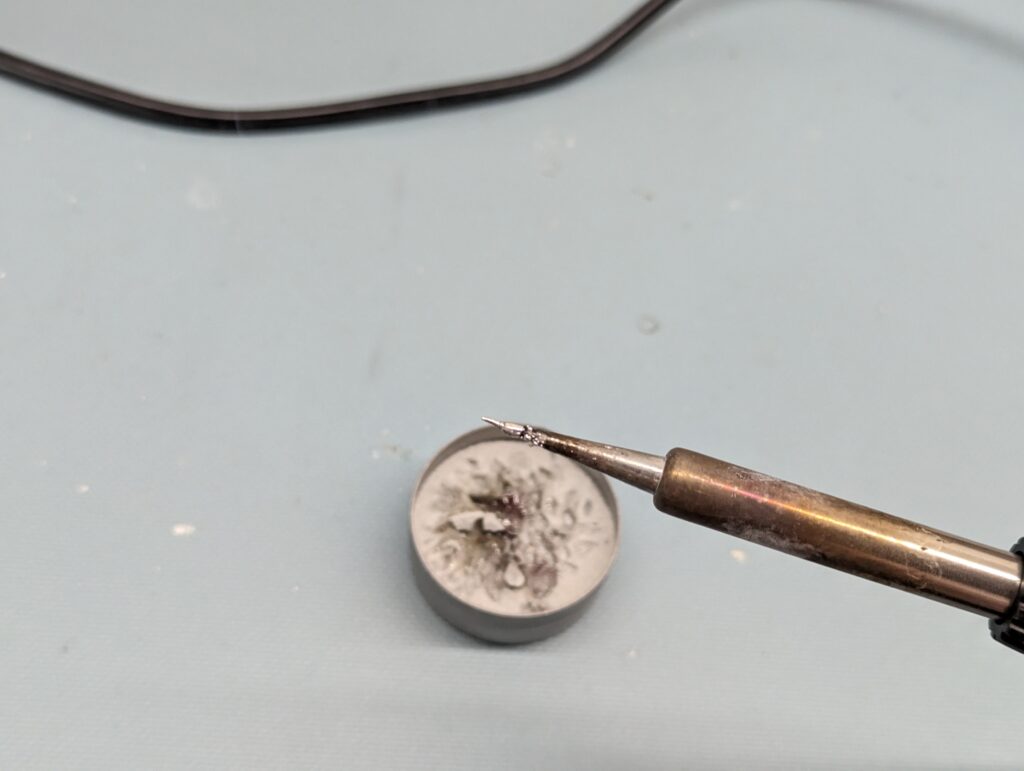
- The tip tinner will leave a solder coating on the soldering iron tip. Even it out with a poking motion in the brass wool.
- The tinned tip should look like this:

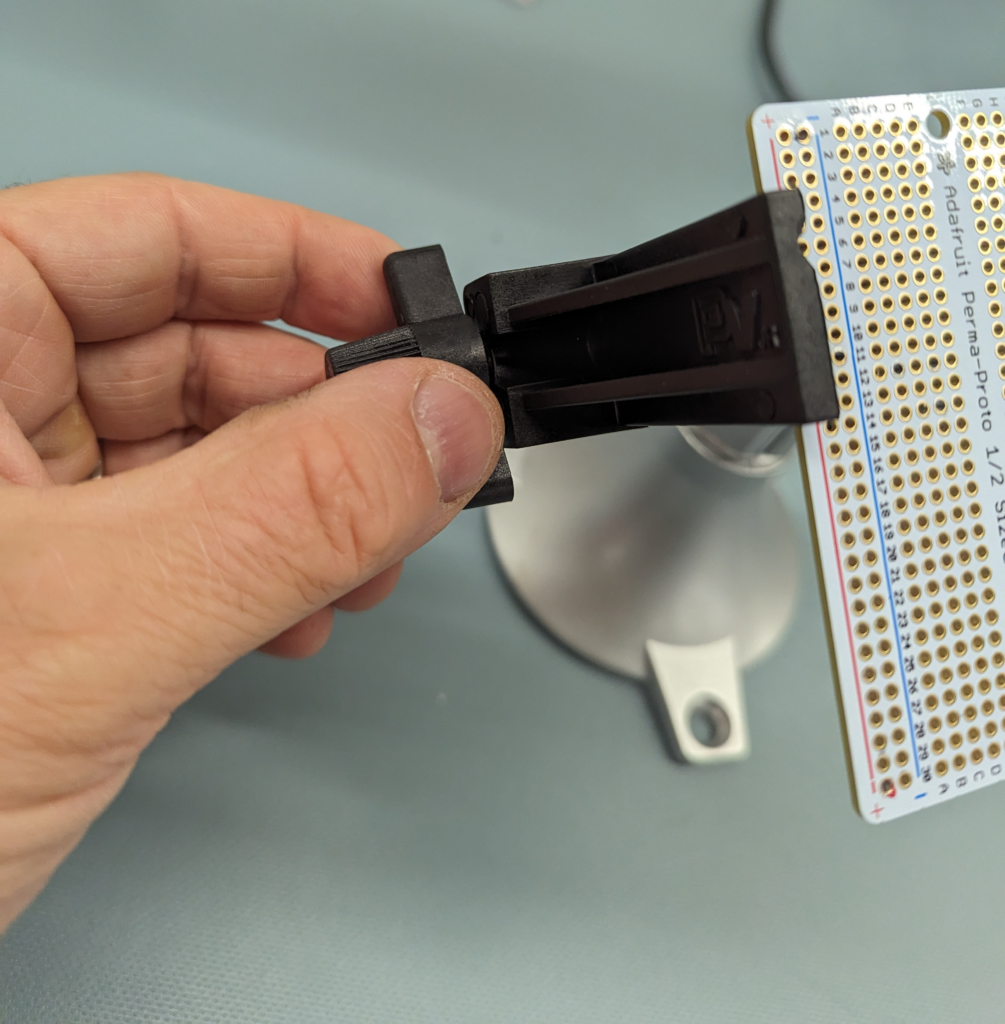
- Put the perfboard in the circuit board holder.
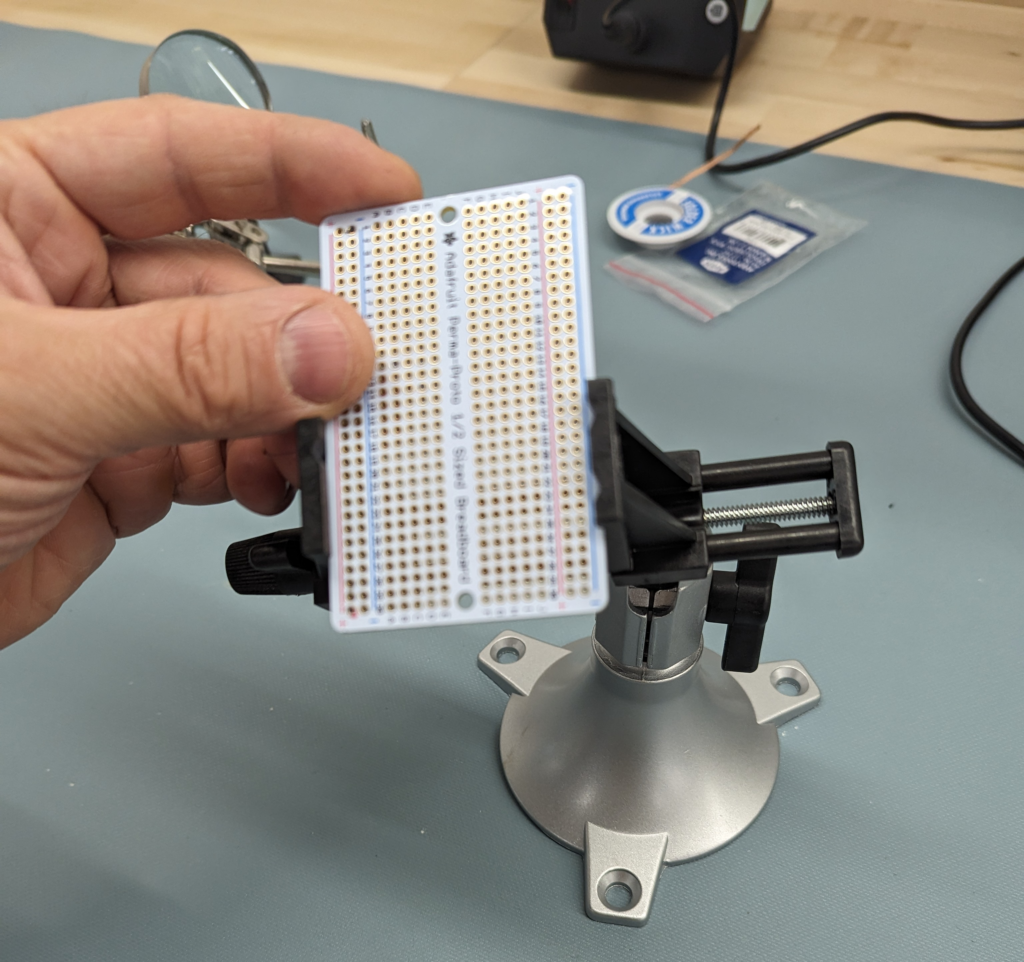
- The circuit board vise adjusts with the handwheel on the side.
- The circuit board vise adjusts with the handwheel on the side.
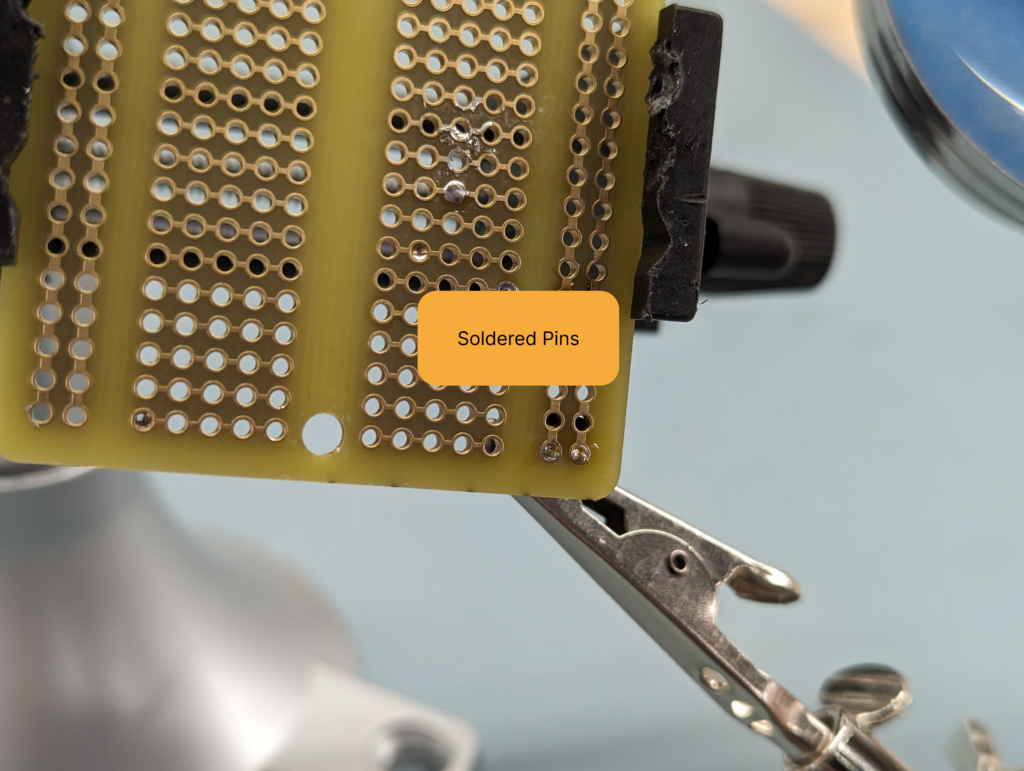
- Solder the screw terminals onto the perfboard on the + and – vertical strips. You may need the helping hands tool to hold it in place. The soldering for through hole components is often easier on the back of the board

- Place the soldering iron on the through hole pins and the through hole pads, and warm them up. When they are hot, try to melt the end of the solder into the joint. When the components are hot enough, the molten solder will flow to fill the hole.

- Move each of your components and wires from the breadboard to the Perfboard.
- It is easier to solder the connections from the underside of the perfboard.
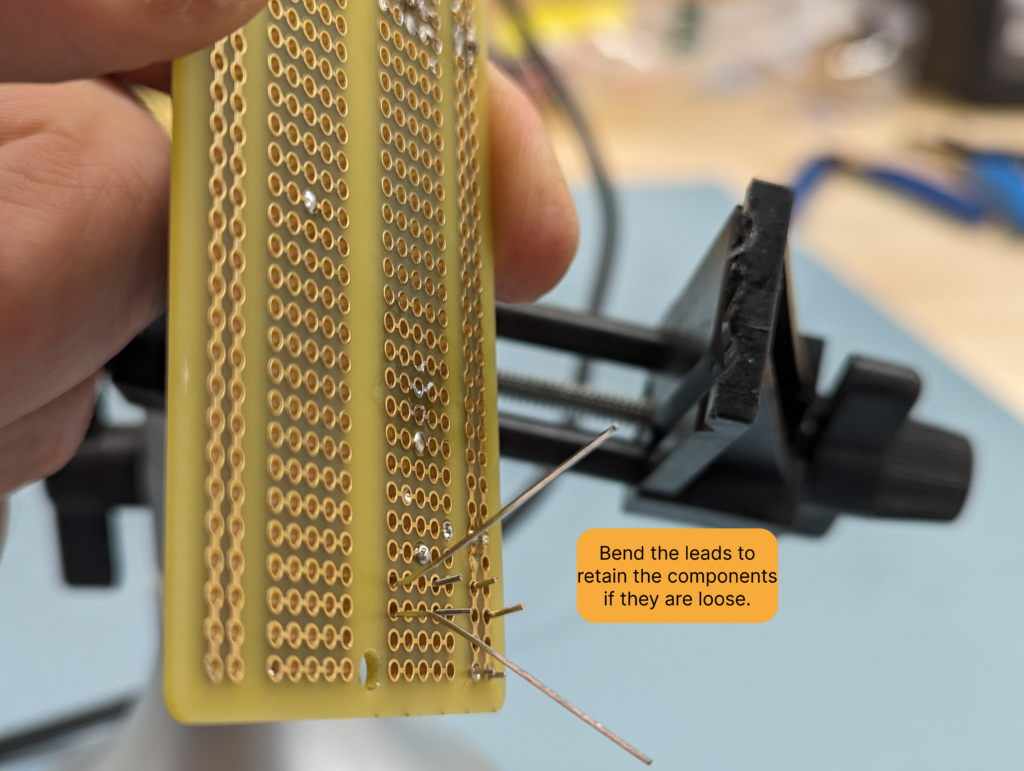
- Solder all the components and wires in place.

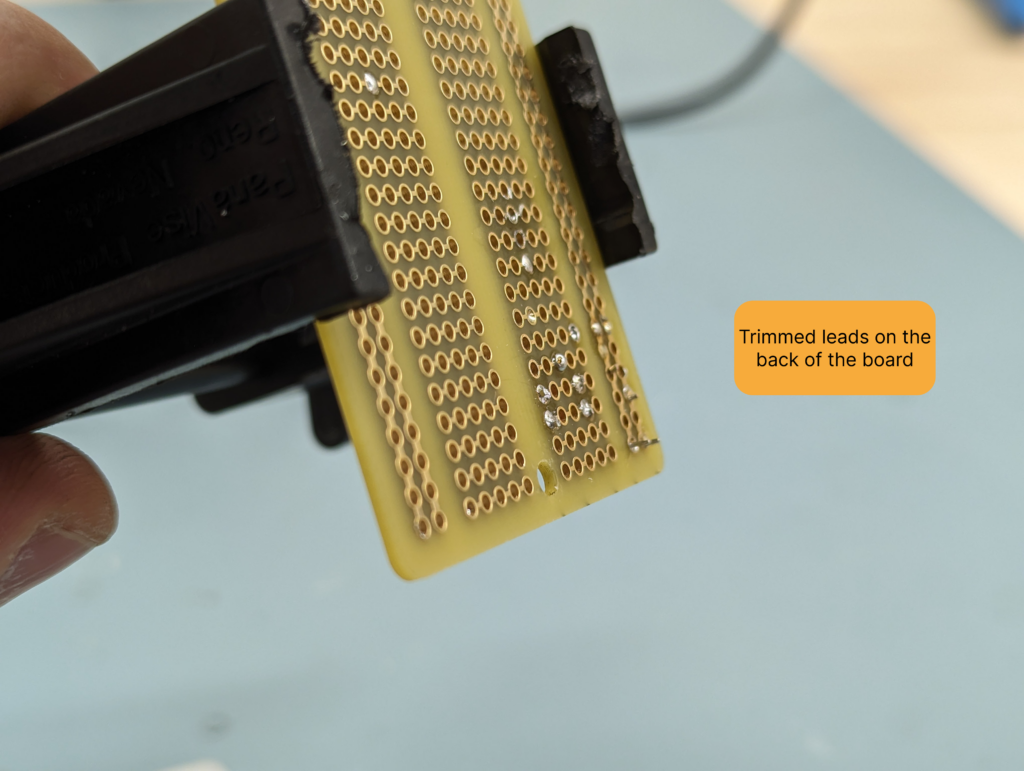
- After soldering, trim the leads on the backside of the board.

- The trimmed leads should not stick out from the back of the board significantly.
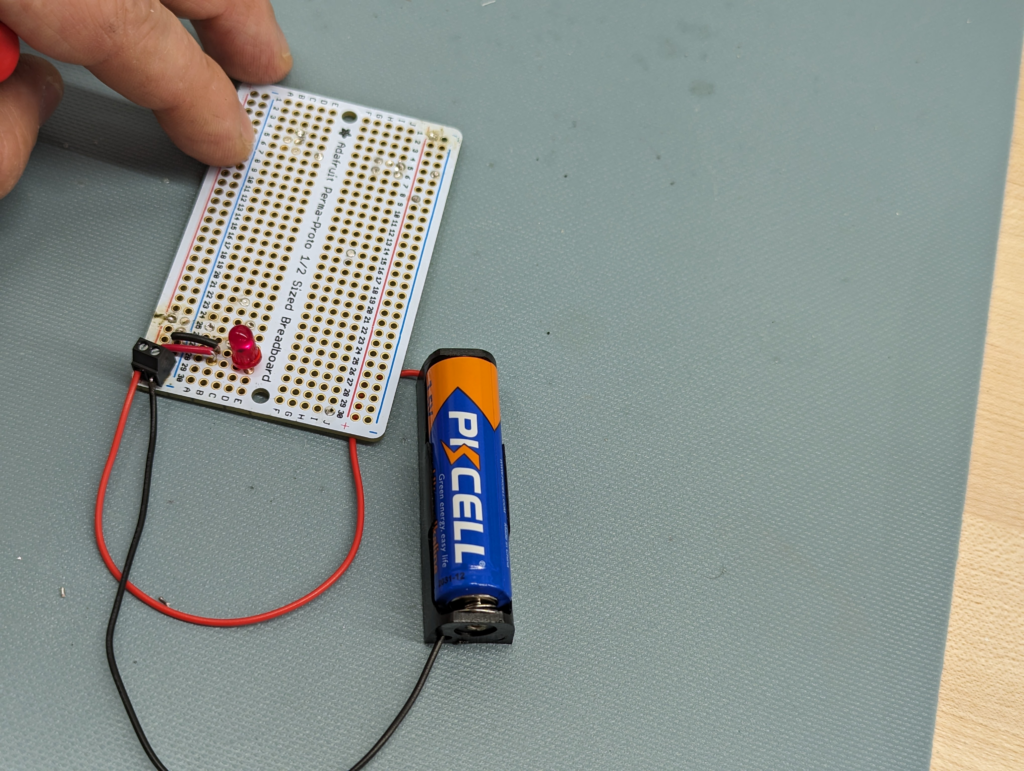
- Connect the battery holder with the screw terminals using the precision screwdriver.
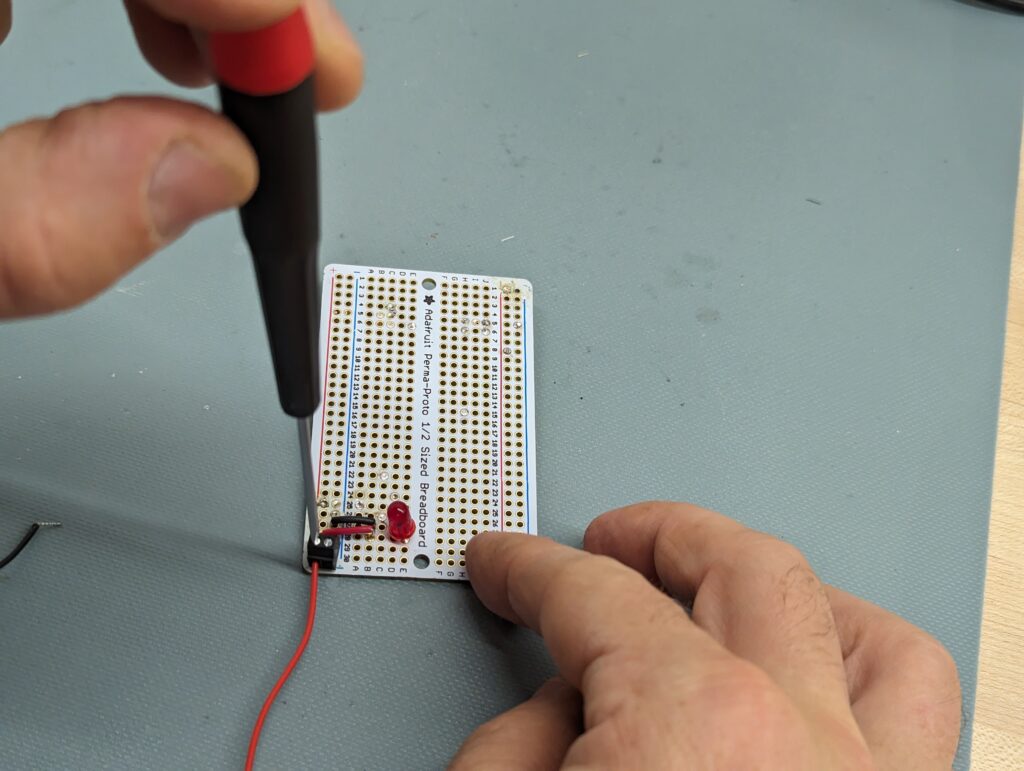
- The LED should light up! If it does, talk to a staff member and get the Soldering credential! Happy soldering! If it does not, talk to a Staff Member and we’ll help you troubleshoot it. Happy Soldering!
- Please clean and tidy your work area. Sweep all wire trimmings into the trash, put tools back in their homes, and leave the space ready for the next user. Turn off the soldering iron and the ventilation.
Clean Up
- Clean the soldering iron in the brass wool to clean off any solder that got on the tip. Be aggressive with the soldering iron and the brass wool– solder is hard to take off!
- Turn the iron off. Make sure the iron is kept IN THE HOLDER as it cools down.
- Turn off the fume extractor.
- Wait a few seconds, and then put any usable wires back. Throw out any wire scraps too short to use. Throw out the soldered LED and return the battery, battery case, and breadboard to their spots.
- If there are wire shavings on the table, sweep or vacuum the worktable.