The scroll saw cuts wood in a very detailed manner. Its thin blade allows for finer curves when cutting, but cuts slowly and can only cut relatively thin types of wood (less than 1-inch thick) without breaking. We carry several types of blade widths, which allow for different cuts of varying curve radii.
Safety Considerations
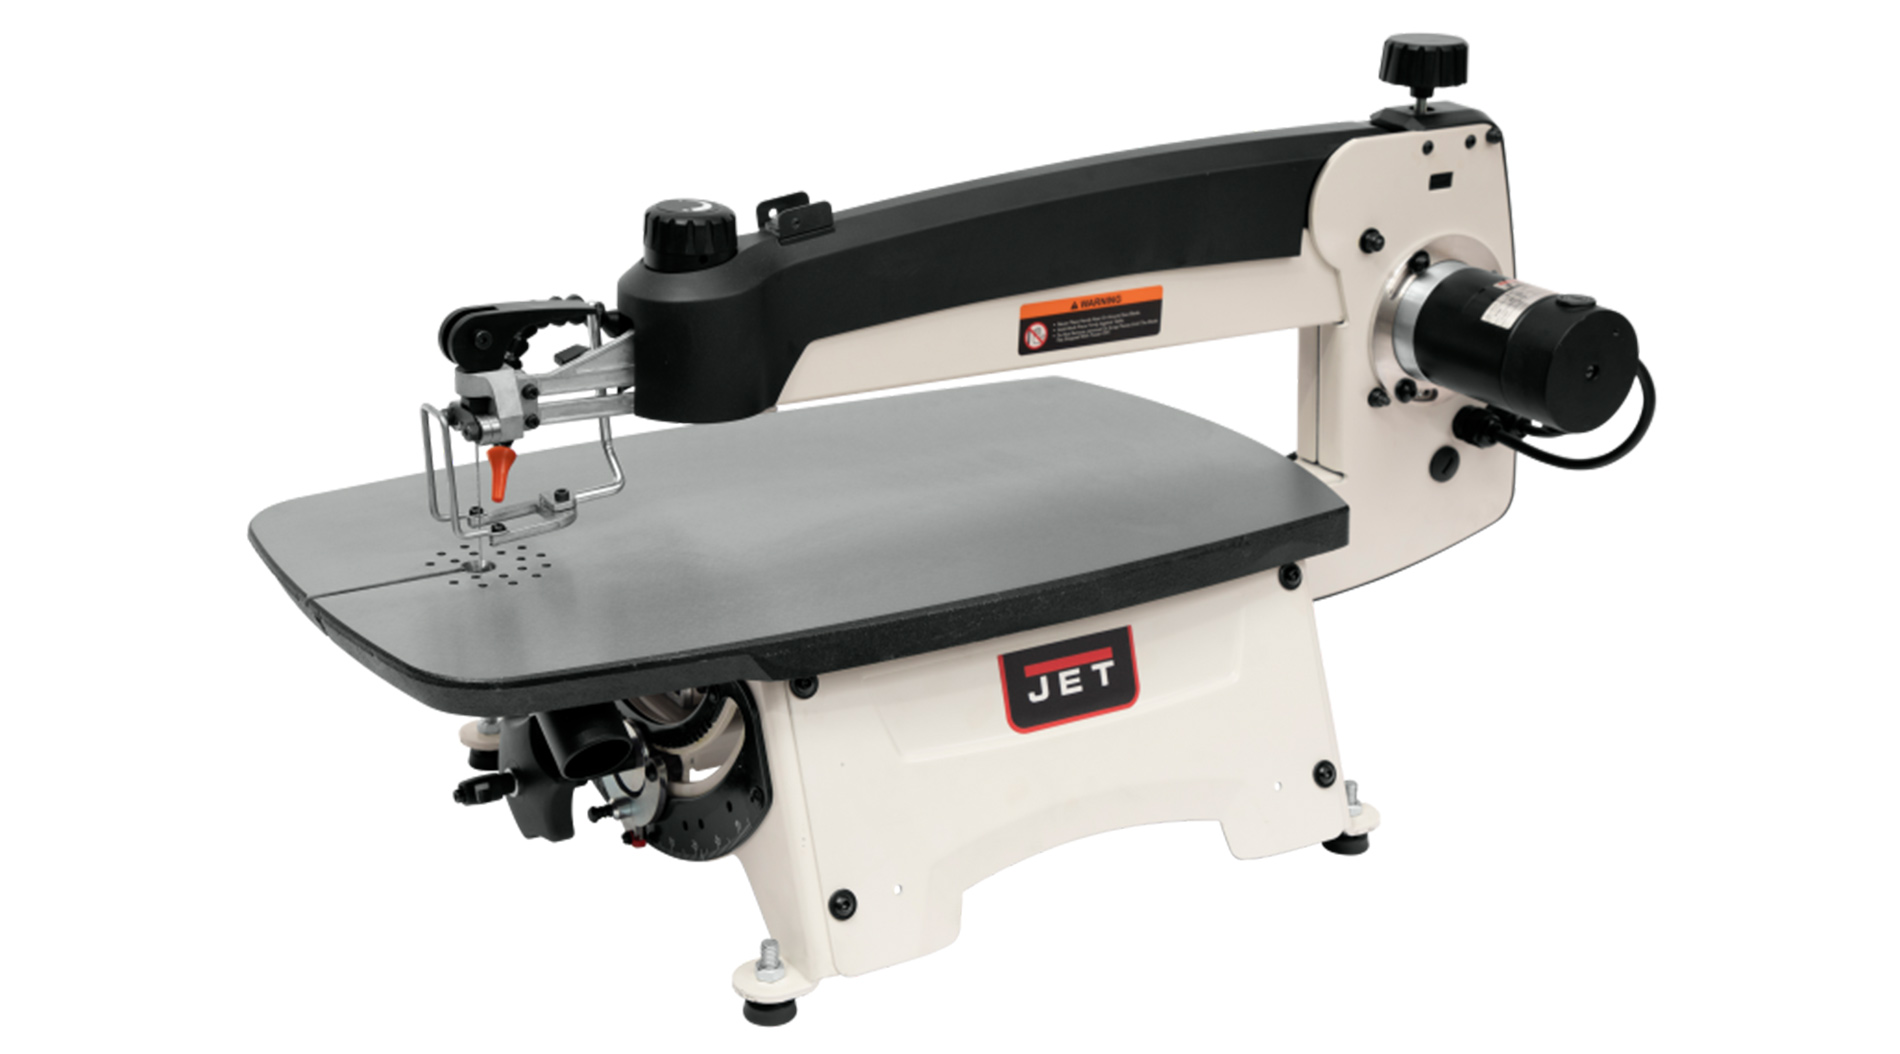
Machine Anatomy
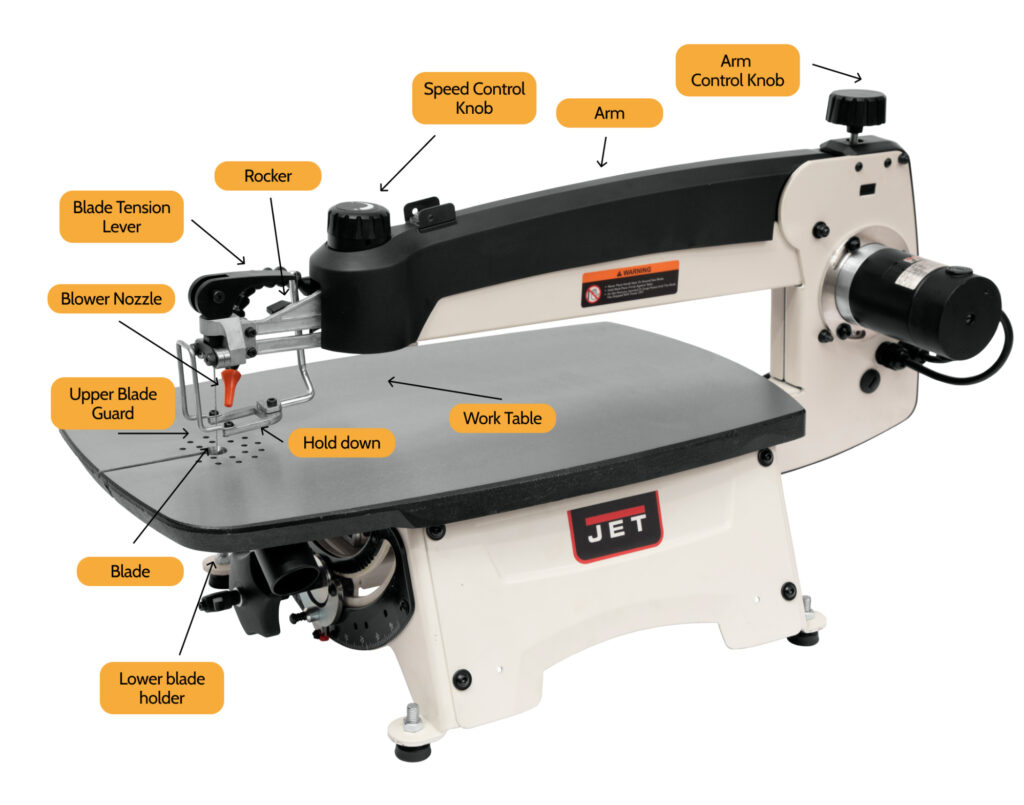
- Work table: Make sure your piece is always in contact with this table.
- Hold down clamp: To hold down your piece
- Blade: These blades are thin and can get changed out easily.
- Upper blade guard: Adjust this depending on the width of your piece.
- Blower nozzle: When connected to air, this nozzle will blow sawdust out of the way as you cut.
- Blade tension lever: Raising and twisting this lever will increase the tension of the blade.
- Rocker: This rocks the blade up and down at a rapid speed, which is what cuts your workpiece.
- Speed control knob: This knob controls the speed at which the blade moves up and down. Turn this blade as the machine is running to adjust speed.
- Upper and lower blade holders: Hold the tips of the blades in place.
Operating the Machine
Adjusting the Blade Guard
- Make sure the machine is off and the blade has come to a complete stop before adjusting the blade guide bar.
- Loosen the knob on the side of the blade guard and raise or lower guidepost.
- Position blade guide bar approximately ⅛” above the highest point of your material.
- Tighten lock knob.
Making a Curved Cut on Flat Bottomed Stock
- Make sure the machine is off and the blade has come to a complete stop before loosening the fence lock knob.
- Slide the guard upwards until you have enough room to allow your piece to move freely around the blade.
- Check the chart to see if the blade on the saw allows for the radii you want to cut.
- Turn on the dust collection system.
- Place the workpiece on the table and place it flush against the fence.
- Adjust the blade guide bar following the steps outlined above.
- Turn on the bandsaw.
- Wait a few moments for the blade to speed up, then feed the workpiece through the saw, keeping fingers clear of the blade. Feed the workpiece saw along the curved path you desire keeping fingers well clear of the blade.
- Thinner material can be pushed through faster than thicker material, but a feed rate of an inch every few seconds is considered reasonable.
- When the cut is complete, turn off the scroll saw and wait for the blade to come to a complete stop before removing your workpiece.
Changing out the blade
- Turn off the saw.
- If you’re changing the blade to cut out details in a hole in your workpiece, thread the blade through your piece before installing the blade into the machine.
- Slide the blade into the holder. Make sure the teeth point down towards the blade holder, then tighten the blade holder knob.
- Flip open the clamping lever to the front of the saw.
- Push the blade holder into the clip underneath the work table while guiding it through the table slot.
- Push the top of the blade into the upper guide. Make sure it rests between the guide set screws.
- Flip the clamping lever toward the rear of the saw to tension the blade.
- Double check that the blade teeth are pointing down and towards the table.
- If the blade is properly tensioned, plucking the blade with your finger like a guitar string would sound very clear.
Changing blade tension
- The blade tension can be increased or decreased if the blade was installed incorrectly. Lift the handle above the blade vertically.
- Rotate the handle clockwise one turn to increase the pressure, then push it down.
- Turn the set screws with a hex wrench clockwise to reduce the gap between the metal that clamps the blade.
Changing speed
- Rotate the speed control knob while the saw is running. Clockwise increases the strokes per minute, and counterclockwise decreases it.
Best Practices
Relief Cuts
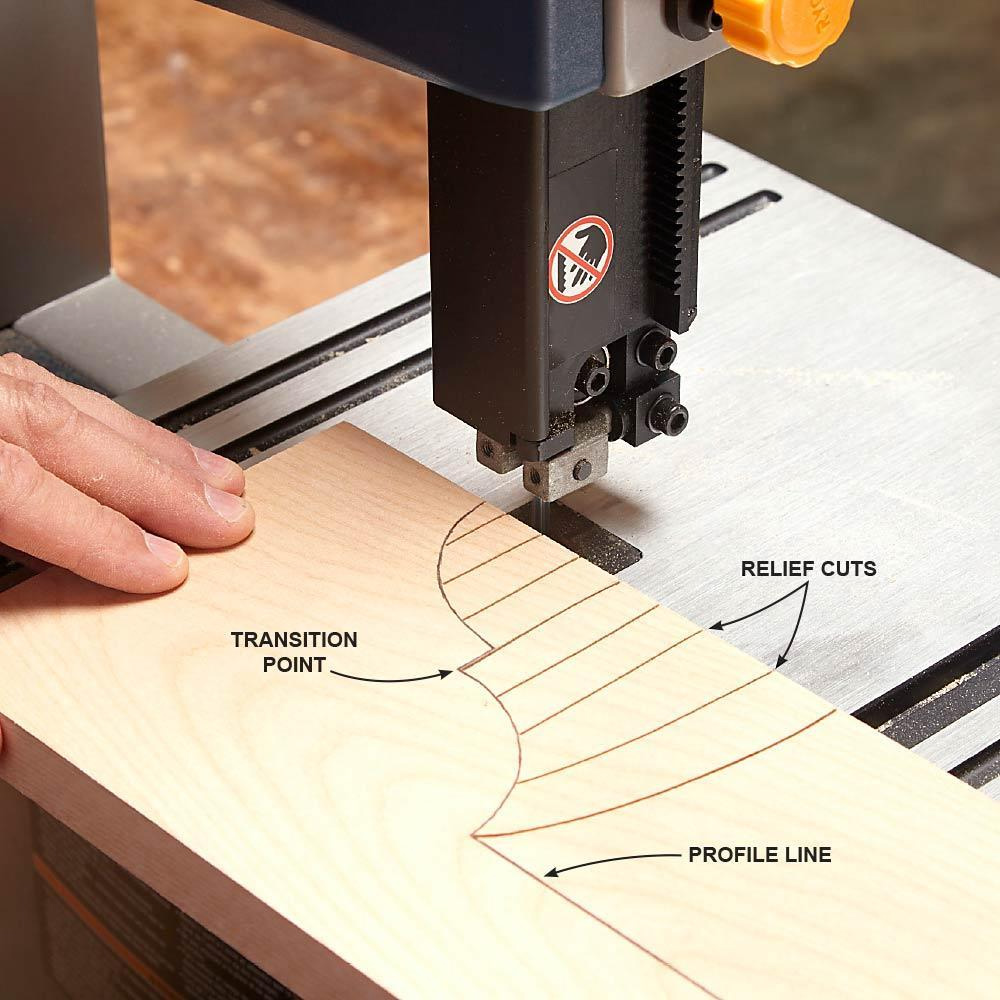
- A relief cut is a cut that lies perpendicular to the curve of your desired cut, and edges right up against it
- Relief cuts provide flexibility in cutting curves with a bandsaw: you are less likely to break the blade when the wood capturing the blade is allowed to escape.
- You can still break a blade by trying to cut a too-tight curve!
- A properly executed relief cut can greatly improve the quality of your bandsaw cut.
- The tighter the radius of the curve, the closer together your relief cuts should be.
Transition Points
- As you can see in the image above, transition points between types of curves are important to note
- As you reach a transition point, it can be helpful to stop, reevaluate, and figure out the best angle of approach for your next cut.
- Use the transition points as a way to take off excess material, if you have not done so already.
- Avoid backtracking whenever possible. While backtracking is occasionally necessary, you can plan for it and avoid it by using relief cuts and cutting away waste material as you go.