This is a user guide and does not grant a credential. While there are examples and steps shown it is NOT necessary to complete each step of this user guide before gaining access to the rotary tool. You MUST have completed the in-person training Laser Cutting I.
Text in blue boxes are steps you can actively take to practice these skills.
What is a rotary tool?
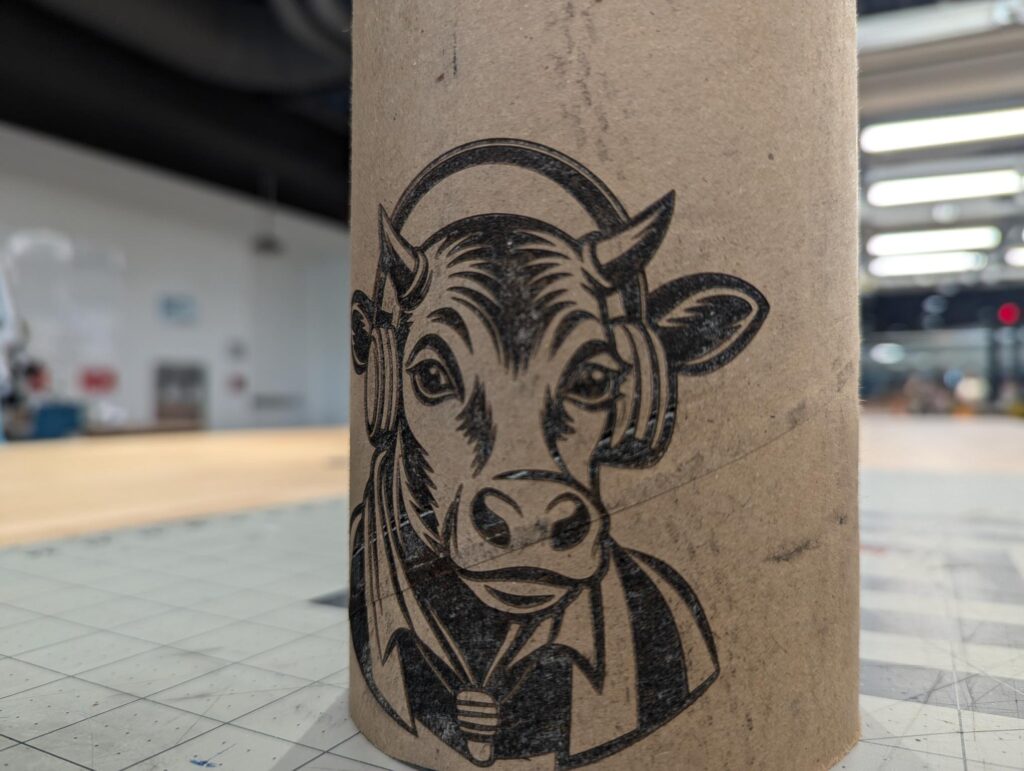
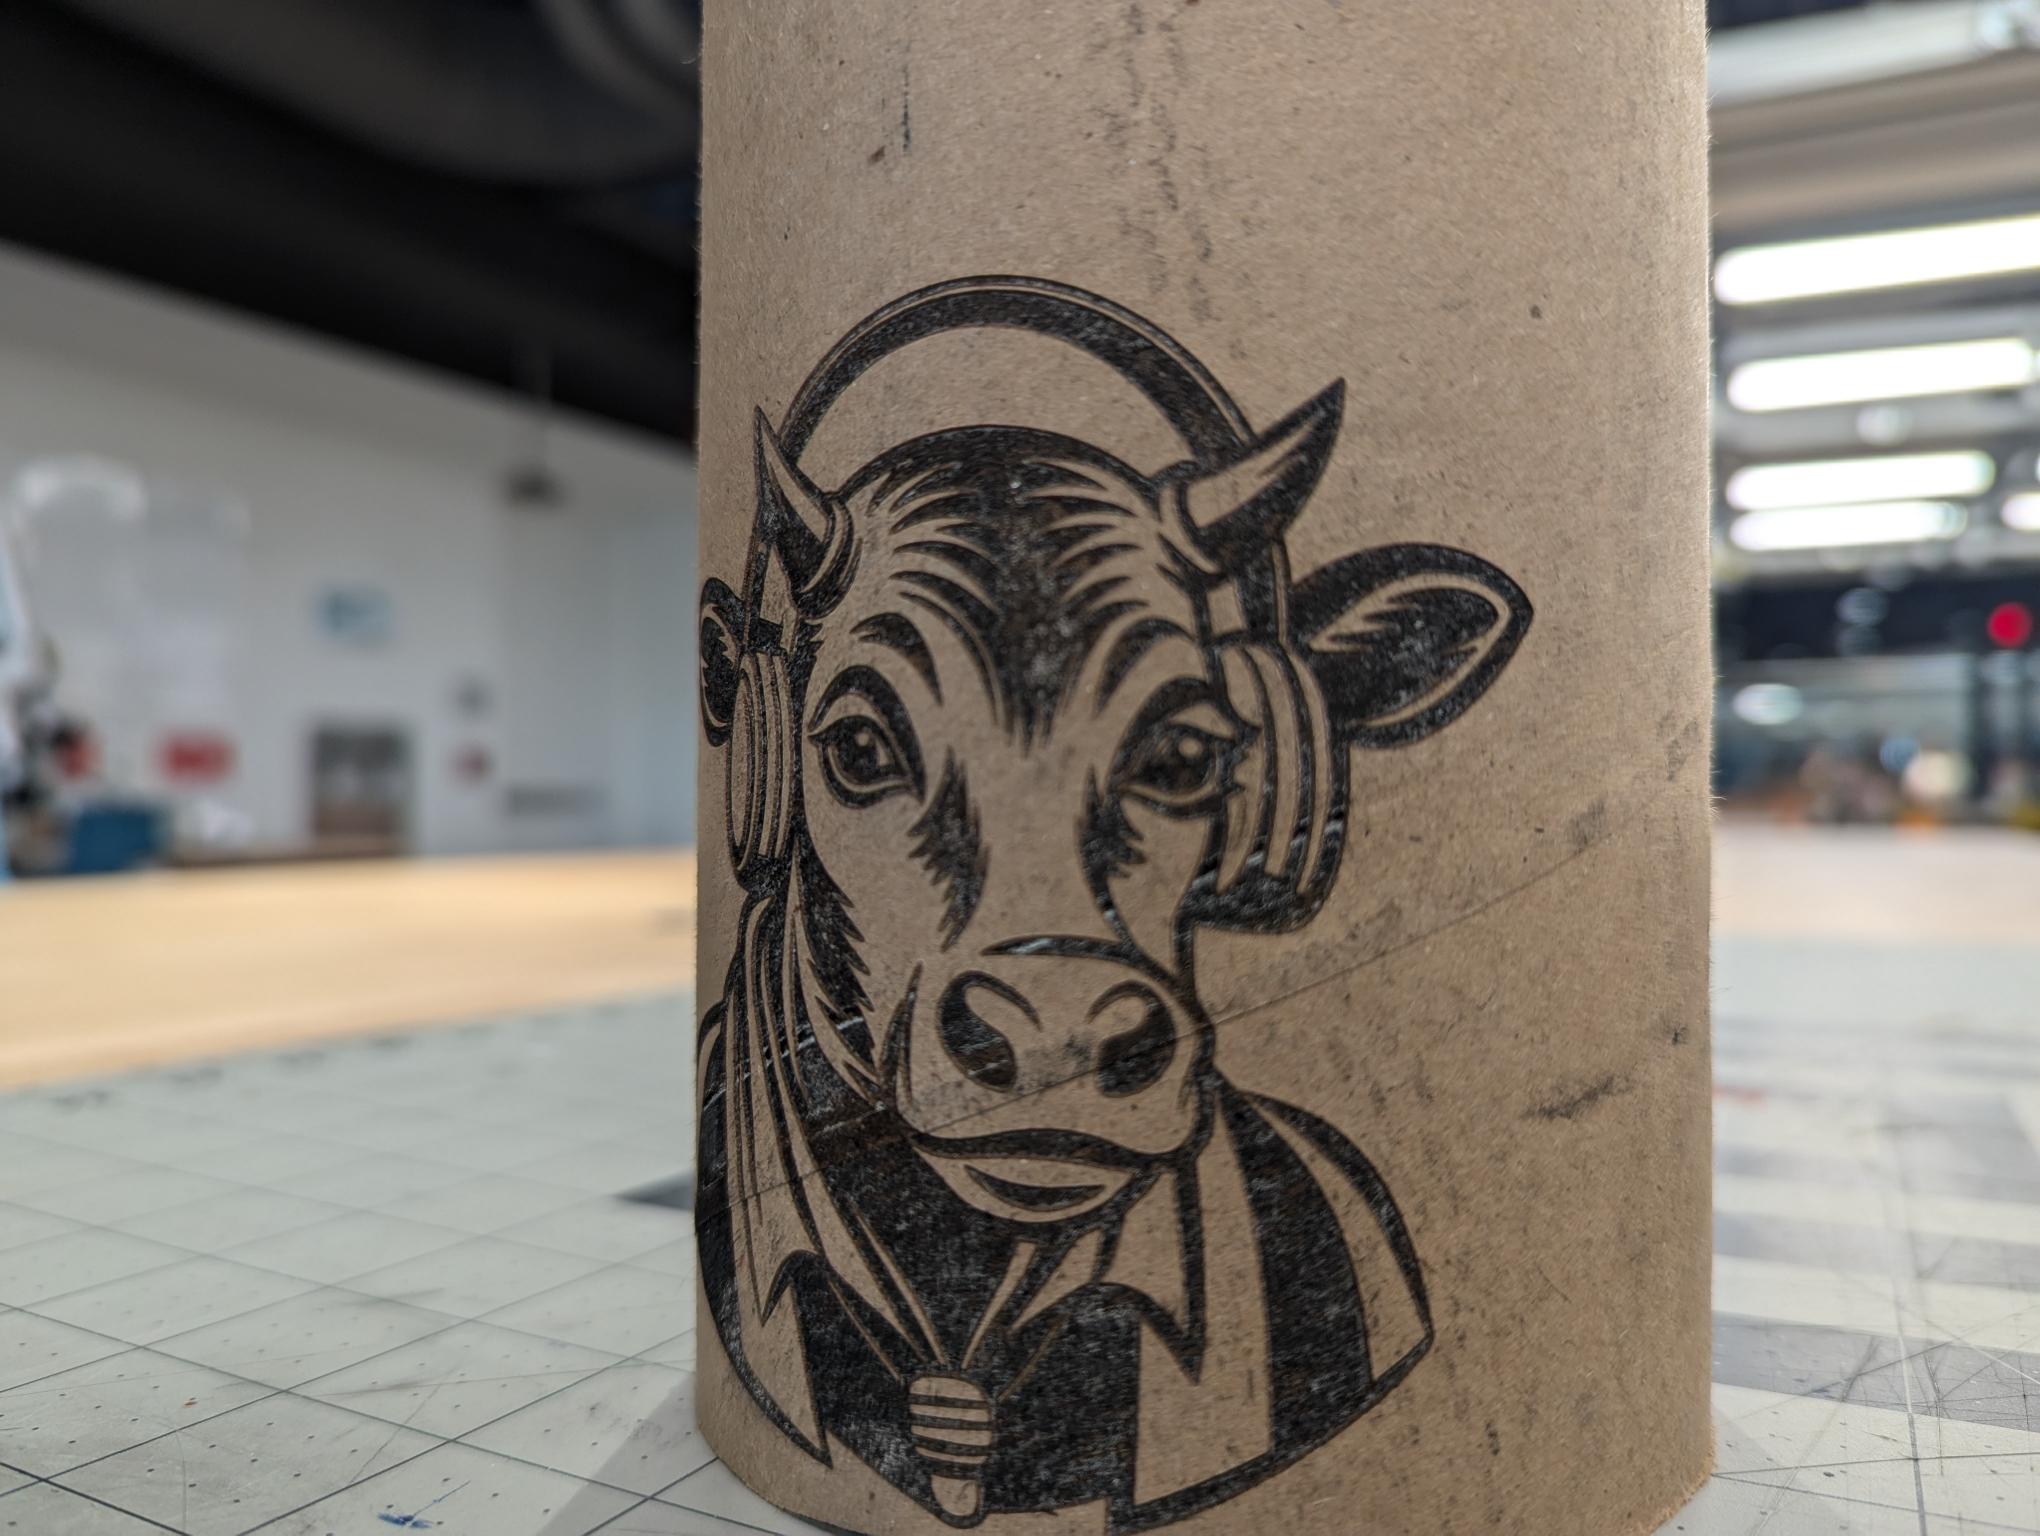
A laser cutter rotary tool integrates a fourth (rotational) axis into our laser cutters. It allows you to engrave or cut cylindrical/round objects. This tool is ideal for customizing items like mugs, bottles, and tubes. It combines the precision of laser cutting with the versatility of working on curved surfaces. Our rotary tool is large enough to engrave a baseball bat.
Safety Considerations
Preparing your design in Adobe Illustrator
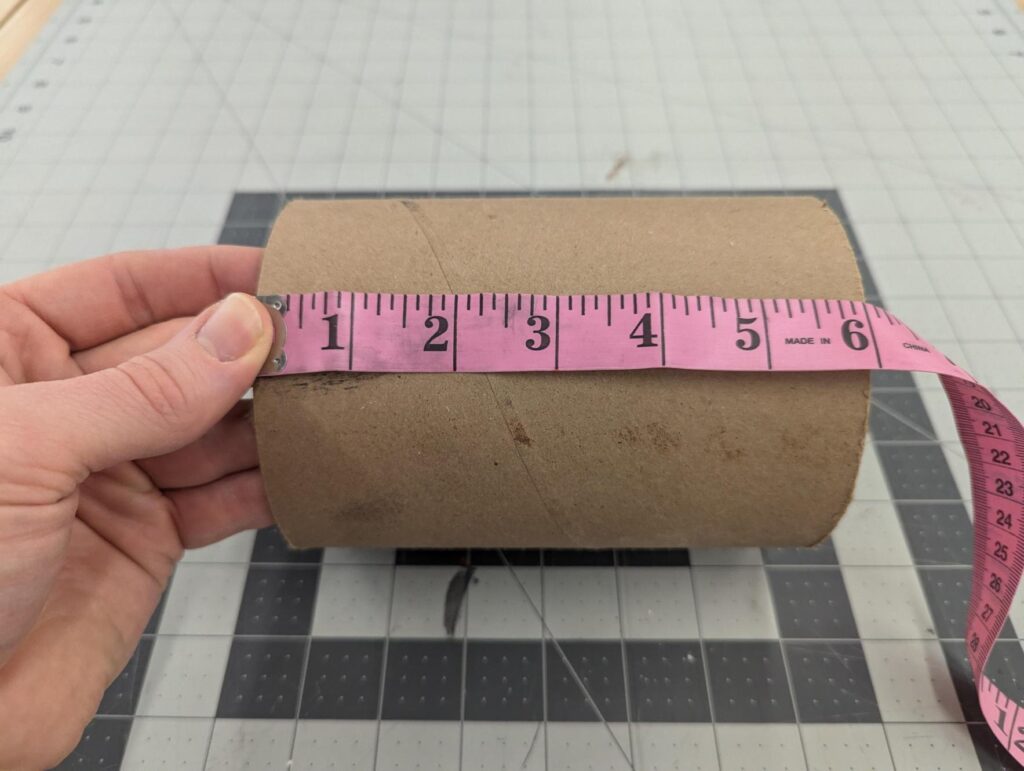
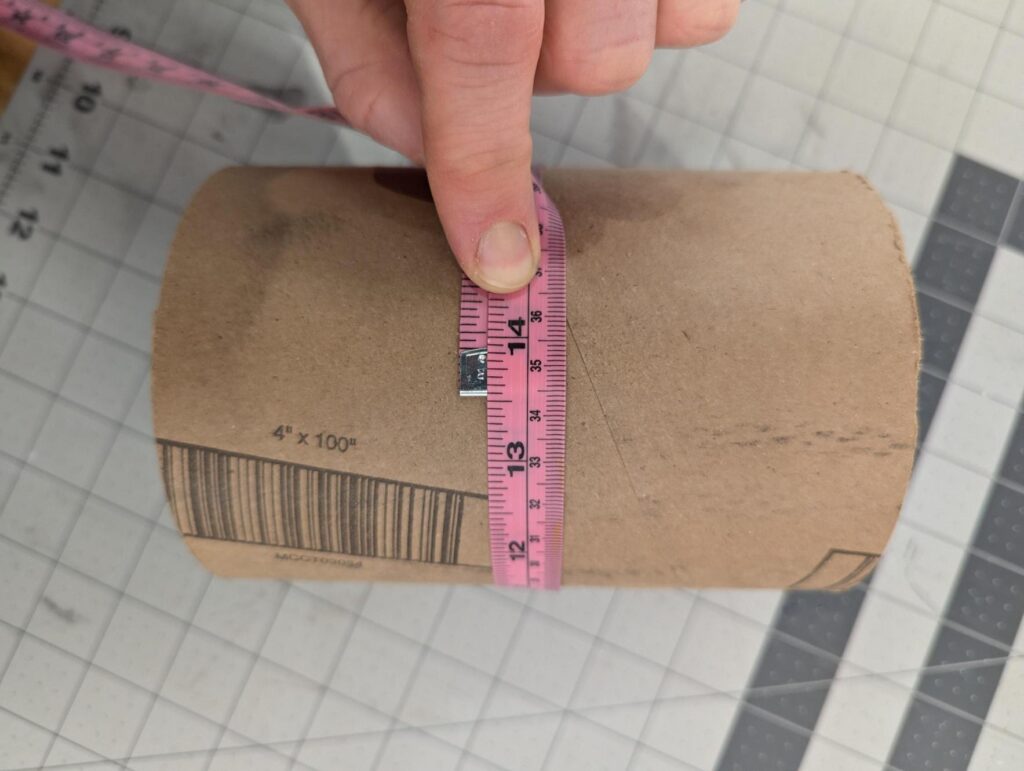
- Measure the circumference and the width of the object you would like to use with the rotary tool.
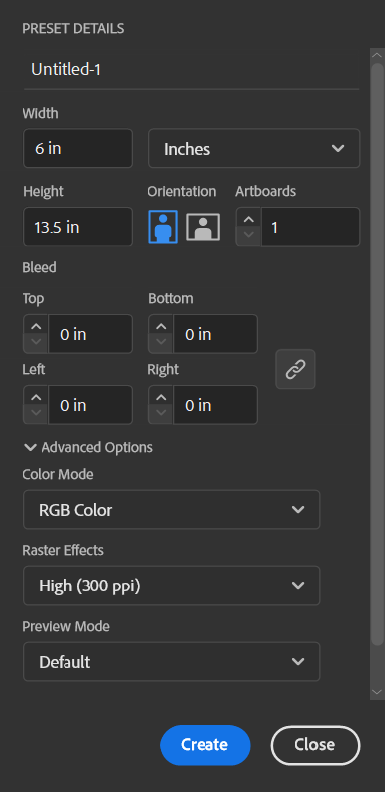
- Use these measurements to set up a new RGB file in Adobe Illustrator where the circumference of your object is placed into the height field.
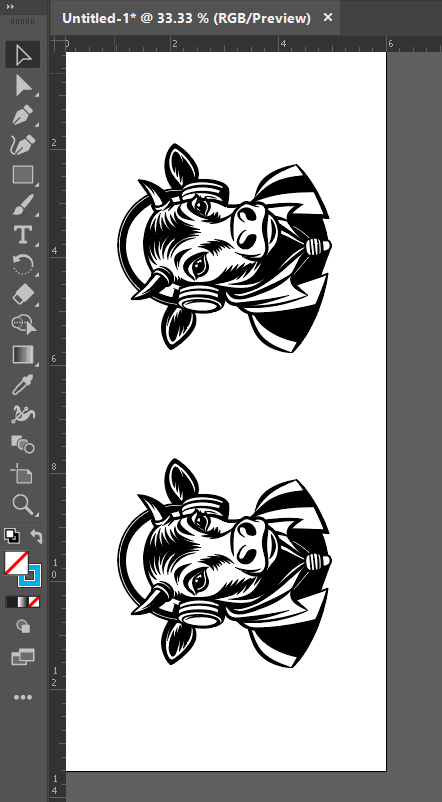
- Your artboard for your illustrator file will now match the object you are using with the rotary tool, make sure to design within these constraints.
Preparing the Rotary Tool for Your Object
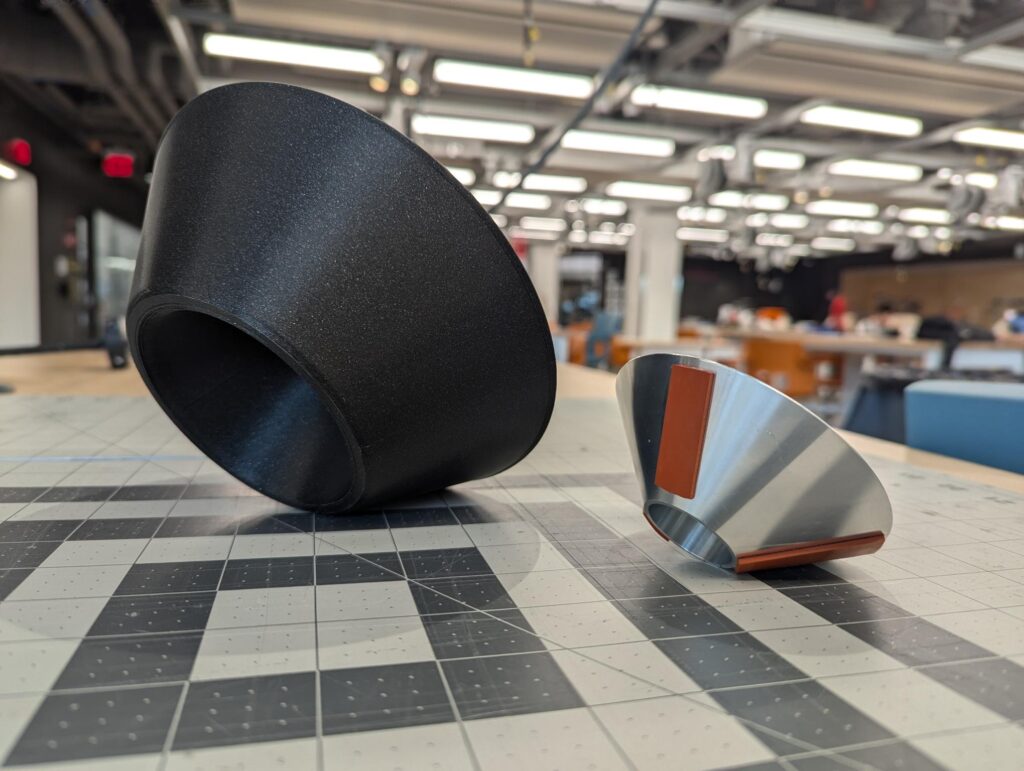
- The EXP makerspace has two different styles of rotary heads, convex, and concave with a diameter if roughly 3.5 inches.
- Generally, convex heads are for open-ended objects, while concave heads are for circular objects without an opening
- A cup or tumbler may use both styles of rotary head, convex for the top and concave for the bottom

- The rotary heads are held in place with a set screw which must be loosened to change them
- Choose the combination of heads that work for your object and install them
- IMPORTANT: Do not overtighten the set screws, they only need to be snug (just slightly over feeling resistance when tightening the set screw)

- Spin the head to ensure that it is properly attached to the rotary tool
- If you have an object that will not work with these heads you may design and 3d print your heads.
- Remember that any custom fixtures need to attach with a set screw of some kind
Installing the Rotary Tool
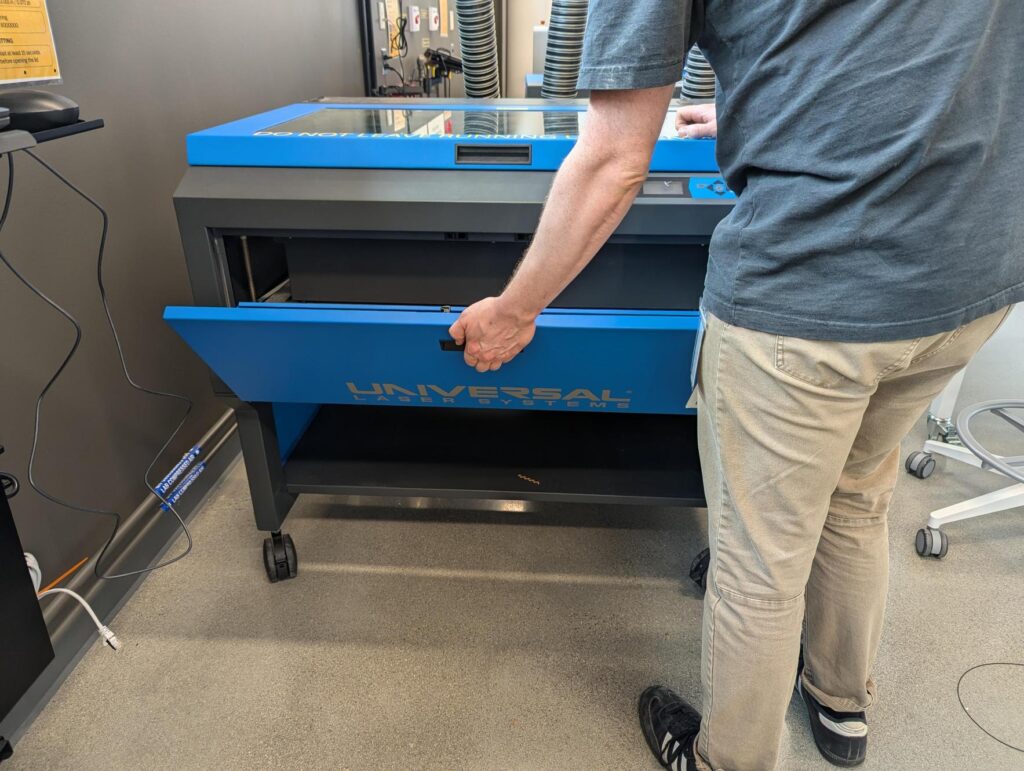
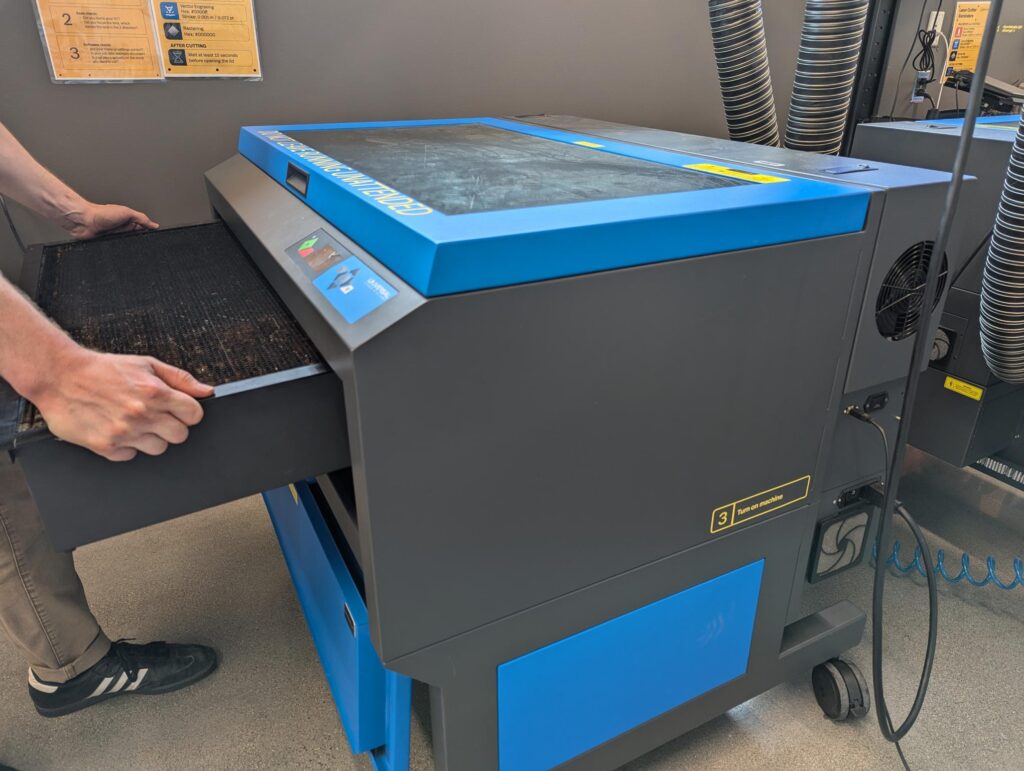
To use the rotary tool the laser bed must first be removed.
- Open the front of the laser cutter
- Slide out the honeycomb bed
- Place the honeycomb bed on the shelf below the laser cutter
- Slide the rotary tool into the laser cutter via the front door, being careful not to pinch the gray wire
- You may need to lower the Z-axis of the laser cutter to accomplish this
- The rotary tool is long, slide the front of it in first, and then the back

- Align the rotary tool with the back ruler of the laser cutter, setting the shoulder screws on each of the rotary tools into the block on the right-hand side of the laser bed

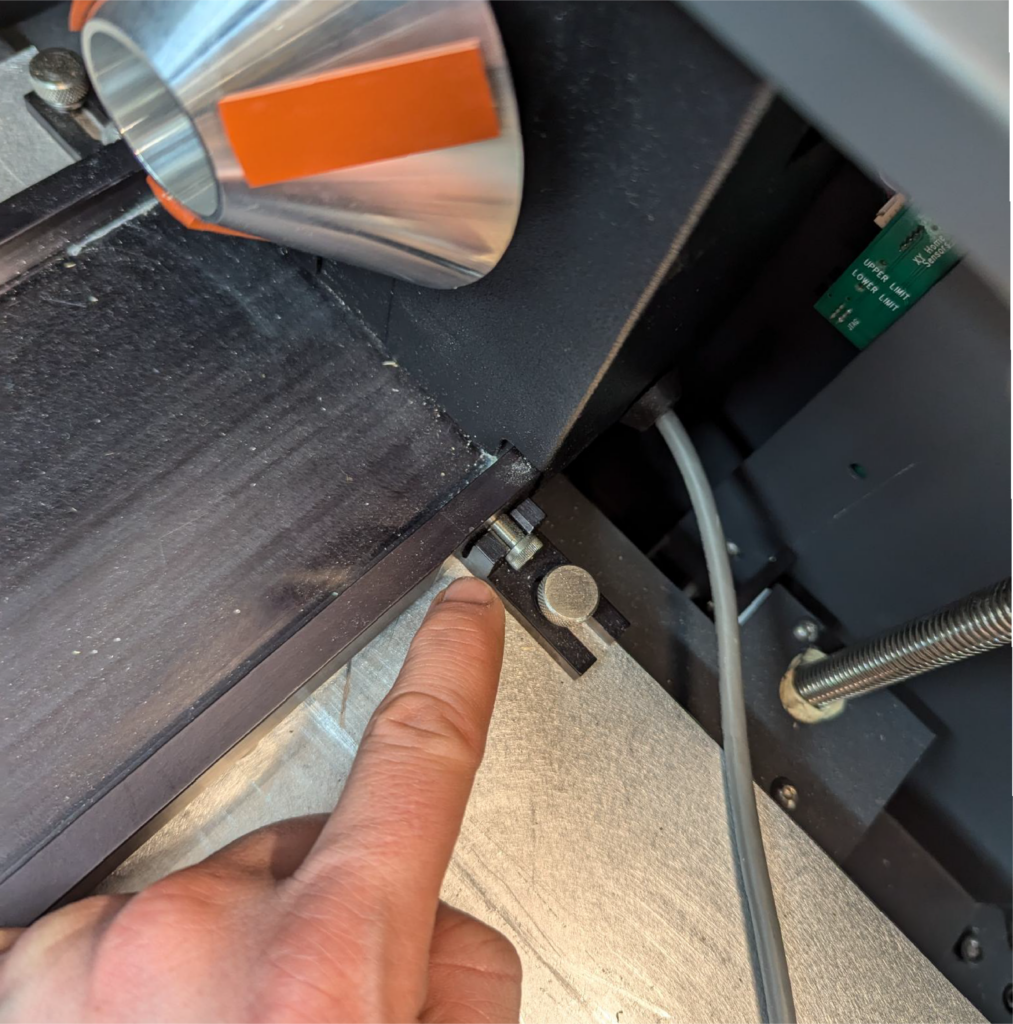
- Plug the gray DVI-style plug into the port located on the right side of the inner laser cutter frame
- Be sure to tighten the srews
- The rotary tool is now installed into the laser cutter.
Loading objects into the Rotary tool
- Lift the red lever on the left rotary head mount and slide the mount to the left until you have enough space to place your object between the two rotary heads
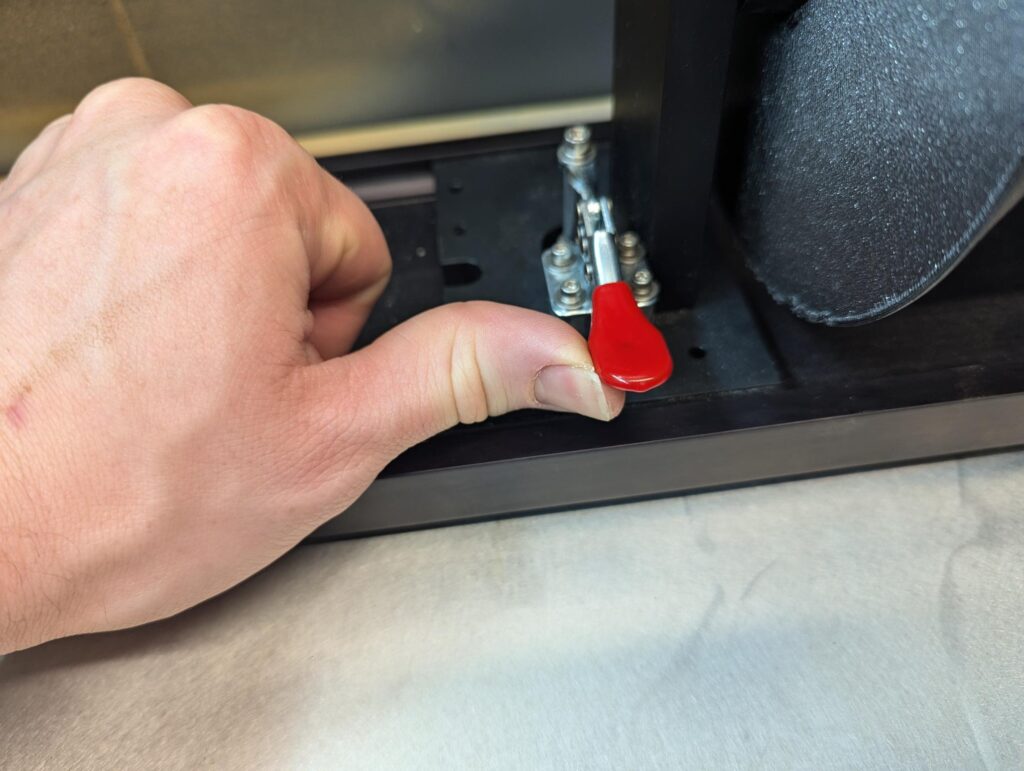

- Place your object between the two heads and then push the left rotary head to the right until the object is held in place by the two rotary heads
- Push the red lever on the left rotary head mount down to lock it into place
- Spin the left rotary head, ensuring that the object and right rotary head are spinning at an equal rate.
- If the heads or your object are out of sync you may need to push the left rotary head in slightly more.
- Focus the laser as you would normally.
- If you have made a custom rotary head ensure that there is enough clearance on the right head before raising the bed too far
Loading your File into UCP
Loading your file into UCP for use with the rotary cutter has different steps than loading in a normal file.
- Ensure that the rotary tool is plugged into the laser cutter
- Ensure that the laser cutter is on and that UCP is connected
- If UCP is not connected the large play button will be gray instead of green
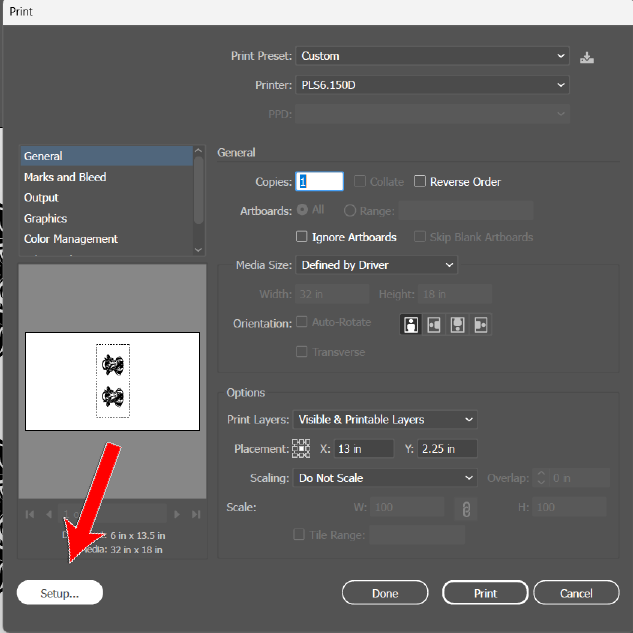
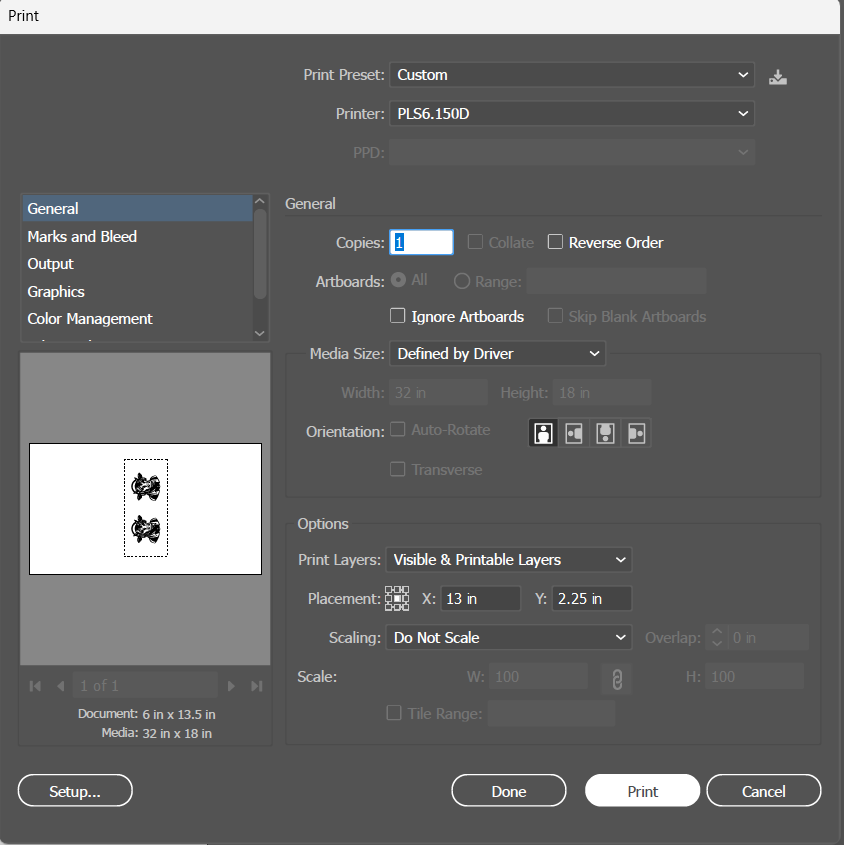
- Go to File → Print located on the top left of the Adobe Illustrator Window
- Ensure that your printer is set to “PLS6.15D”
- Click Setup in the lower left of the print window
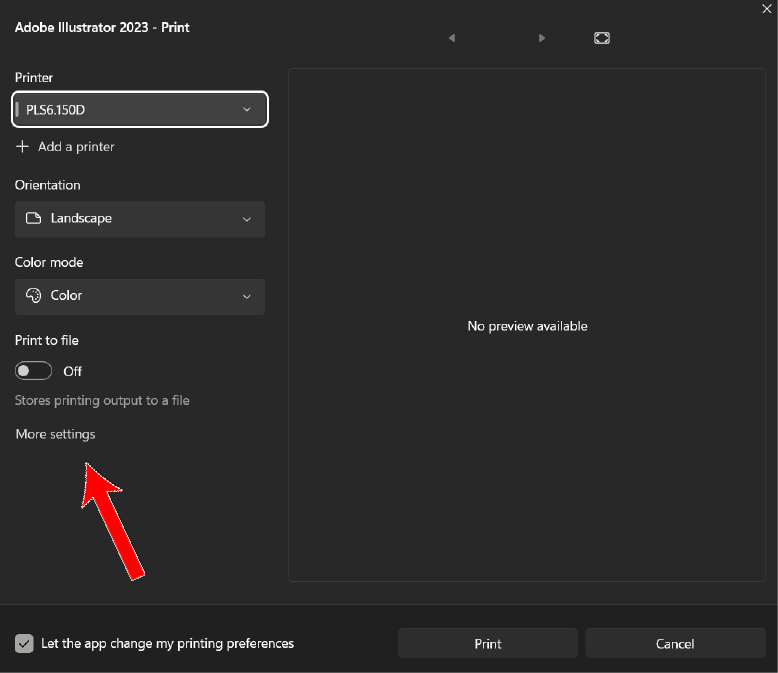
- On the new window click on “More Settings” This will open up the UCP Settings
- Select your Material and Material Thickness as normal
- Make any Intensity Adjustments as normal
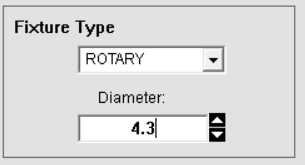
- Using the “Fixture Type” drop-down menu change your fixture type to “Rotary”

- In the same “Fixture Type” box set the diameter of your object
- You can measure the diameter of your object or divide the circumference measurement you have already taken by 𝝅 to find the diameter. (Diameter = Circumference / 𝝅)
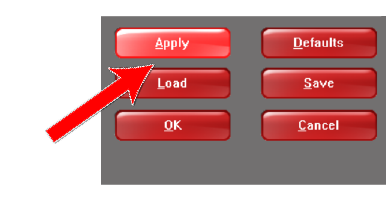
- Click on “Apply” in the lower right of the settings box
- Click on “Ok” in the lower right of the settings box
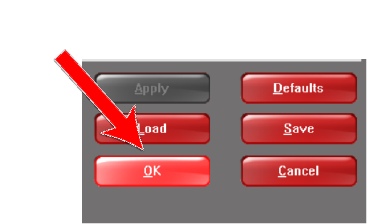
- Click on “Print” on the Black print box
- You may have to click on your screen just above the gray print box to get this black (or white if you are not using dark mode) print box to show up again

- Click on “Print” in the lower right of the grey print box
- Your design is now loaded into UCP.
- Open UCP as normal
- If you followed these steps correctly your design should only be able to be moved left and right (not up and down) and there should be a horizontal line across the center of UCP’s screen
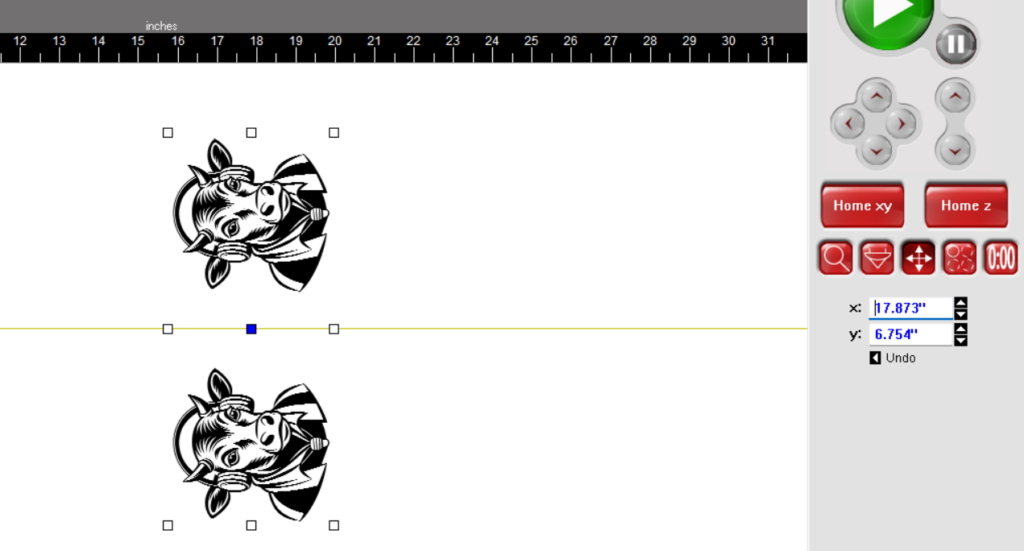
- Unlike normal laser cut designs that can placed anywhere on the print bed, rotary tool designs must start in the top right.
- Move your design so that it is over the object you wish to cut
- Leaving the top of the laser cutter open will activate a red pointer in the laser head
- You can use this red pointer to align your design, using the “To Pointer” button on the bottom right of UCP with the move tool selected. It will move the highlighted blue box to where you have the pointer (in this case the center box)
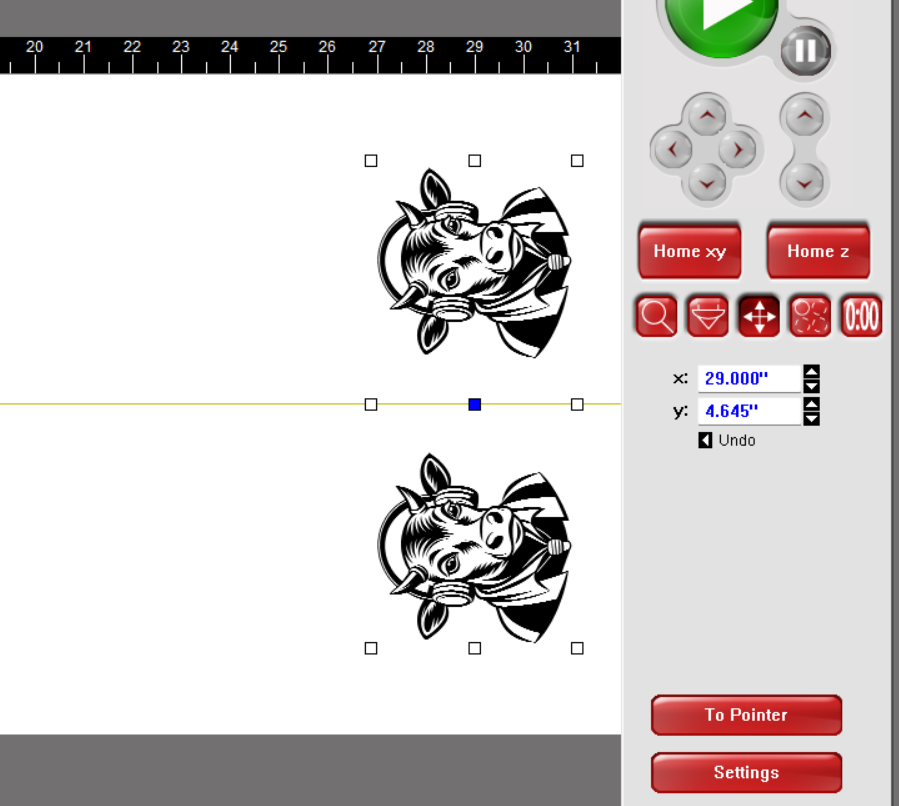
- TIP: The laser is aligned in the middle of your object. If you would like your design to be directly over a logo (such as the word YETI on a Yeti Tumbler) load your object with this in mind
- Once you are happy with how your design is aligned, close the lid and run the job as normal.
- Congrats! You did it