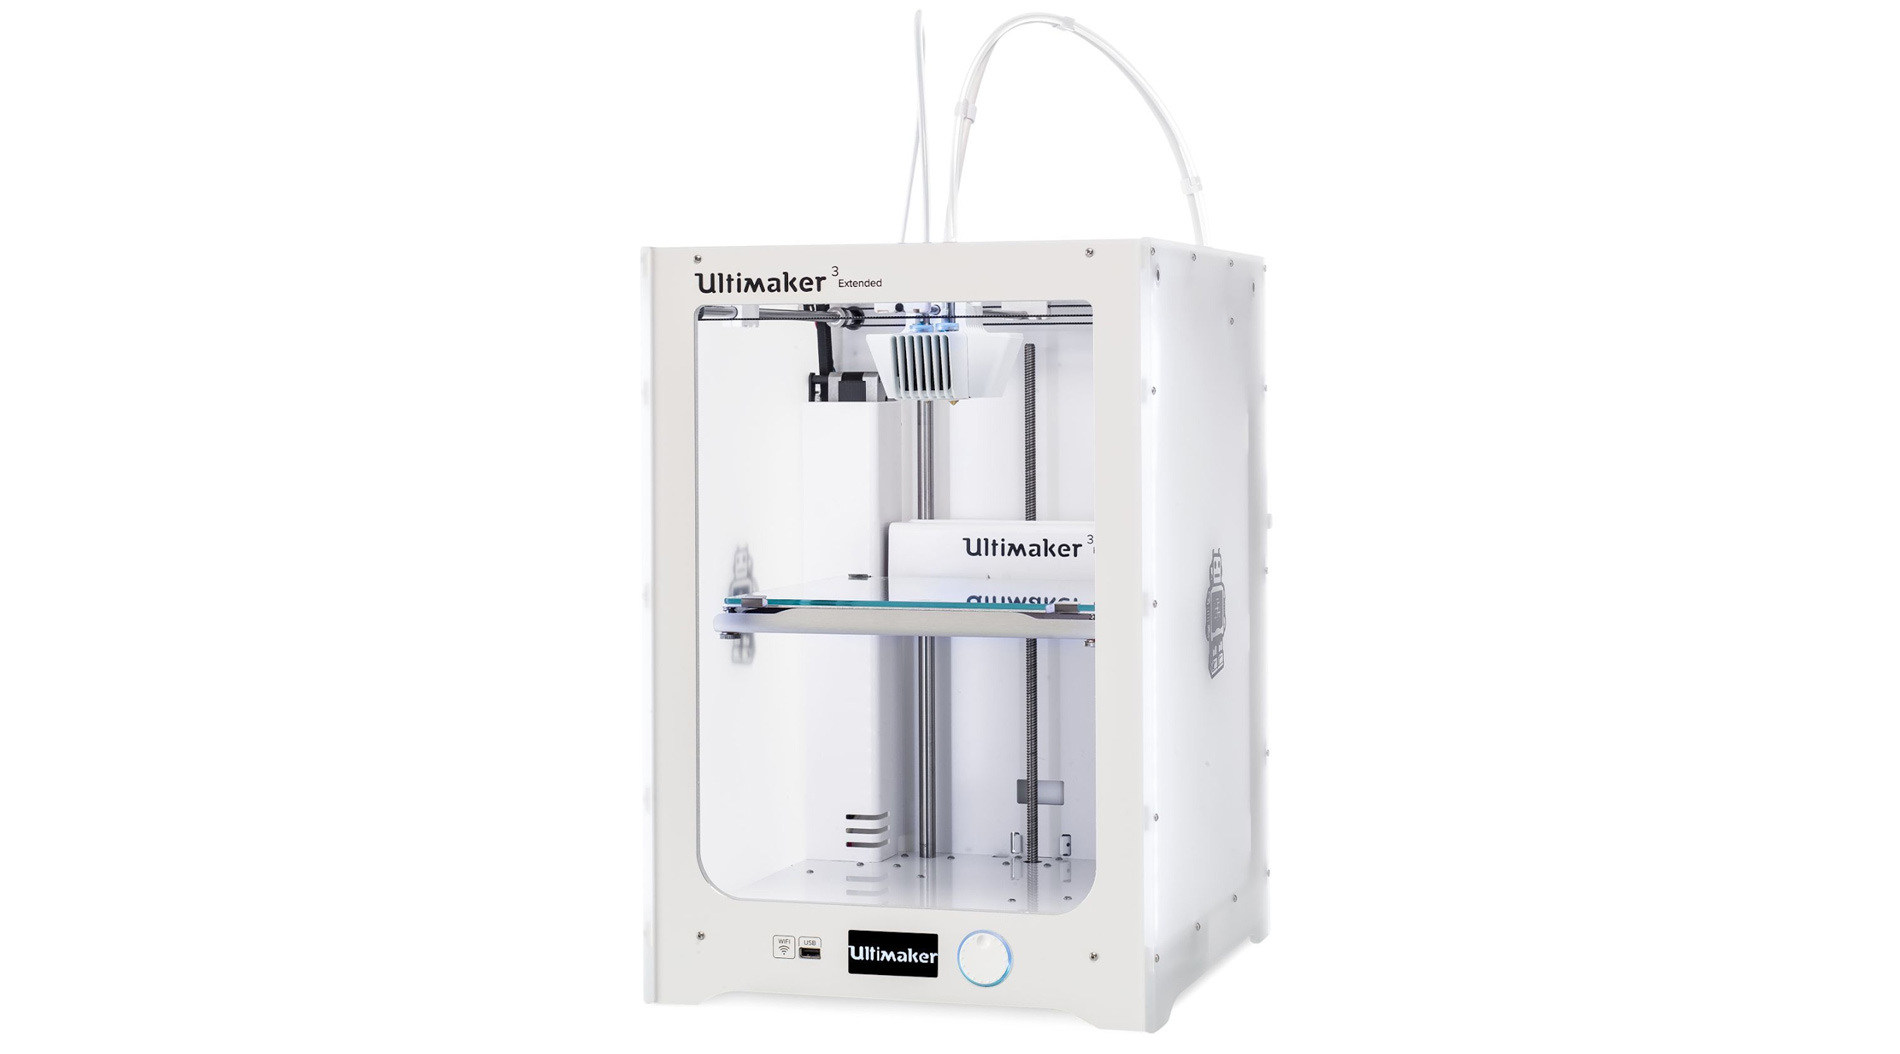
The Ultimaker 3 Extended is an FDM 3D Printer, which melts plastic and extrudes it in a pattern, building up a 3D shape layer by layer. The pattern is determined by a digital 3D model, which the software “slices” into layers.
Safety Considerations
For 3D Printing Room in general:
For the Ultimaker FDM specifically…
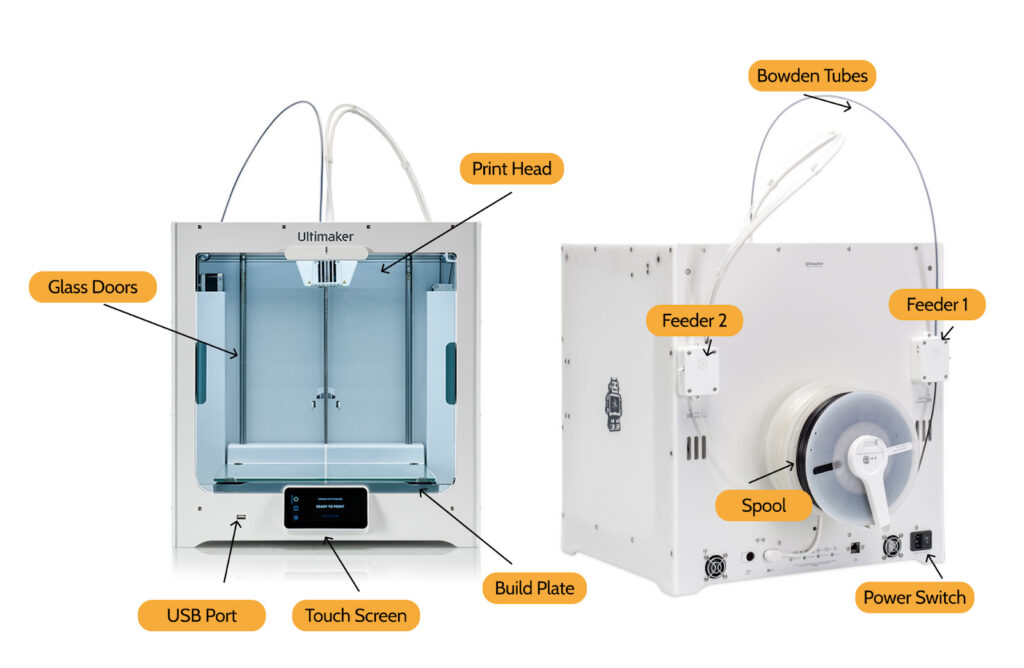
Printer Anatomy
The Ultimaker S3 and S5 are virtually identical, except the S5 has a larger build volume (230 x 192 x 200 mm vs 330 x 240 x 330 mm).
Software Download
Cura, the free slicing software used for Ultimaker, can be downloaded here. Workstations in the 3D print room will have this software installed, but you can also download it on your own laptop if you want to set up your print outside out EXPmaker.
Operating the Machine
Load your part into Cura
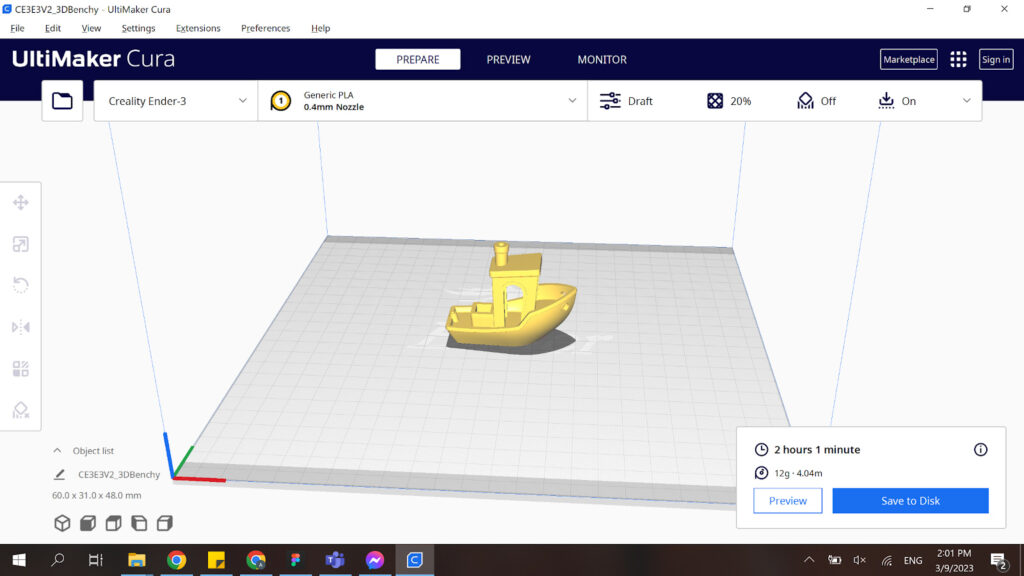
- Open Cura on the computer next to the printer or your computer. You should be looking at a window similar to this:

- If you are using your device, make sure your Cura is configured for the “Ultimaker 3 Extended” printer, using the button in the top right corner.
- Click the “Open File” icon in the top left corner. Select the STL file you want to print and open it.
- Your part will appear in the Cura workspace window. If it fits in the printer workspace, it will appear yellow. Otherwise, it will appear striped, and a striped piece is too big to be printed.
- A yellow piece with red patches on the underside is okay: those patches indicate where supports will be placed. Supports are tiny scaffolding designed to support a piece, so it doesn’t collapse during printing but can still break off easily from the finished piece.
- Click the yellow model to bring up the placement menu on the left side. Use the top four buttons to adjust your piece:
- Move will let you reposition your piece. Try to put it in the middle of the print bed.
- Scale will change the size of your piece. If you are making a functional rather than a decorative piece, be careful: this will also resize things like bolt holes.
- Rotate will change your piece’s angle, which is the most important placement setting to get right. Rotate your piece, so it sits securely, and won’t need too many or too tall supports.
- Mirror will reflect your piece around some axis, so you can create two images that reverse each other.
- The other two options, “Per Model Settings” and “Support Blocker,” should be left alone.
Select print settings
- Material: Select the material you’re using: either PLA or ABS. PLA is less finicky of a material to print with and recommended if you’re new to printing or printing things for fun. ABS is a more “industrial” material, so it’s recommended if you’re printing parts for a larger project.
- Click “Custom” to see more options. The recommended options are usually good but not that versatile.
- Quality -> Layer height is how thick the slices are. Smaller layers will mean the print is of higher quality, but it will also take longer since there will be more layers. A good layer height is 0.25 mm – if you want to print thinner than that, ask an Explorer if that’s okay.
- Walls are the outside of the piece. Printed parts are semi-hollow, but the shell is solid up to a small depth. A suitable wall thickness is 0.6 mm, strong and thick enough for scratches. If you are printing something that needs to support a lot of weight, you can turn the wall thickness up to 1 mm.
- Infill is the inside of a 3D-printed part. Typically, it’s filled with a honeycomb pattern, but this can be changed depending on application, as some patterns provide strength in different directions. You can change infill density as well, and 20% infill is a good number. Even as low as 10%, a piece will still be strong. 30% is very high and should only be used on pieces that need to support a lot of force. Higher infills will extend the print time and use more filament, so don’t make it higher than you have to.
- The settings under Material should be automatically set. Make sure they match the guide on the wall but don’t change them.
- Everything under Speed is set automatically as a property of the machine. Leave all of the speeds as-is. Make sure Cooling is enabled.
- Supports are printed scaffolding that supports any overhanging or curved parts of your piece to prevent it from collapsing. Supports are made to break away easily, so you can remove them after you print. Check the box to make Cura automatically generate supports if you want them.
- Best practices for supports: While supports do break off easily, you shouldn’t have supports on important features of your project (parts requiring highly precise dimensions, the most aesthetically critical parts of your print, etc). This is because the supports will slightly warp whatever they’re attached to and could also chip your part when you remove them. While of course you can sand away imperfections, that might mess up any important features.
- Build Plate Adhesion determines what prints where your piece sits on the build plate. There are four options: None, Skirt, Brim, and Raft. We recommend a brim for all PLA parts and most ABS parts or a raft for ABS parts that seem more likely to warp.
- None means the printer will start with your piece without making a base, which is risky, as prints are more reliable with a base.
- A Skirt is a thin line of filament that outlines your piece but doesn’t touch it. This is almost the same as None, but it gives the extruder a chance to warm up first, making it slightly less likely to jam.
- A Brim is a thin sheet printed beneath your part. A brim helps your piece adhere to the build plate, holds the bottom flat during the early stages of the print when the piece is thin, and gives the piece protection against scratches when you remove the piece from the printer. Brims are usually the best option.
- A Raft is a much thicker version of a brim, and it serves the same benefits but is much better at preventing warping. It has the downside of increasing the print time and using extra filament, so it should only be used when warping is a concern.
- Once your settings are ready, click “slice” in the bottom right corner. This will generate a “gcode” of your part – instructions for the printer. It will also tell you how long your print will take, how many grams of material it will use, and how many meters of filament it will use up.
- If Cura’s time estimate is longer than 8 hours, check in with an Explorer. Long prints can be run overnight, so we may ask you to wait so shorter prints can happen during the day.
Physical Checkup on Printer
- Choose one of the Ultimaker printers and do a checkup. There are three things you want to check for:
- Check if the bed is clean. If any old prints are left there, remove them and put them on the shelf. If scrap bits of filament are on the bed, gently wipe them off with your hand or a paper towel.
- Troubleshooting: Sometimes, 3D printer print beds don’t heat up well or have built up residues from old prints, which means that prints won’t adhere well. If this happens to you even though you’re using a brim, you can use a thin layer of Elmers glue stick on the print bed. Please note that you are responsible for cleaning off any leftover glue with a damp paper towel after you collect your print.
- Make sure the nozzle is clean. If plastic is solidified on it, gently pluck it off by pulling it downwards. Be careful not to push any material back into the nozzle.
- Last, check the roll of filament on the back. Make sure it is the correct type of material (it should match what you selected in Cura), make sure the color is one you are okay with, and make sure there is enough filament left on the role. Cura tells you how much length is required, so you won’t start a print that will run out before it finishes.
- Check if the bed is clean. If any old prints are left there, remove them and put them on the shelf. If scrap bits of filament are on the bed, gently wipe them off with your hand or a paper towel.
Load part into Ultimaker itself
- Once the file is set up in Cura and the printer is ready, you can start the print.
- Since you’ve already sliced the part, you will see a button that says “Save to Disk.” With a USB drive in the computer, click this to save your gcode to the drive. Safely eject the drive and plug it into the Ultimaker.
- You can also send a part directly to the printers from the 3D print room computers if you’re slicing your part on one of those computers!
- Using the dial on the Ultimaker, select “Print.” Then scroll through to find your piece and select it. Your part will start to print automatically.
While your part is printing
- Part of the beauty of 3D printing is that after setup, the machines are completely automated. You don’t need to stick around for the whole process, but you need to watch the first few minutes.
- The printer will heat the bed and the nozzle, which will take a minute or so. Then it will move to the front left corner and extrude a small blob of filament. This is to ensure the machine extrudes properly – if you don’t see a blob, pause the print and ask an Explorer to help you fix the filament.
- The vast majority of 3D printing failures happen during the first few layers. Watch the printer make the brim or raft, and let it print enough to be sure it’s working. If something goes wrong, stop the print and ask an Explorer to help you fix it.
Now that your part is done:
- Make sure you know how long your print will take and when it will be done. Try to come back and get it soon after it is ready. This saves the next person the trouble of removing your part from the bed and avoids the risk that someone will mishandle it.
- Use common sense here. If a part is going to be done at 3 am, you don’t have to get it then – sometime the next day is fine.
- When you retrieve your part, remove it from the bed using one of the scrapers hanging on the wall. It’s better to use the scraper like a chisel, removing the piece with several tiny pushes rather than hacking it off all at once. More forceful pushes can scratch and damage the bed.
Troubleshooting
Material is stuck in the 3d printer head/extruder
- Feed material out through the back of the feeder
- Recommended opening a window
- Remove Bowden Tubes (note, there is a small white moon-shaped piece of plastic connecting the tubes and printer head, remove that first)
- Take the material and put it directly on the top of the print head, and mark with a marker where the first exposed material is when you insert it. This will make it easy to see how much the material has moved.
- Turn the print core heat up above the melting point of the material inside that is stuck (if you are not sure, try 200)
- Gently push the material through the print head. The printhead should flex only slightly.
- Gradually, the material will go through the print cores. It can take up to two hours of gently pushing the material through the print cores for the print material to be through the machine.
- As material builds up on the end of the print core, dab the material away with a paper towel (but remember it is hot)
- Clip off the material that is covered in the material that is stuck in the machine
Repeat steps 1-9 until the material is stuck and completely removed