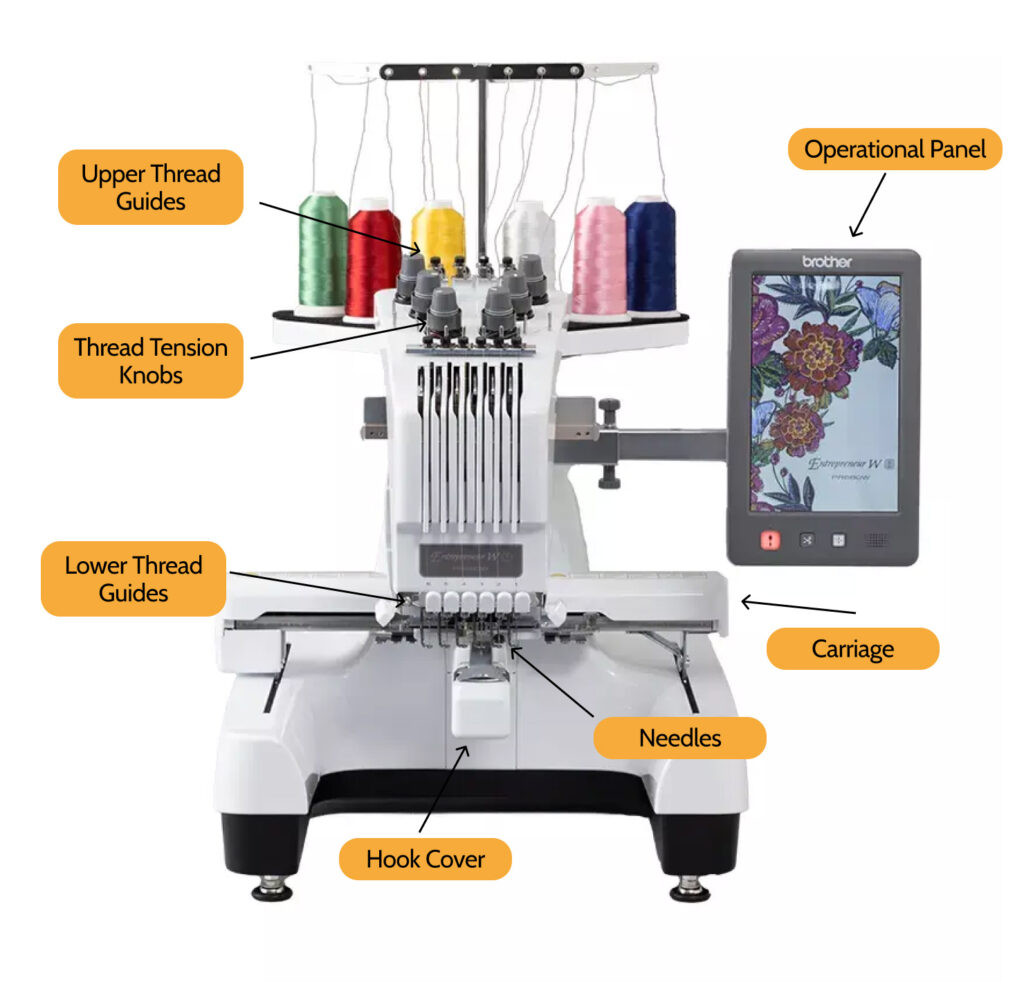
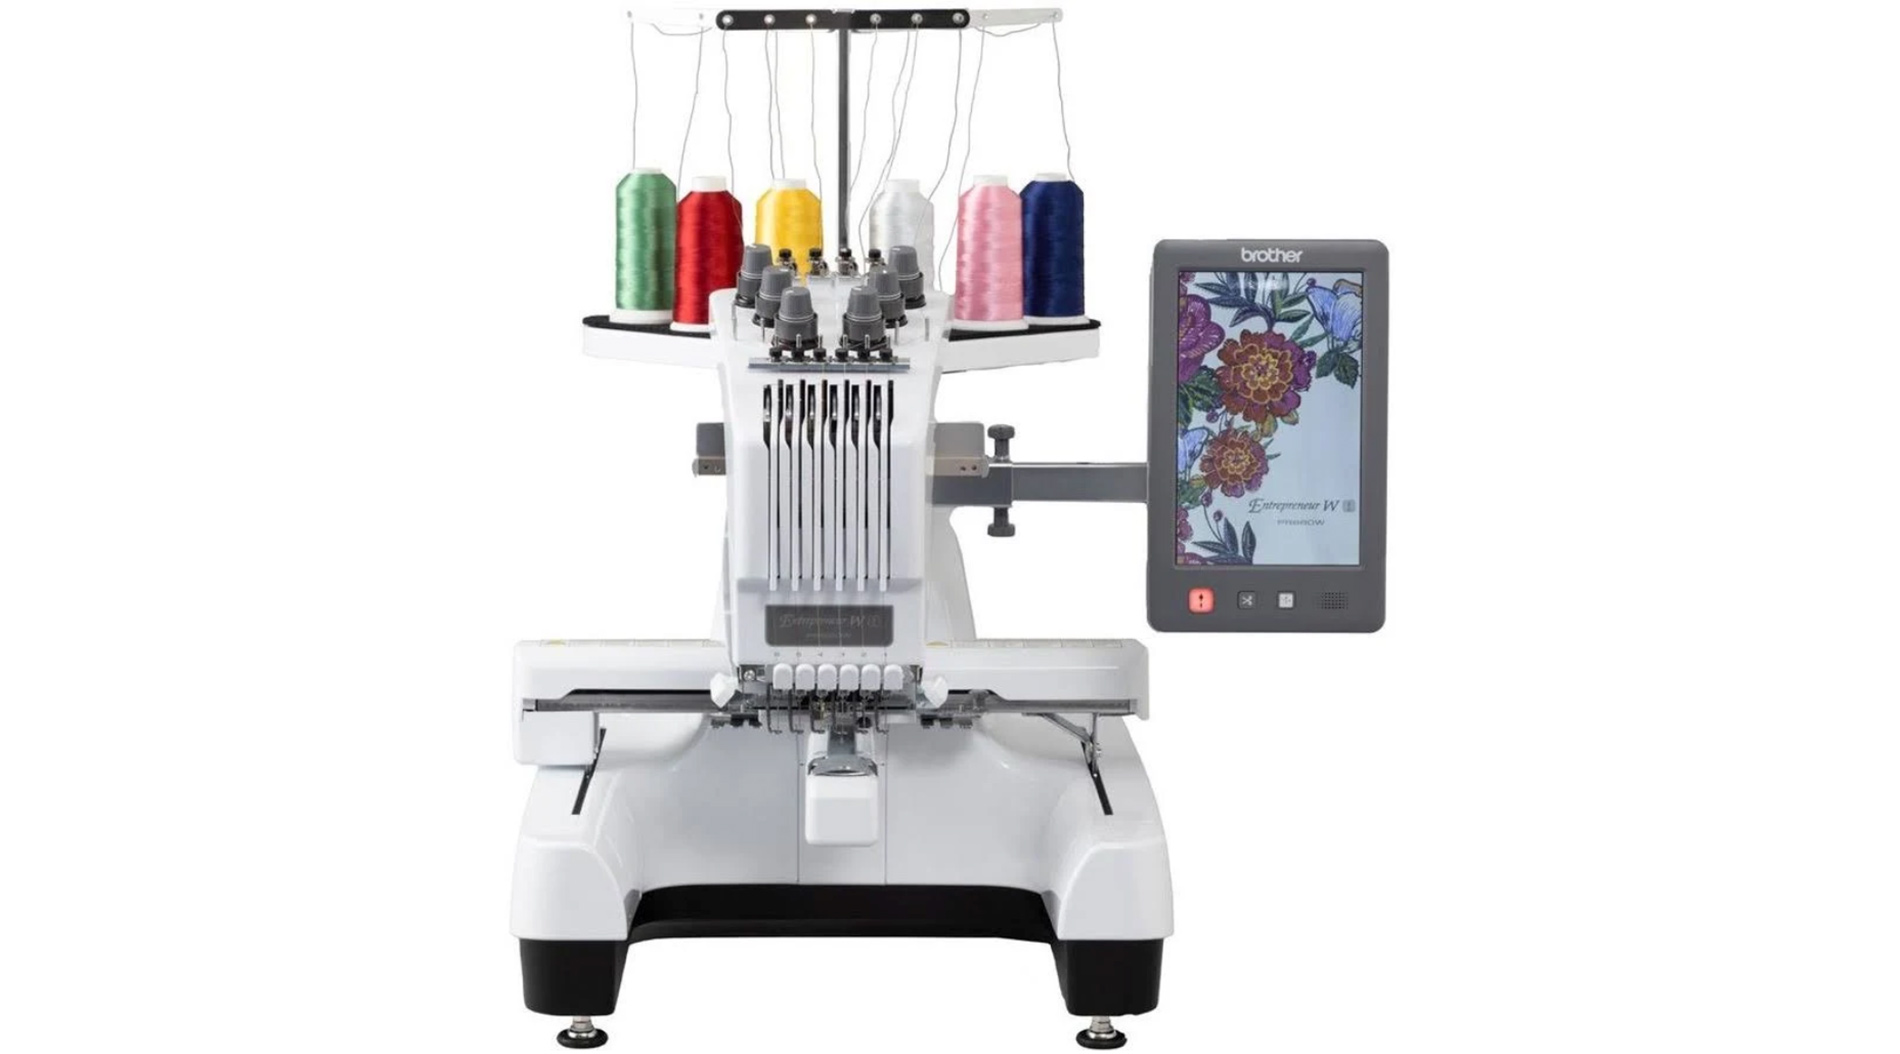
The Brother PR680W Embroidery machine is a specialty sewing machine used to create patterns, images, and words on fabric. The tool uses layers of decorative threads to create designs. Patterns for machine embroidery are designed on the computer and uploaded to the embroidery machine. This machine cannot replace the functions of a regular sewing machine.
Safety Considerations
Parts of the Embroidery Machine

Operating the Machine
Creating your embroidery file in Hatch
- Launching Hatch
- On the desktop, open “Hatch Embroidery Digitizer.”
- When Hatch launches, you will see the Design Library, which contains many pre-designed patterns. To make your pattern, click “New” in the top left corner.
- Built-In Tools
- The software has many built-in patterns and text tools you can customize with existing designs.
- Making a Pattern from a Picture
- The left side of the screen has your Toolboxes, which are various tools you can use to design patterns. If you have an image you want to embroider, select “Artwork” > “Insert Artwork.”
- This will open a file explorer. Navigate to the image you want and open it. It will appear in the Hatch workspace. You can load multiple photos this way or the same image more than once.
- If you load multiple copies of the same image, they will be stacked so you can only see one. Drag it so you can access both.
- Select the image in the workspace and resize it to your desired dimensions. It is essential to do this now instead of after generating the pattern because it may change the path the computer generates to embroider the pattern.
- Select your image in the workspace and click “Auto-digitize Embroidery” to generate an embroidery pattern.
- In the window, you will see side-by-side of the original image and the same image rendered in fewer colors. Each color is one type of thread that the machine will use, and you can reduce the number of colors to use fewer threads and clean up the pattern.
- When you have adjusted the color count, click okay. Another window will open where you can specify what each color will do. From the dropdown menu, select “fill” to do the whole area, “details” to do more refined pieces, or “omit” to ignore that color. Omit is usually for the white background of an image.
- An embroidery pattern of your image will be generated.
- By selecting individual design sections, you can adjust the type of stitch used for that section. Typically, a tatami stitch is best for large flat sections, and a satin stitch is used for outlines, lettering, or small details.
- Suppose you change the colors of specific sections or make multiple copies of a multi-color design in one pattern. In that case, you will want to minimize the number of times you have to change the thread by hitting Edit> “Optimize Color Changes…”
- Saving your pattern
- At the top, there is a “Player” button that you can use to see the path the machine will take to embroider your design. Once you have confirmed that your pattern is as you would like, you should save it.
- First, save the embroidery edit file as an. EMB file type, through File> “Save Design As.”
- Next, export your design through File> “Export Design” as a .PES file type and save it to a USB so it can be used on the embroidery machine.
Preparing your fabric to embroider
- Interfacing
- Interfacing is a material that helps keep your fabric stiff enough for the embroidery machine to work with. If you don’t use interfacing, the fabric will bunch up around your design and turn out uneven.
- Select a piece of interfacing that is at least as big as your design. Tear-away interfacing feels papery and is used for most jobs. There is also thinner interfacing that is not removable that can be used for projects where you are sewing a lining over the back of your design.
- Note: Iron-On Backing is not interfacing and should be added at the end of a project, not now.
- Lay out your interfacing on the ironing board, lay your fabric on top of it, and iron them together to flatten them out and keep them smooth.
- The hoop
- Take a hoop that can contain your design but doesn’t go much more significant than you need to (so you don’t waste fabric).
- The hoop has two parts: the outer hoop and the inner hoop. The outer hoop has a slider on the side and a knob on one end. The inner loop is just a plastic frame.
- Loosen the knob to open the outer hoop, place it on the table, and lay your interfacing then fabric on top of it. Place the inner hoop on top, with the small arrows on the rims facing each other, and press it down. The fabric will crumple where the hoops meet, but the area in the middle will be flat.
- Tighten the knob to close the hoop, locking the two together. You should now be able to pick the hoop up and have your fabric stay secured.
Setting up the machine
- Turn on the machine and tap the screen to bring it to the home screen
- A message will alert you that the machine carriage will reset.
- Move all pieces away from the body of the machine and press “OK.” The carriage will move to its starting position.
- Insert your USB if you are using your design.
- Press “Embroidery Edit,” and you should arrive at a menu showing the different pattern sources.
- Press your pattern source and select your pattern from the menu.
- You should be taken to the design set up a page, and your chosen pattern will be in the center of the grid representing the embroidery frame.
- Reposition and resize your design as desired using the adjustments on the bottom half of the screen.
- To add an additional pattern or text to the same design, press “Add,” which will bring you back to the same source menu, where you can select additional elements for your design.
- Once satisfied with the design, press “Embroider,” which prepares the machine to embroider your design.
Changing the bobbin
- The bobbin is inserted into the machine very similarly to how it works in a normal sewing machine.
- The bobbin is housed in the small rectangle at the bottom of the machine. Open the bobbin cover and pull down the lever in front of the bobbin.
- Remove the bobbin and its casing by pulling on the tab in front of the housing,.
- Put a wound bobbin into the casing so the string goes clockwise. Pull the string through the bobbin casing’s slot, so that when you pull the string, the bobbin will spin in the opposite direction.
- Install the bobbin case by sliding it in until it clicks, replacing the lever, and closing the bobbin cover.
Positioning the hoop
- Open the carriage lock by lifting the lever.
- Slide the hoop into the carriage following the arrow on the hoop, going under the presser foot and needle
- Close the carriage lock. The hoop should be secure in the carriage.
Threading the top of the machine
- Embroidery thread is different from standard sewing thread. Please only use this thread for machine embroidery.
- Open the top of the machine to expose the thread holder and guides.
- Place your thread on the thread holder.
- Make sure your needle is up by pressing the “needle up/down” button
- Bring the thread along the numbered guides to bring your thread down to where the needle is. Make sure to wrap the threads clockwise around the thread holders (the grey cylinders), then down and up the thread guides above the needles.
- Hit the “auto-thread” button.
- Check to make sure your thread went through the needle.
Embroidering
- Now that your file is set up and the machine is ready, we can start embroidering!
- Hit the “Presser Foot Down” button. The “Start/Stop” button should turn green once the machine is ready to sew.
- Hit “Start/Stop”
- The machine should sew one color of your design all the way through.
- The machine will beep and tell you when that color is complete. The “Start/Stop” button should turn red. You can then remove the top thread and set up the next color, following the top thread setup steps above.
Post-processing your piece
- Once your design is complete, the machine will sing a little song and message that it is done.
- Remove the hoop from the machine by opening the carriage lock and sliding it out.
- Open the hoop and remove your fabric.
- If you used to tear away interfacing, you could rip it out now.
- Be careful not to tear your design, especially if it has multiple parts.
- Please save any usable interfacing scraps!
- Iron your project flat.
- Iron-on Patches
- We have iron-on backing that can turn your embroidery into a patch that can be ironed onto any other fabric or clothing.
- Cut out your design, leaving some space around the edges
- Cut a piece of iron-on backing to the same size
- Lay your design on top of the backing with the shiny side touching the back of your design
- With the iron on Medium, gently press the two together for 2 seconds. Do not slide the iron.
- Once the backing feels attached to your design, cut it out as close as possible to the edge of the design.
- To attach the patch to another piece of fabric:
- Remove the paper backing for your patch
- Place your patch where you want it
- With the iron on Medium, gently press the two together for 6-10 seconds. Do not slide the iron.
- Check if the path seems attached, and continue pressing if necessary.
Troubleshooting the Embroidery Machine
Something is wrong; what do I do?
- Ask an Explorer!
- If something doesn’t seem right, tell an Explorer. Even if you can fix the problem independently, we’d like to know what it is.
- Check the bobbin.
- The machine uses pre-filled bobbins. You don’t have to change them often, but they run out. The machine will tell you if the bobbin thread is empty.
- If the bobbin is empty, load it in one of our many pre-filled embroidery bobbins and put the empty spool in the bobbin box so we can refill it.
- Check the threading.
- The embroidery machine’s auto-threading is reliable, but the thread could come off the needle.
- If it has, just pull it out and re-thread the machine.
- Check your files.
- If your design is embroidering the entire design twice, ensure only one copy is in the Hatch file.
- If the machine says the frame is too small for your design, make sure the file is saved with the correct dimensions
