This is a user guide and does not grant a credential. While there are examples and steps shown it is NOT necessary to complete each step of this user guide before gaining access to Hatch, though you MUST have completed the DIY training for the embroidery machine.
Text in blue boxes are steps you can actively take to practice these skills.
What is Hatch?
Hatch is a computer program that is capable of making “paths” for our embroidery machine; this is called digitizing. It can make a best guess at digitizing artwork, via auto-digitization, or allow the user to manually digitize. This guide will cover the auto-digitization capabilities of Hatch.
Accessing Hatch and Setting up a New Document
Hatch is available for use in the Makerspace on the computer located next to the embroidery machine.
- Log in to the computer as “Guest“
- Open Hatch 3 via the shortcut on the desktop
- If prompted to sign in, please find an explorer to enter the username and password for you
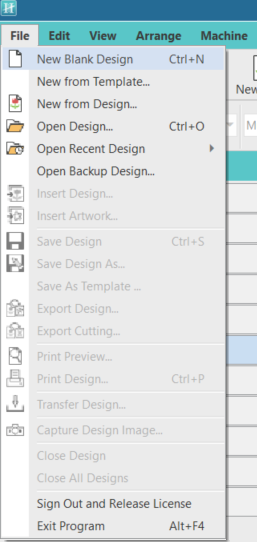
- To start a new design use the File → New Blank Design option shown below.
- Before importing any art, consider the size of your design, and select an appropriate size hoop. This guide uses the Brother, Multi Needle, 180(W) x 130(H)mm option. Selecting the hoop gives you a reference point for resizing or rotating your design. On EXP’s embroidery machine, all hoops will begin with the Brother Multi-needle option
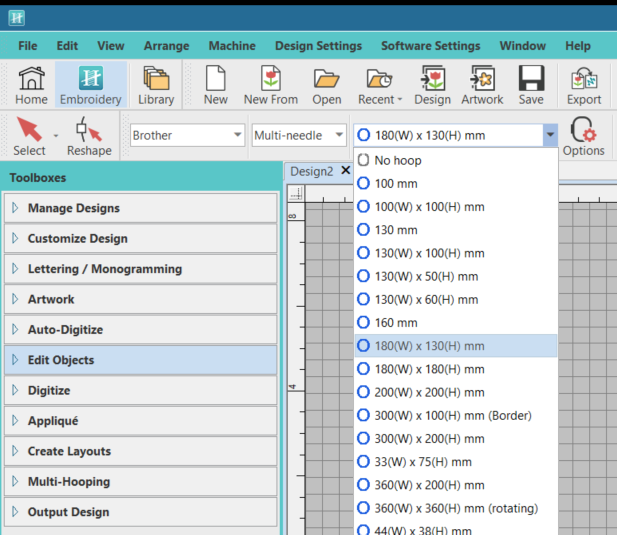

- If the hoop outline does not show up in red, then select the “Hoop” button located on the top toolbar
Part One: Line Drawing to Embroidery
Part one of this guide creates a simple embroidery from Pamela Colman Smith’s “Page of Cups” in black and white using Hatch’s auto digitization.
Importing File into Hatch
- Download the above file named Page-of-Cups-PNG
- In Hatch go to File → Insert Artwork
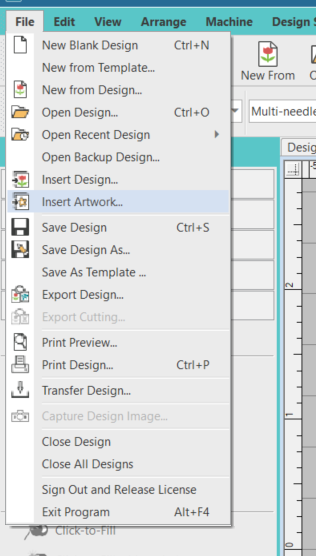

- Locate and select the Page of Cup PNG File. This can be done by double clicking the file.
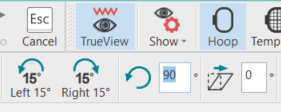
- Change the height of this file to 6 inches by changing the highlighted box shown below and hitting the enter key
- Rotate the image by 90 degrees by changing the highlighted box shown below and hitting the enter key
Using the Auto digitizer
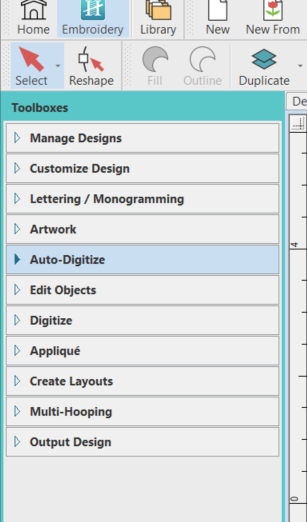
- Open the Auto-Digitize tool under the tool boxes panel on the left of the screen
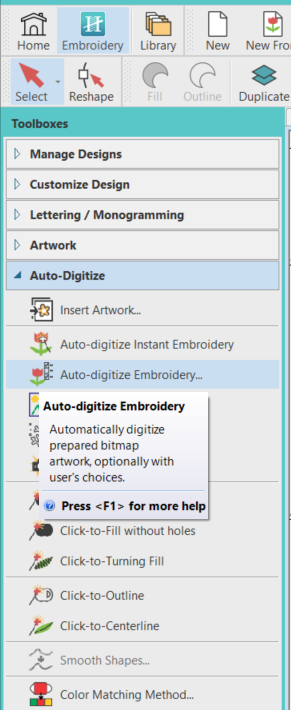
- Select the “Auto-digitize Embroidery…” option; DO NOT use the “Auto-Digitize Instant Embroidery” Option. It is unlikely to give good results and likely to crash Hatch.
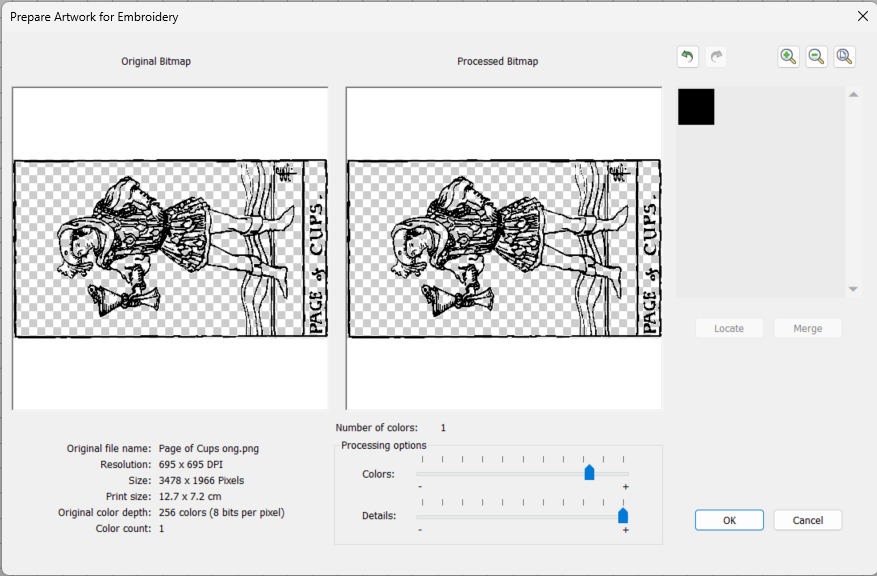
- The “Prepare Artwork for Embroidery” menu will open. On this screen you will need to think about the level of detail in your pattern. It is important to remember that these details will be sending a needle into fabric, and as such small details may be impossible to stitch (and be given a stich count of 0 by Hatch) and lines that are very close together may cause odd bunching in your pattern. To get a sense of this, turn the details slider all the way to the right.
- Click “OK” in the lower right
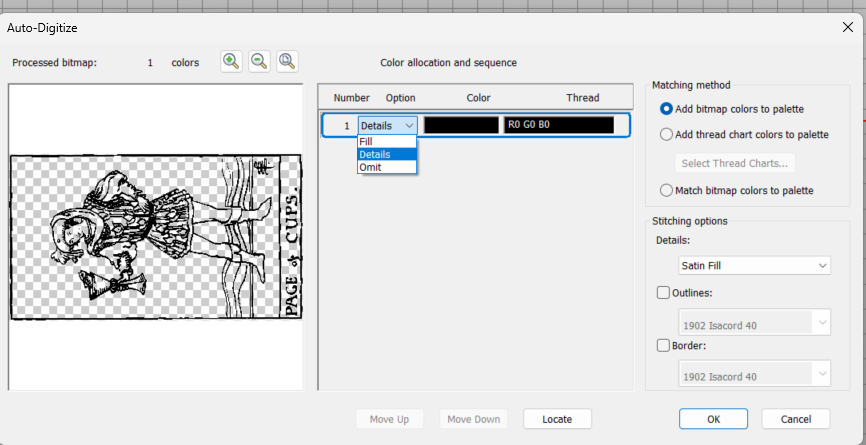
- On the next screen, you will have some options for each available color.
- Because we are working with a detailed line drawing we want to select the option “Details” in the drop-down menu shown below.
- Additionally, we do not want to use the “Satin Fill” stitching option on the right side of the screen as our main image is too detailed to allow that type of stitch to fit
- Change the details drop-down to “Centerline” as shown below, this will create a straight stitch along the center of the lines
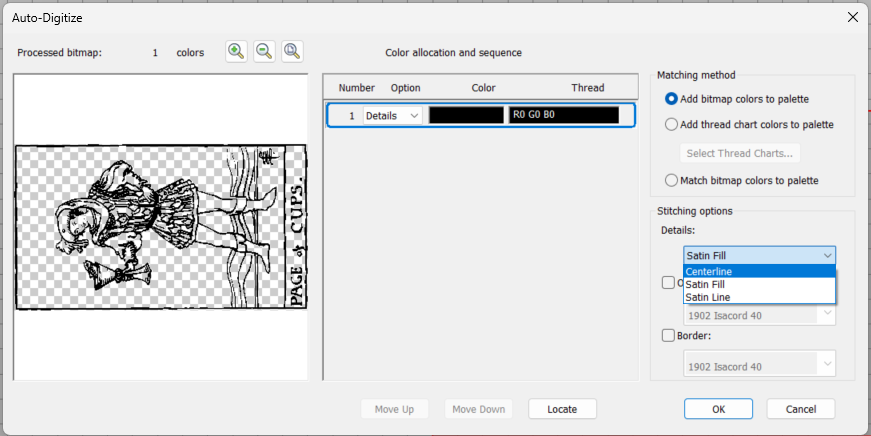
- With these two settings changed, click “OK” in the lower right.
- Hatch will now generate an embroidery pattern for your design, it is important to note that you should not accept this pattern as is.This guide only shows minor adjustments, but it will be beneficial to make more significant adjustments in future projects
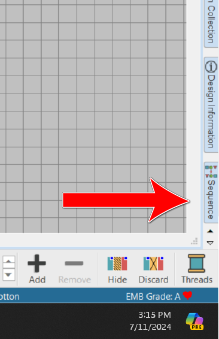
- Open the sequence tab in the lower right-hand of the screen.
- If it is not already selected, click the Show More (Two arrows pointing to the left) on top of this panel
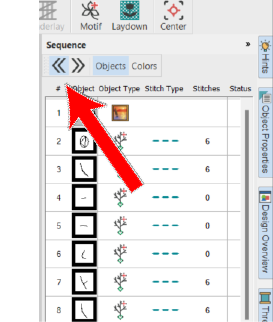
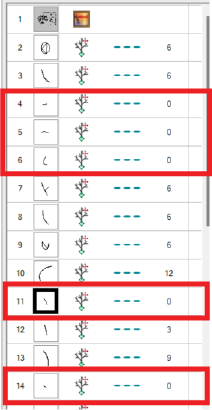
- Clicking the object image in the sequence tab will highlight the stitch on the main screen.
- On the right of this panel, you will see the stitch count for each object Hatch has made. Find and delete all objects with a stitch count of zero, these objects are too small will not be made
- Consider the order in which the objects are stitched. You want to avoid large, back-and-forth movements over the design for the sake of efficiency. Additionally, if you use jump stitches instead of trims for your pattern these large movements between objects are more likely to tangle.
- Change the order of objects so that you are working from left to right (shown) or right to left, and then make the largest object last. You can do this by dragging objects in the sequence screen to the desired position
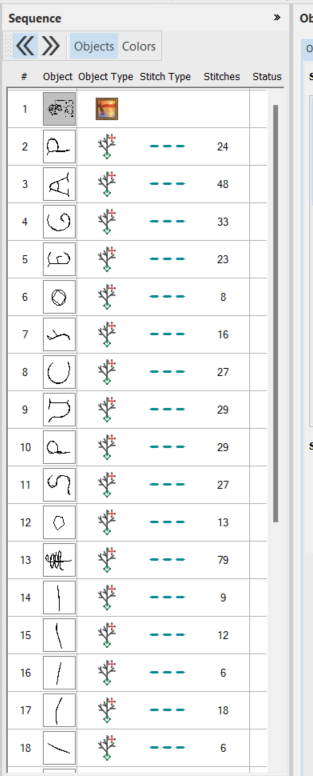
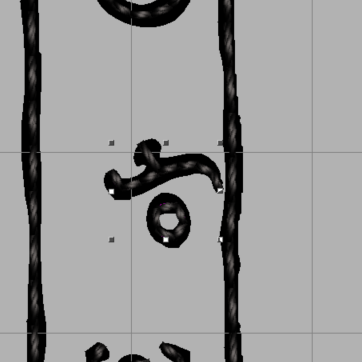
- While this is now a more efficient design there are still some minor tweaks you can make to improve it.
- First, click on the “o” in the “of” text on the right of the image. Then, while holding shift, click on the “f”. This will select both objects
- Move these two objects slightly to the left to get them farther away from the border stitch by dragging them to the left
- Increase the size slightly by dragging a corner of the box diagonally
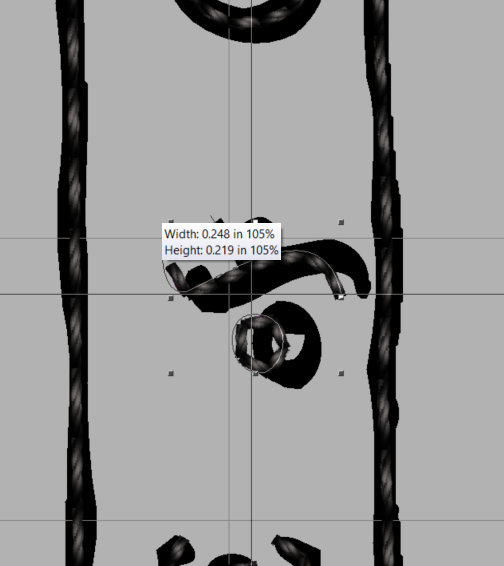
- The Period at the end of “Prince of Cups.” is not rounded, and will look better if it is.
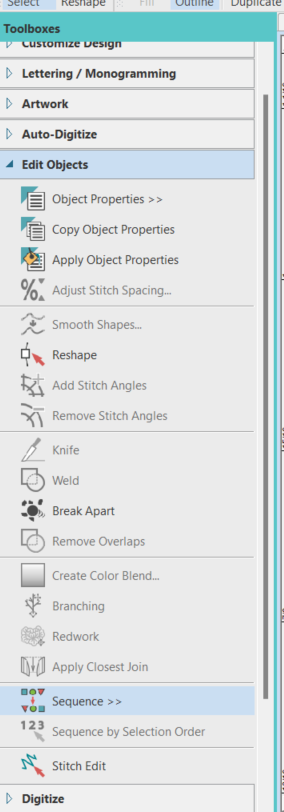
- In the “Toolboxes” window on the left of the screen, Open the “Edit Objects” tab
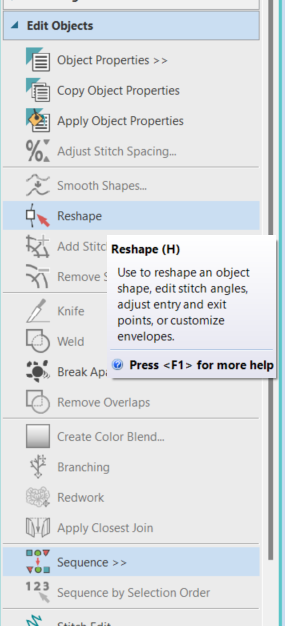
- Click the “Reshape” option

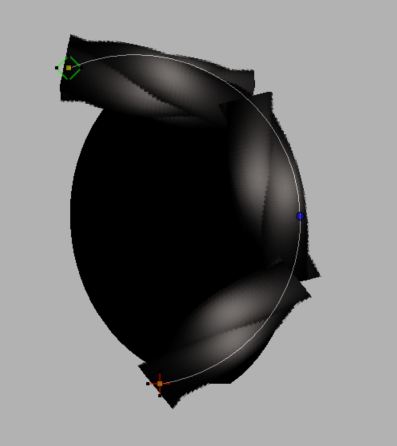
- Double-clicking in the middle of the stitch will create a new node. Do so then drag the new node point to the bottom of the black circle (that black circle is the original artwork underneath the stitches)
- Press the spacebar to switch from a straight line to a curved line.
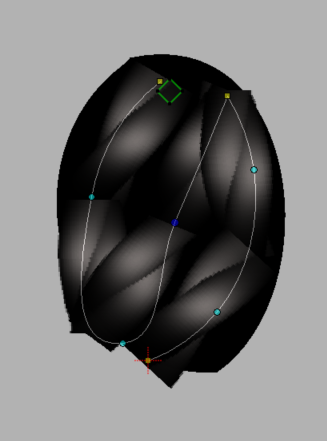
- Create more nodes and adjust the stitch until you are happy with its shape. Reference the image below, you may need to hit the space bar to switch from a straight to a curved line for each node (select the node first)
- The period after the artist’s signature was too small for a stitchable object. The period you just made looks like it will fill that spot nicely
- Right-click and drag that period to where the period after the artist’s signature should have been. This will create a new object by copying,
- Reshape if desired.

Observing Design Information
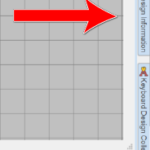
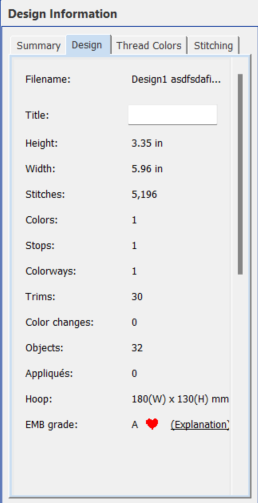
- Open the Design information panel on the right hand of the screen (close to where the sequence panel is).
The important things to look for are the number of trims and the number of stitches.
- A small design with a large amount of stitches will likely become a rat nest of thread
- A design with a large number of trims will take much longer than a design with fewer trims
Exporting your design and loading it onto the machine
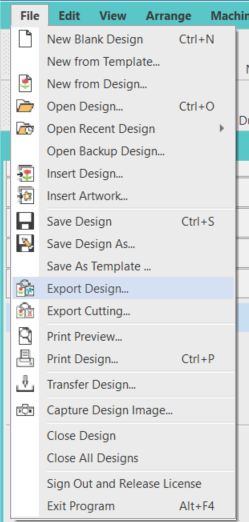
- To export your design click on File in the top left of the screen, then click on “Export Design”.
- Our Brother embroidery machine uses the file extension “.PES” which stands for “Program for Embroidery Stitch.” Make sure to set your file type to .PES for Brother/Babylock/Deco

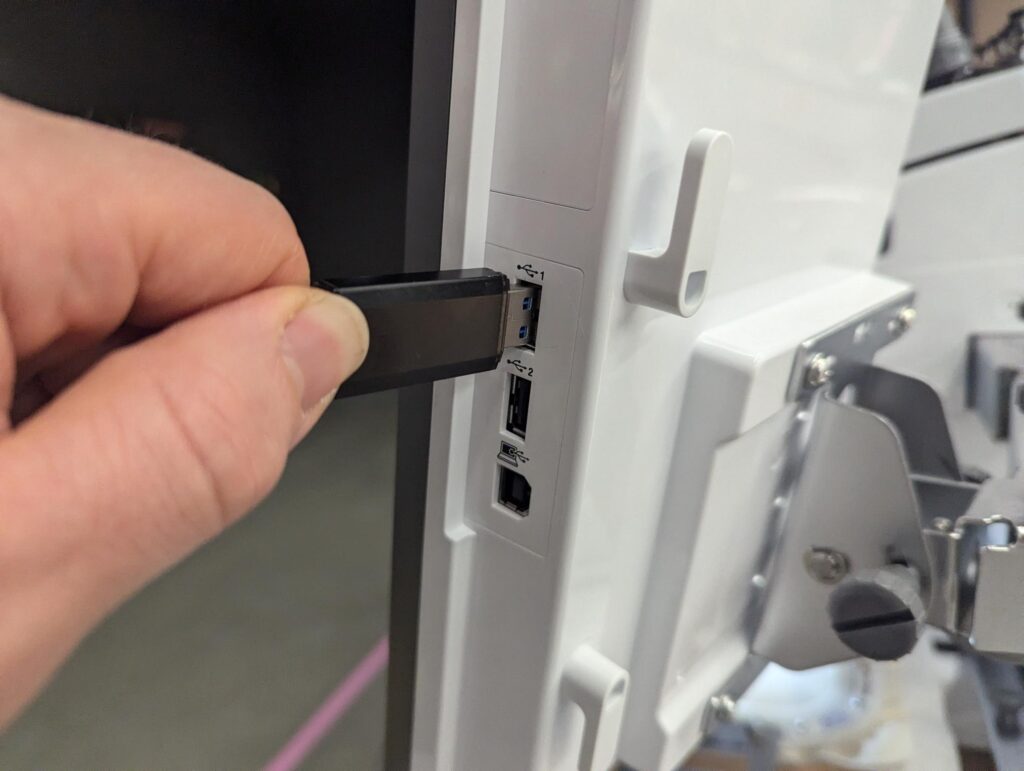
- Save your file to a flash drive and bring it to the embroidery machine
- On the side of the operations panel, there are two USB ports. You may place your flash drive into either of the two ports.
- Turn the machine on as you did in the Embroidery 1 Training
- On the bottom of the home screen, you will see two USB data transfer logos marked one and two. Click on the one that corresponds to the USB port your flash drive is in


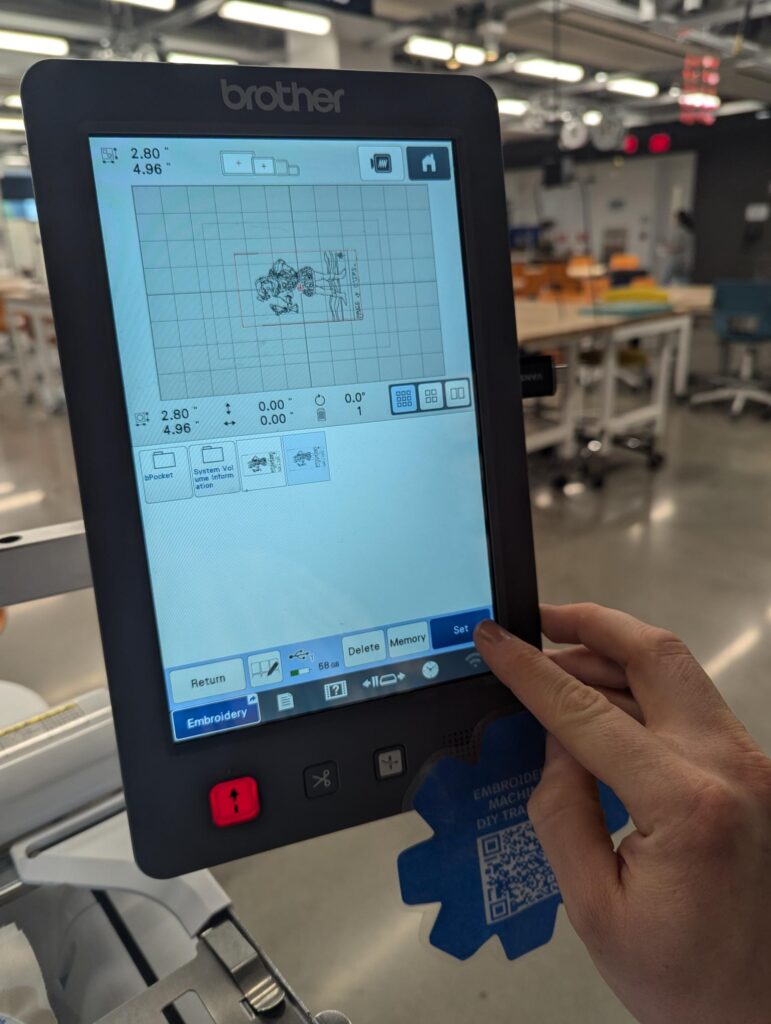
- Select your design by clicking on it, then hit “Set” in the lower right of the screen
- Trims are recommended for this design, although it will add more time. Ensure that the trim button is highlighted on the Edit screen.
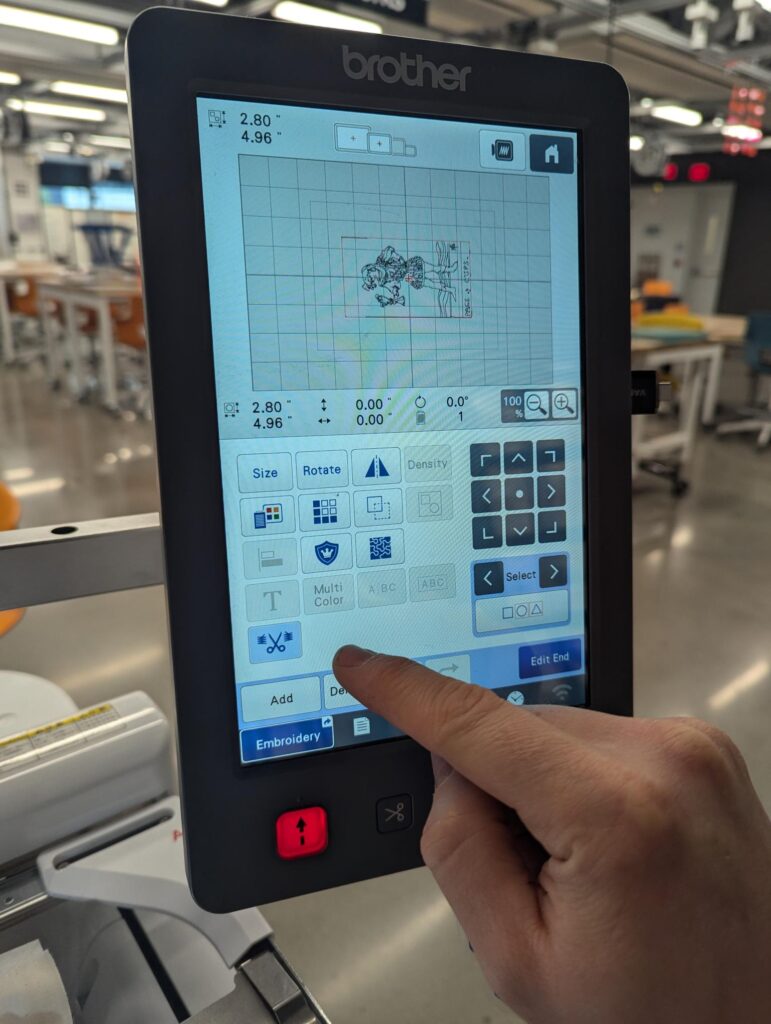

- Your design is now loaded onto the machine. If you are using a magnetic hoop. make sure your design will fit by using the image trace option before running your program.
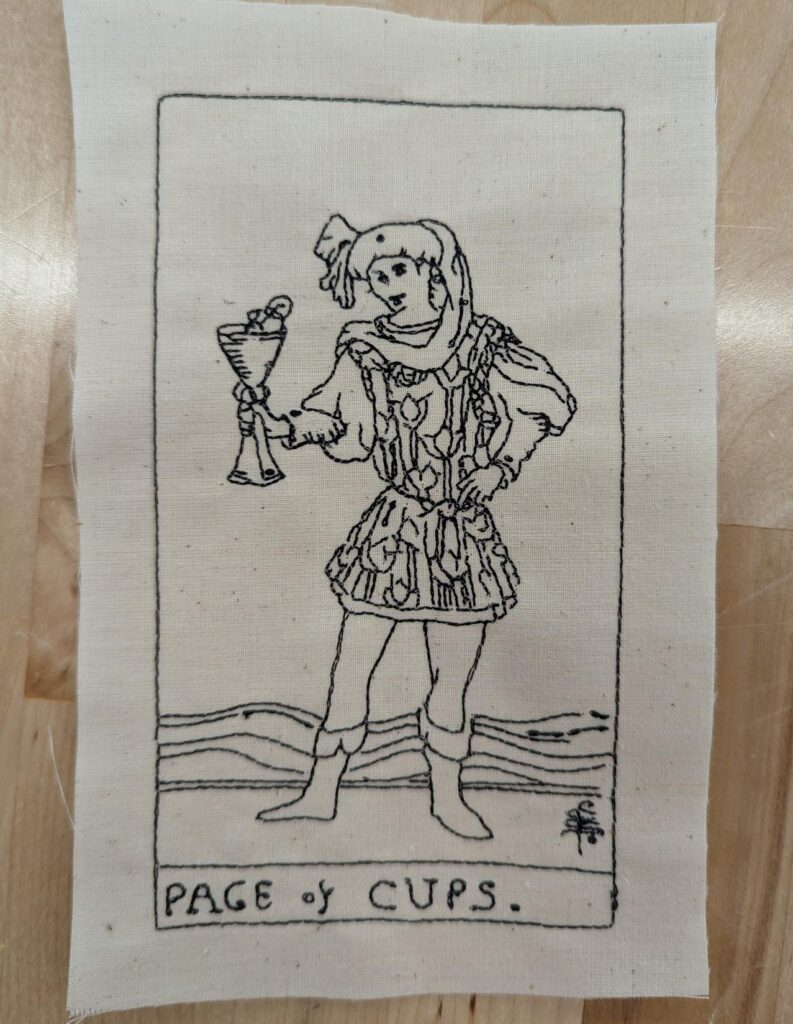
- Run the Design!
- You will end up with something similar to the image shown
Part Two: Multi-Color Embroidery with Fills (Work In Progress)
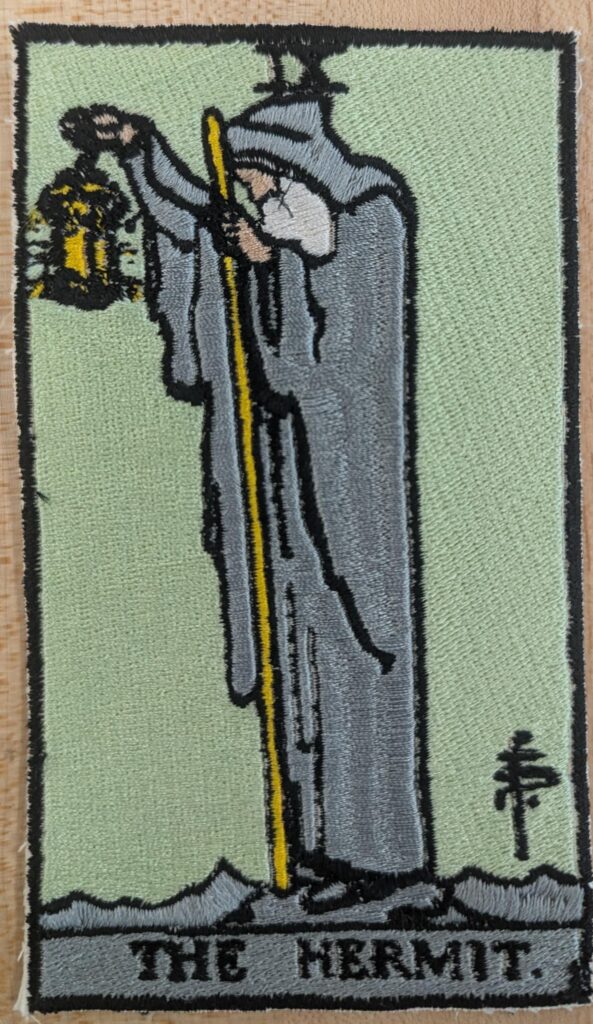
Part two of this guide creates a more complex embroidery pattern from Pamela Colman Smith’s “The Hermit.” You will utilize fills, details, and satin stitches. This will build off of part one and assumes you understand how to change the order of objects, edit nodes, and load your design onto the machine.
It is important to have realistic expectations when embroidering. A detailed image will look great in print but incredibly messy as an embroidery.
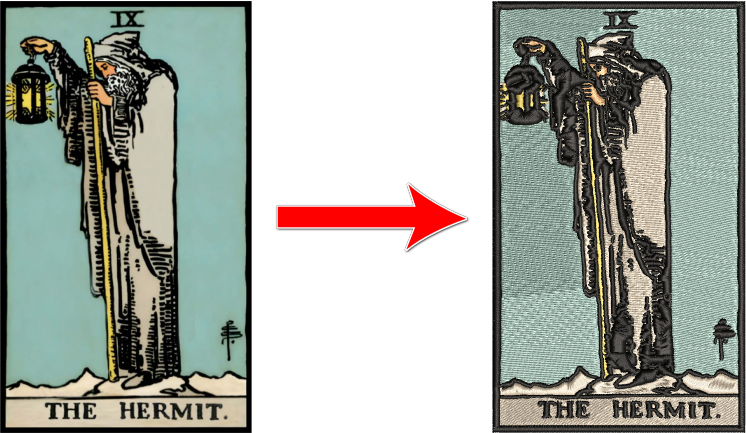
Because of this, you may have to spend some time vectorizing or altering your image in a software such as Adobe Illustrator, as shown below.

Preparing a full-color embroidery
- Download and import the above file named “The-Hermit-PNG”
- Note: The red patterns here will be changed to black on the embroidery machine. They are red here to help differentiate between the inner (detail) and outer (fill) stitches.
- Change the height of the image to 6 inches and then rotate the image 90 degrees
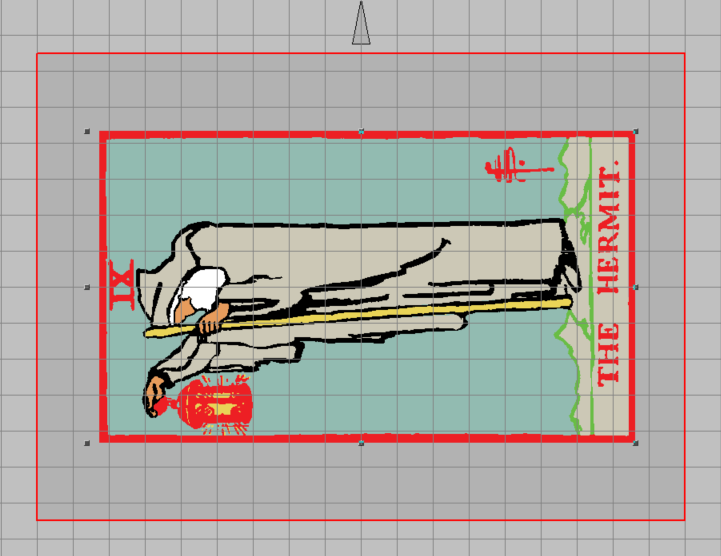
- Select the “Auto-digitize Embroidery…” tool
- Because this image is vectorized and with many details removed it is ok to keep the detail slider on the higher end
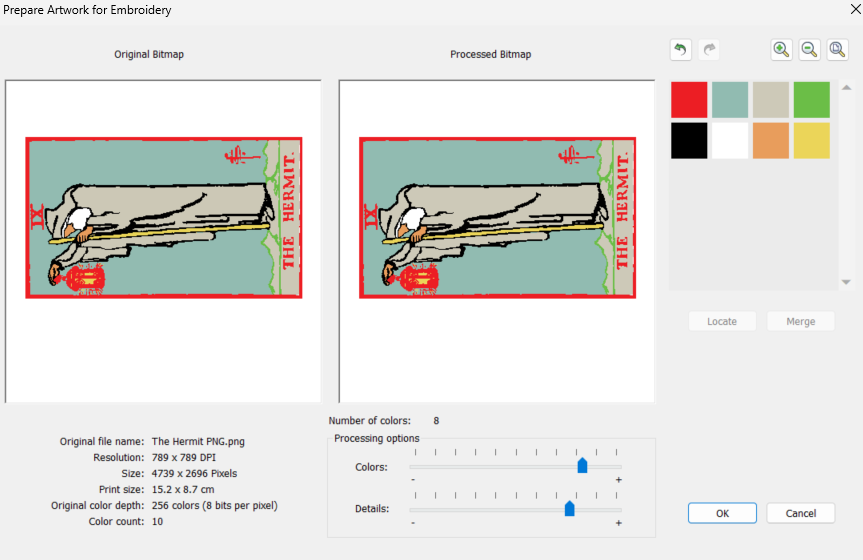
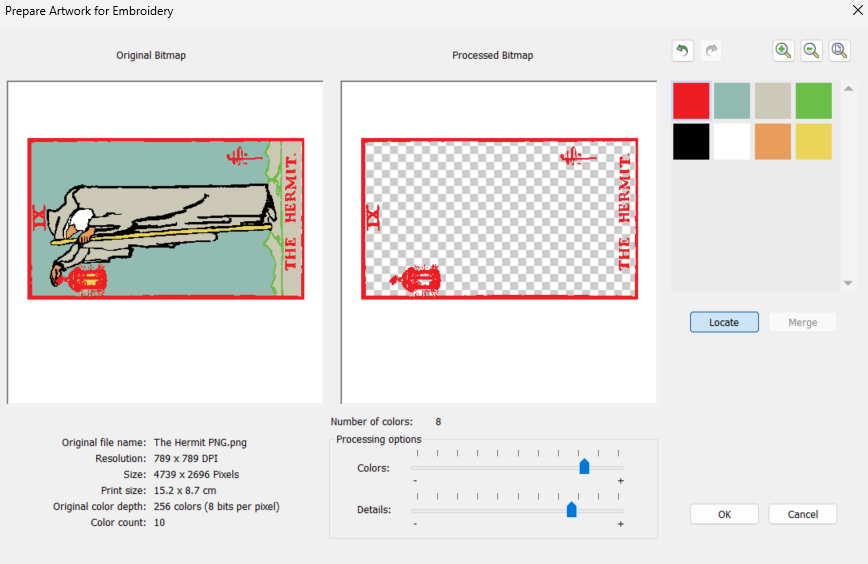
- In this design, the design the red border and green mountains would look better as the same color.
- Click on the red square that represents to color of the border then click and hold “Locate.” You can now see where this color is.
- Holding the “CTRL” key click on the green square. You will now have both colors selected
- Hit the “Merge” button
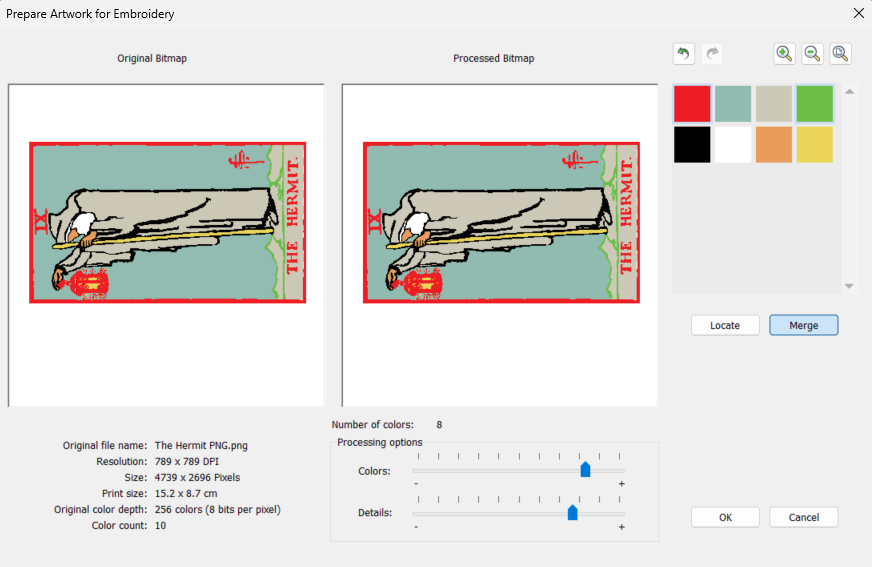
- Click “OK” in the lower right-hand corner of the popup
- In the color allocation and sequence menu the black is sometimes set to “Omit” which will skip it. Instead of skipping black change it to “Detail”
- Think about the layering of your stitches here, generally, you want background colors on the bottom and foreground colors on the top
- Consider moving the red to be after the yellow, as you want the light to lantern light to look as though the lantern itself contains it
- To change the order of colors click on the color you would like to move and then click “Move Up” or “Move Down” on the bottom center of the popup
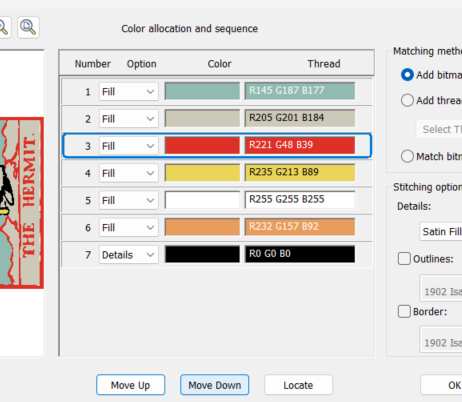
- In the “Stitching Options” box on the lower right-hand side make sure the “Details” are set to “Satin Fill”
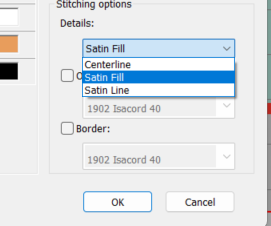
- Click “OK” on the lower right-hand side of the popup
- Hatch will calculate the stitch paths. On more complex designs this may take some time, on VERY complex designs Hatch may crash. If Hatch crashes rethink your initial design, lower the details, lower the colors, or a combination of all three.
Adjusting Fill Types
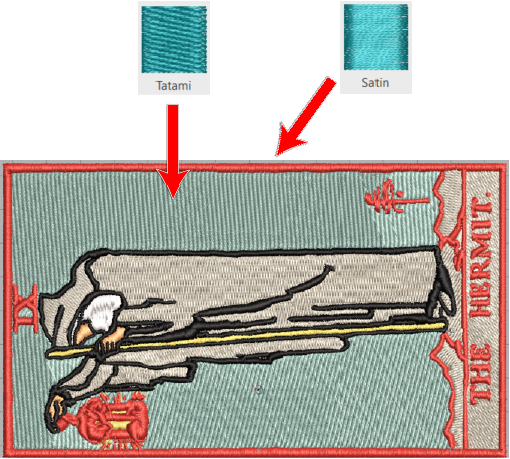
- Hatch has several Fill types that offer different textures. The two most common fill types are
- Tatami: Textured and dense stitch that is ideal for backgrounds, shading, and complex color blends. It will create and underlay stitch making its overlay very stable
- Satin: Smooth (untextured) stitch of parallel lines placed very closely together. Satin stitches are less stable than Tatami and as such are better suited for narrower elements such as outlines, text, and details
- Open the object properties tab on the right-hand side of the screen
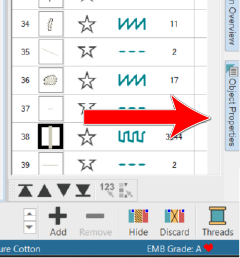
- Navigate to the fill tab of the “Object Properties” toolbox
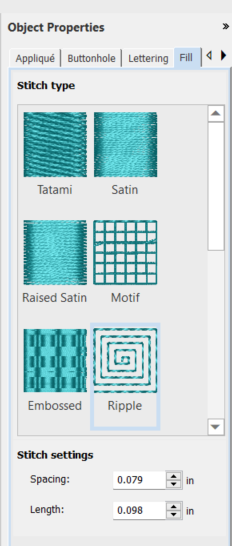
- With the “Object Properties” toolbox open, select elements of the green background and turn them into Tatami stitches by clicking the Tatami box. Do this for every green object
- You can select objects by clicking them in the “Sequence” toolbox or clicking those objects on the generated pattern
- Continue to change stitch types of objects.
- Change the red and black stitches to satin
- Change the background, mountains, and robes to Tatami.
- You may choose between the two stitch types for other elements
Isolating Colors and Removing Unnecessary Trims
- Open the sequence menu and MENU (as you did in Part 1)
- Hatch has made it so we will do one color at a time. You should examine each color individually.
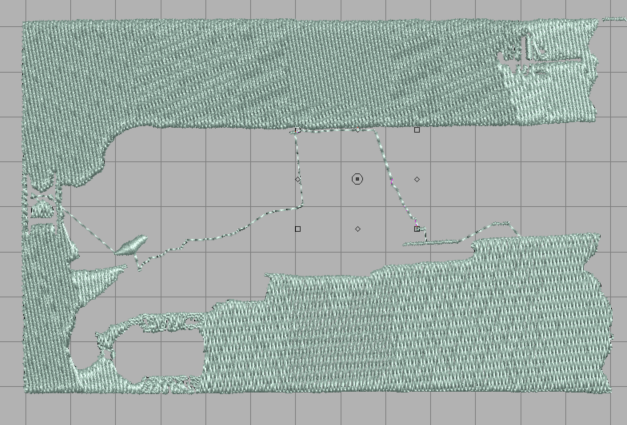
- Isolate all of the green objects and stitches
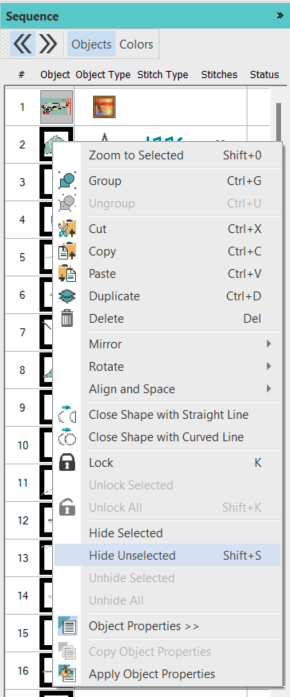
- Click on the top green object in the menu, scroll until you get to the last green object, then while holding shift, click on it. This will select each object between your first and current selection (each object should have a black box around it)
- Right click on one of the selected objects and select “Hide Unselected”
- Now only the green objects should be on your screen
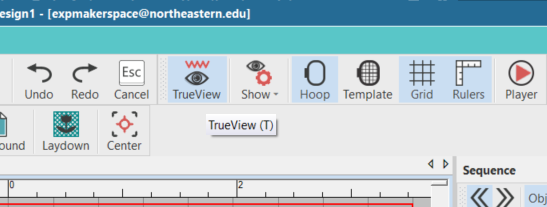
- To see what the path of each object is, and whether or not there is a trim happening, “True View” needs to be turned off
- On the top toolbar ensure that “True View” is not highlighted. This can be achieved by hitting the letter “T” on the keyboard or by clicking the “True View” tile
- You will now see the paths created by Hatch.
- NOTE: Hatch will not always create the same paths each time it Auto-Digitizes, so use the below as a reference
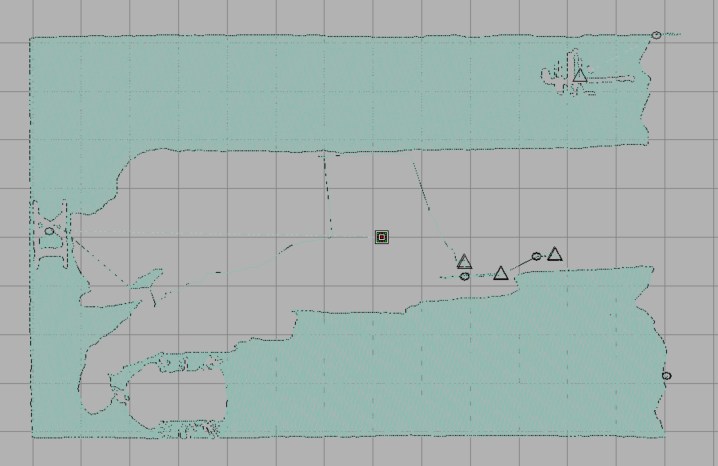
- A trim (when the embroidery machine cuts the thread before moving on to the next object or stitch) is denoted by a triangle on the screen. Here you can see that there are 5 trims. Examine these closer
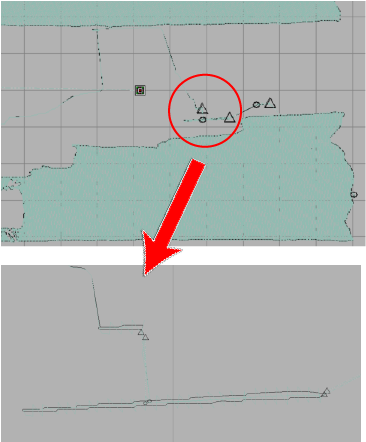
- Here you can see four total trims where the two objects are connected by a running stitch. These running stitches are meant to keep the machine from having to trim between objects, so something is wrong here.
- Open the “Edit Objects” tab in the “Tool Boxes” window on the left side of your screen as you did in Part 1
- Select the reshape tool and then select the stitch running between the two objects
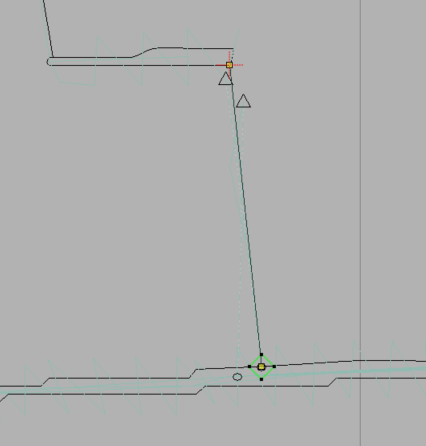
- The green diamond surrounding the yellow node denotes the starting point of the stitch. Here you can see the stitch starting on the lower object even though the lower object is sequences after the upper object. To stop that machine from trimming here we want to start the running stitch in the upper object and finish in the lower object.
- Drag the green diamond (not the node) so it surrounds the blue node. Hatch should automatically change the stopping point denoted by the red cross.
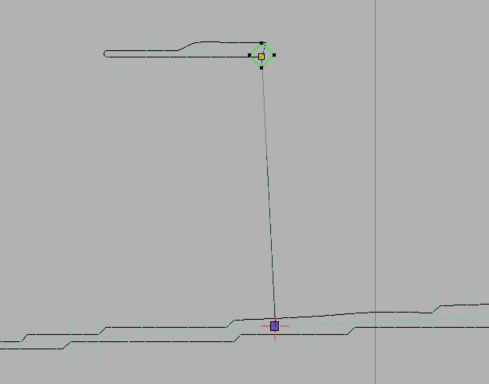
- The trims will disappear. Confirm you have eliminated them by checking the “Design Info” tab as you did in part 1.
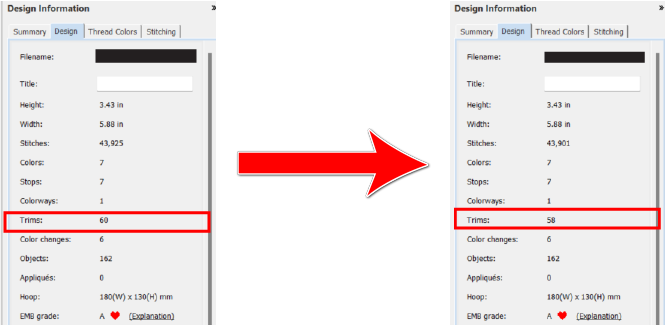
- Continue this process for the other trims and then the other colors. Your goal should be to eliminate as many trims as is reasonably possible to cut down on time
- It is ok to use trim, for example, between the letters of “The Hermit” on the red layer. You are not trimming on the green layer as the running stitches will be covered by everything above them
Finishing Up
- Once you are happy with your Sequence, Fill Stitch Types, and Trims export your design and load it into the machine.
- In the machine set your red stitches to black (refer to DIY Training 1 if needed)
- Run the embroidery, you will end up with something similar to the image below
