At the EXP makerspace, we have several DSLR cameras and a variety of lighting equipment available for use in our AV Alcove. Before you borrow our equipment, you will need a general understanding of its function and proper handling practices. This includes:
- Camera and lens assembly
- Readying the camera
- Camera Maintenance + Proper Handling
- Best Practices for Finishing Up
- Glossary of equipment pieces and photography terms
This document will also walk you through the basic mechanics of DSLR cameras and how to effectively use the lighting equipment offered in our makerspace. This will not cover post-processing images or go into depth about more advanced camera mechanics, nor will it teach how to take artistic and “good” photographs—that’s a skill that will develop over time and lots of practice!
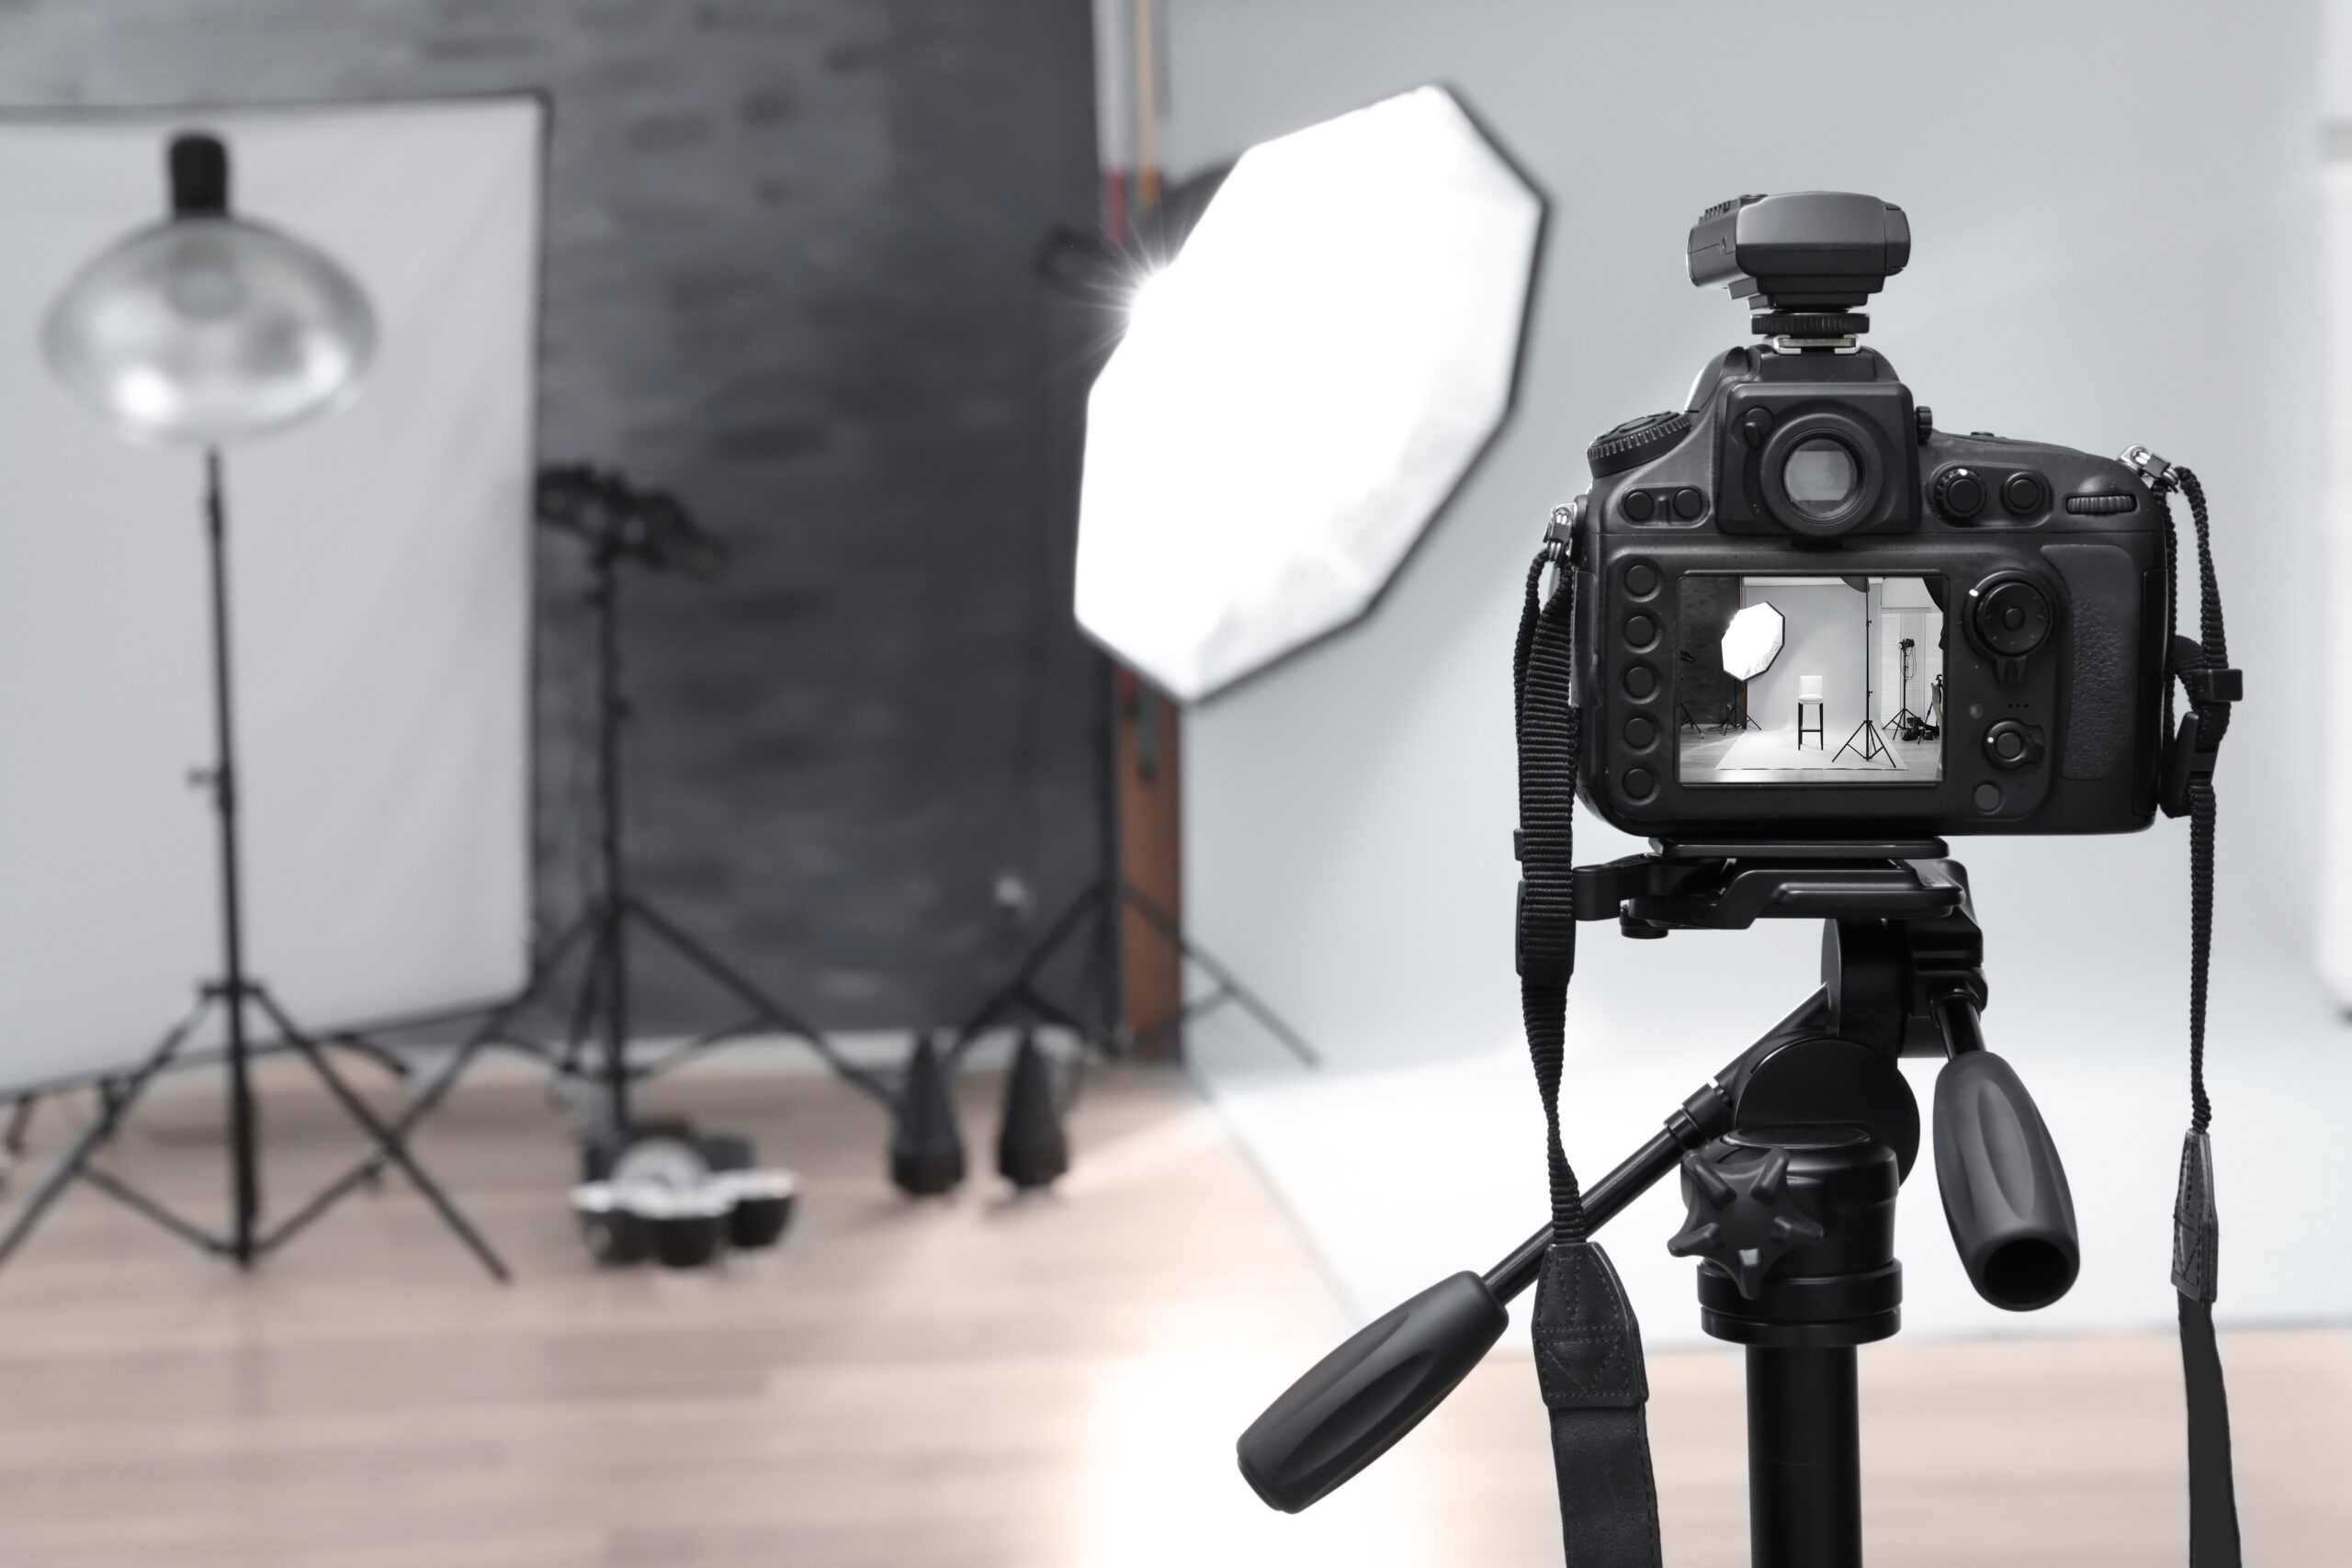
What is a DSLR?
DSLR stands for Digital Single Lens Reflex. DSLR cameras have become synonymous with “professional” photography in the modern age, as it’s what many professional photographers shoot with, from wedding photographers to photojournalists.
DSLR cameras work by passing light through the lens, bouncing it onto a mirror, into a prism, and through the viewfinder (the part you look into). While this process is happening, a sensor records the image into the familiar .jpeg (or .raw!) file that many people already know. The image going into your camera lens (referred to here, in short, as “light”) is exactly what you are seeing in your viewfinder.
Camera and Lens Assembly
At the makerspace, we have Nikon D780 camera bodies with Nikon DX F-mount 35mm prime lenses for use.
To borrow one of our cameras, talk to a Makerspace Explorer or Staff Member. They will help you unlock the equipment cabinet by the AV Alcove. Cameras should come with the lenses already attached. However, in the case that it is not or if you would like to change a lens (see further down), follow the instructions below for mounting a lens onto a camera body:
- Turn the camera off; this is crucial in reducing the likelihood of dust and debris entering the camera body.
- Place the lens face-down (rear-side up).
- Remove the camera body cap and rear lens cap by rotating clockwise, being careful to limit the amount of time that the camera’s inner chamber and the lens’ rear element are exposed to the environment.
- Align the mounting marks on the camera and lens and rotate the lens counterclockwise until it clicks into place.
- Remove the lens cap by pinching the sides of the cap, before taking pictures.
- If you would like to attach a lens hood, align the lens hood attachment index (either of the two indexes) on the hood with the lens hood mounting index on the lens. Then, turn the hood counterclockwise (as viewed when holding the camera with the lens facing away from you). Incorrectly attaching the lens hood may cause vignetting to occur.
Changing Lenses
If you would like to switch the lens on the camera body, please talk to a Makerspace Explorer or Professional Staff Member first. If you need assistance, please let them know and they will help change the lens for you.
If you would like to use your own F-mount lenses on our camera bodies or use one of our lenses on your own camera, you must talk to a Makerspace Explorer or Professional Staff Member first. You will be responsible for changing your own lenses and maintaining your own equipment.
Readying the Camera
Now that you have your camera with a mounted lens, you are almost ready to start shooting! Before you begin, please make sure the steps below are completed:
- Inserting the Batteries: Make sure that your camera contains charged batteries.
- Inserting the Memory Card: Make sure that the camera contains a memory card.
Getting Started
- Turning on the Camera: The power button is located on the top right of the camera. Press it to turn on the camera.
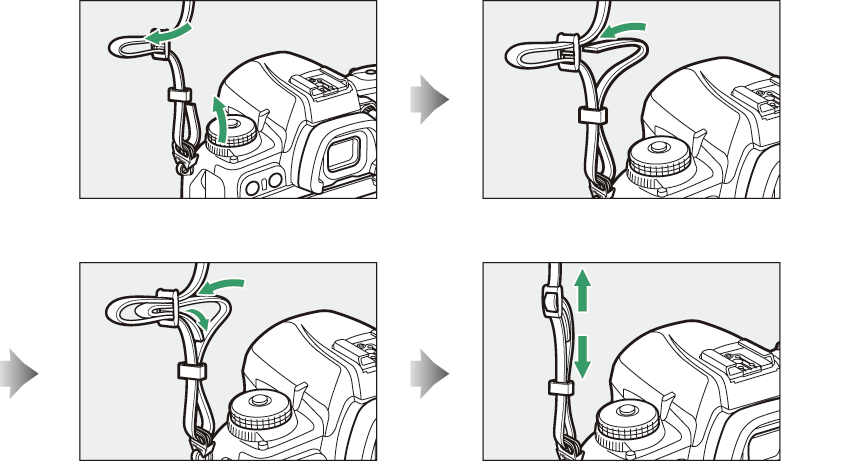
- Attaching the Strap: Attaching the strap can be tricky. We recommend watching a video tutorial for guidance.
- Lens Cover: Don’t forget to remove the lens cover before taking a picture!
Basic Point and Shoot Photography
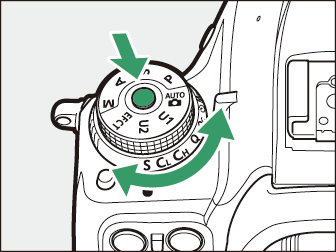
- Camera Mode: Press the mode dial lock release on top of the camera and rotate the mode dial to (auto mode) for simple point-and-shoot photography.
- Framing the Photograph: You can frame your photograph in two ways:
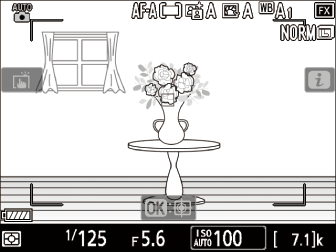
- Viewfinder Photography:
- Look through the viewfinder, position your subject in the AF-area brackets, and press the shutter-release button halfway to focus.
- The in-focus indicator (I) will appear in the viewfinder when the focus operation is complete.
- The active focus point is displayed in the viewfinder.
| | Viewfinder Display | Description |
| The subject is in focus. | ||
| The focus point is in front of the subject. | ||
| The focus point is behind the subject. | ||
| The camera is unable to focus using autofocus. |
- Live View Photography: Rotate the live view selector to ‘C’, press the ‘Lv’ button to start live view, and position your subject near the center of the frame.
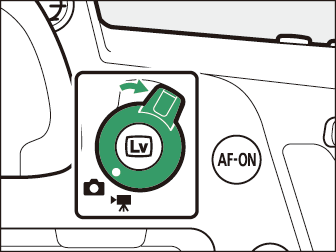
- The mirror will be raised, and the live view will start. The viewfinder will go dark and the view through the lens will be displayed in the monitor. Frame the photograph.
- Position the subject near the center of the frame.
- At default settings, the camera automatically detects portrait subjects and positions the focus point over their faces or eyes.
What are the different modes for shooting?
You can use the mode dial to choose a shooting mode. Choose whether to adjust shutter speed and/or aperture manually or leave the camera in charge. Press the mode dial lock release and rotate the mode dial to choose from the following modes:
| Mode | Description | |
| Auto | Auto | All settings are automatic. |
| P | Programmed auto | You can change ISO (exposure), but all other settings are automatic. |
| S | Shutter-priority auto | You can change shutter speed, but all other settings are automatic. |
| A | Aperture-priority auto | You can change aperture, but all other settings are automatic. |
| M | Manual | You must manually change the shutter, aperture, and ISO. |
| U1/U2 | User settings modes | Assign frequently used settings to these positions. The settings can be recalled simply by rotating the mode dial. |
| EFCT | Special effects mode | Take pictures with added special effects. |
What are the most important camera settings?
- Shutter speed: The speed at which a camera shutter opens and closes. The longer it’s open, the more movement and light can enter your camera. Increasing speed will increase the light in your shot.
- An analogy that may help you understand shutter speed is your eyes! Think of blinking as opening and closing a shutter. If you blink very fast, you have less time to take in movement and light, as opposed to keeping your eyelids/your shutters open.
- Aperture: This refers to how open your camera shutter is. A lower camera aperture opens the camera to more light. It also decreases your depth of field, blurring out your background.
- The naming convention for aperture settings are called “f-stops”, which stands for focal stop. To denote an f-stop, you put the letter f in front of the number: f1.8 is a very wide-open shutter, and f16 is a very narrow one.
- Apertures are essentially the same as the pupils of your eyes. You may notice that a person’s pupils widen when they are indoors and narrow when that person walks outside on a sunny day. This is because there is less light indoors, so your pupils must widen to take in more light.
- ISO: A leftover camera setting from film cameras. Back then, film had different ISO’s (pronounced like an acronym, I.S.O, as opposed to one word) you could buy in, and it indicated the film’s sensitivity to light. Higher ISO’s will let you shoot clear photos in a darker setting but will introduce a lot of noise into your photos. Typically, you want to keep your ISO as low as possible, while still maintaining a nice image quality and brightness, so as to reduce the noise.
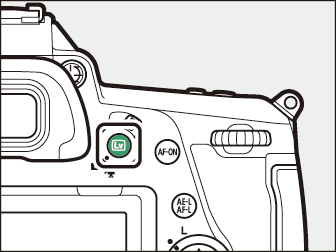
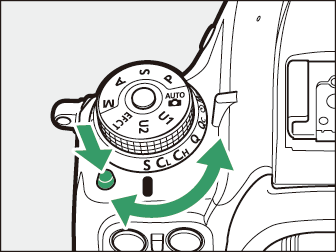
The Release Mode Dial
Rotate the release mode dial to choose the operation performed when the shutter is released. Press the release mode dial lock release on top of the camera and rotate the release mode dial.
| Mode | Description | |
| S | Single frame | The camera takes one photograph each time the shutter-release button is pressed. |
| Cl | Continuous low speed | At default settings, the camera takes photos at up to 3 fps while the shutter-release button is pressed. The frame advance rate can be chosen using Custom Setting d1 [CL mode shooting speed]. Choose from values of from 1 to 6 fps. Note, however, that regardless of the option selected, the maximum frame advance rate during live view is 3 fps. |
| Ch | Continuous high speed | The camera takes photos at up to 7 fps while the shutter-release button is pressed. When [On] is selected for [Silent live view photography] in the photo shooting menu during live view, the frame advance rate varies with the option selected for [NEF (RAW) recording] > [NEF (RAW) bit depth] in the photo shooting menu, increasing to a maximum of approximately 8 fps when [14-bit] is selected or approximately 12 fps when [12-bit] is selected. |
| Q | Quiet shutter-release | As for single frame except that camera noise is reduced. |
| Qc | Quiet continuous shutter-release | The camera takes pictures at up to 3 fps while the shutter-release button is pressed; camera noise is reduced. |
| E | Self-timer | Take pictures with the self-timer. |
| Mup | Mirror up | The mirror is raised before shooting to minimize blur caused by camera shake. |
The Focus-Mode Selector
Choose AF for autofocus, M for manual focus.
How do I light a project?
As you might be able to tell by now, lighting is the core of photography. The word photography literally translates to “drawing with light”! We carry three types of artificial lighting for you to use.
- Softboxes: This is literally a box, with softened light. The light is diffused, giving a hazier effect. A softbox gives soft light in a certain direction.
- This is similar to light coming through a window on a cloudy day.
- Umbrella lights: This is similar to a softbox, except the shape of the light’s container is an umbrella, not a box. The shape of the light diffuses the light in different directions. This gives a soft light in a scattered way.
- This is similar to standing outside on a cloudy day.
- Ring lights: Gives hard light in whatever direction it’s pointed towards.
- This is similar to standing outside on a sunny day.
The type of lighting you choose will depend on your project. It may be helpful to keep these four elements in mind when setting up the lighting:
- Direction: Play around with the direction of your light. Is the source coming from above? Below? Perhaps your subject could even be backlit?
- Intensity: Play around with the distance between your subject and the light source. The closer the light, the more intense it will be!
- Color: At the AV alcove, we have several colored filters as well as different-toned light bulbs for you to experiment with. Will your light be cool-toned or warm-toned? Perhaps a mixture of both?
- Softness: Play around with the softness and hardness of the light. How hard or soft do you want your shadows to be?
Lighting Equipment Maintenance + Proper Handling:
When setting up your lighting, please make sure to handle our equipment with care.
- When changing light bulbs, attaching filters, or extending the height of tripods / artificial lighting stands, please use both hands for stability.
- If you are not confident in your ability to adjust the equipment yourself, please request assistance from an Explorer or Full-Time Staff Member.
- Watch your step in the AV alcove! Space is limited and there may be wires dangling from the ceiling and across the floor. Exercise caution when moving around the alcove.
- Please make sure to turn off all equipment when you are done using them.
Camera Maintenance + Proper Handling:
Remember that these cameras are expensive! It’s important that you handle our cameras with care so that we can keep them in pristine condition for years to come! Please refer to the points below for best maintenance and handling of our DSLRs:
- NEVER EVER touch / scratch the lens as this can lead to smudges and permanent scratches that could detract from the image quality.
- Avoid removing or attaching lenses if you are not confident in your ability to change them. Instead, ask an Explorer or Full-Time Staff to assist you.
- Always remove the lens cap before taking a picture and remember to replace the cap when done using the camera.
- Keep the camera set up as default for ease of use. For troubleshooting, refer to Nikon’s basic setup tutorial here.
- The straps should stay on the camera for safety reasons.
- Avoid leaving the camera on when not in use to conserve battery life.
Best Practices for Finishing Up
Once you have finished shooting with the camera, please ensure that you complete the steps below:
Formatting the Memory Card
After using the camera and downloading your photos:
- Please make sure to put the SD Card back into the camera.
- Additionally, you should format the SD Card to free up storage for the next user. Formatting the SD Card simply means permanently deleting the data (pictures & and videos) stored on the card. To format the SD Card, follow the steps below:
- Press the menu button and select the setup menu (the wrench icon).
- To begin formatting, choose a memory card slot, and select [Yes].
- Do not turn the camera off or remove memory cards until the message [Formatting memory card.] clears from the display.

Turn off the camera
Removing + Charging the Batteries
- After using the camera, please make sure to remove the batteries and place them in the charger. This will ensure that the batteries are charged for the next user.
Camera + Lens Disassembly
- Unless you are using your own lens with our camera body or our lens on your own camera body, you do not need to disassemble the camera and lens.
- Instead, remove the lens hood (if applicable) and replace the lens cap.
- Let an Explorer or Full-Time Staff Member know once you have finished using the camera and have put it away in the equipment cabinet so that they can secure the cabinet. Let them know to open the cabinet for you to return equipment if it is locked.
Glossary
- Lens Hood: a lens accessory that functions as a “visor” for your lens. Besides looking really damn cool, a lens hood also reduces light glare. By reducing light glare, a lens hood can provide greater image contrast and detail. A lens hood provides an added layer of protection to your lens that can prevent damage and smudging from foreign elements
- Vignetting: The darkening of the edges of a photograph. Vignetting can happen because of the camera failing to distribute light evenly across a whole image, however it can also be added deliberately in post-processing to draw the viewer’s attention towards a subject
Additional Resources
- For a deeper understanding of how the camera works, refer to Nikon’s online manual here.
- You can also access Nikon’s digitutor for video tutorials, sample images, and other materials introducing how to configure and use the D780 for taking beautiful pictures.