A drill press is a tool that can make precise, accurate holes of varying depths and diameters through various materials. In Woodworks, wood and certain plastics are the only materials permitted for use on this machine.
Safety Considerations
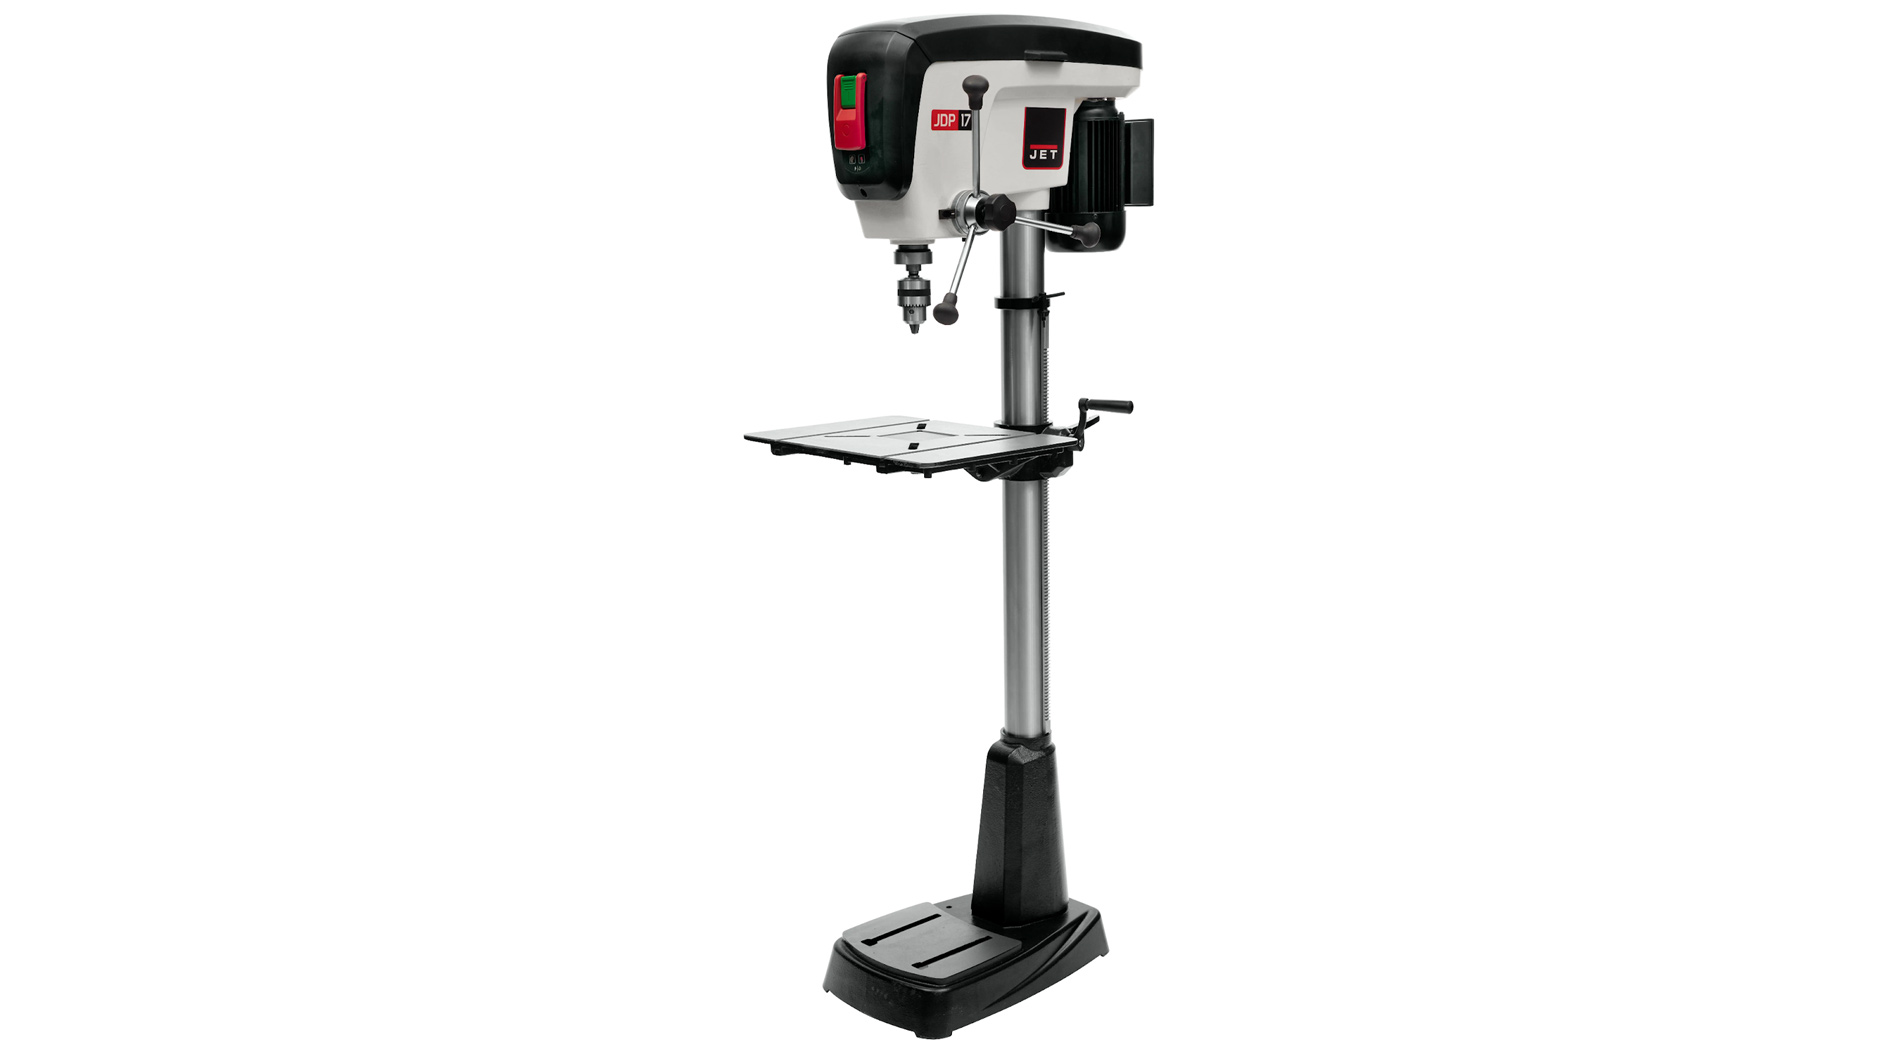
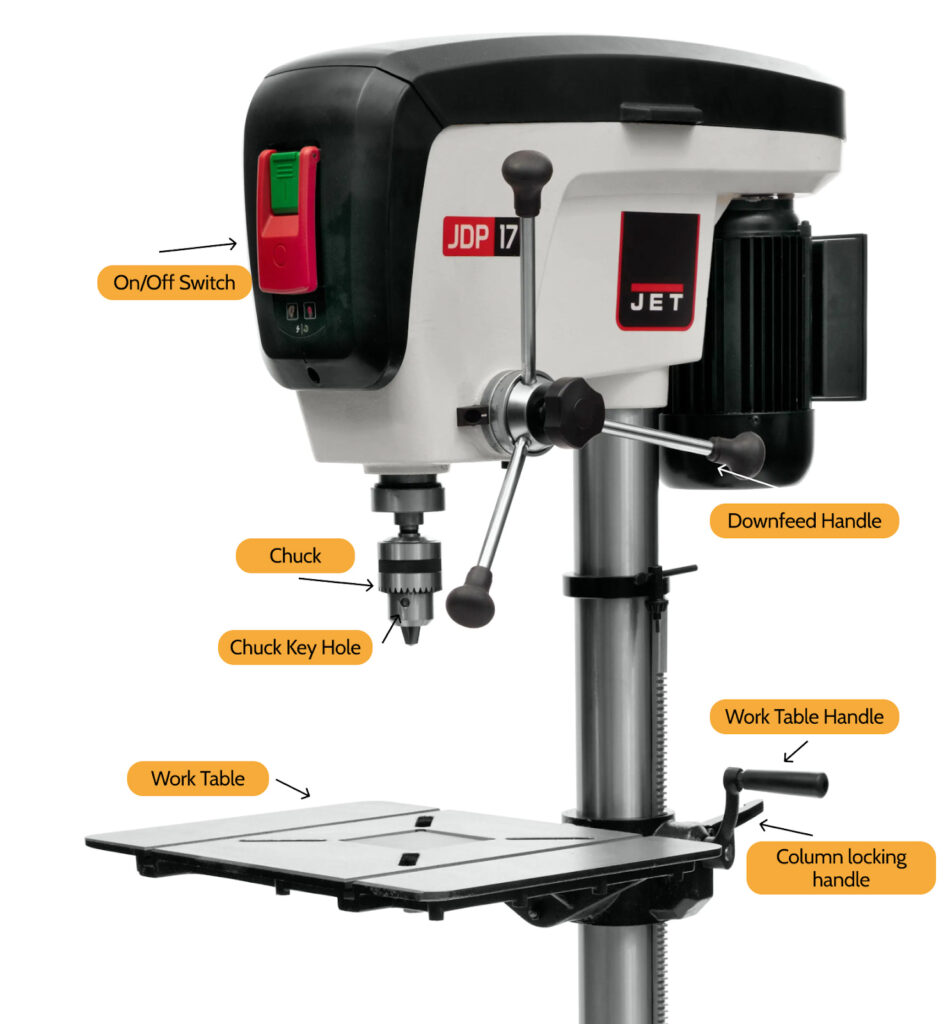
Machine Anatomy
Operating the Machine
Choosing the Right Drill Bit
- The diameter of your bit is the size of the hole it will make. Twist drill bits make holes up to ½” in diameter. If you need to make a larger hole see the sections on Hole Saws and on Forstner Bits below.
- If you want to press-fit something into the hole you are making, use a bit that is slightly smaller than what you are press-fitting into your material. If you want the fit to be loose, use a bit that is slightly larger than what you will be inserting into your material.
- You can always make a hole bigger, but you can’t make it smaller. Start with a smaller bit and then check to see if it’s the right size.
- Note: NEVER USE A SPADE BIT IN A DRILL PRESS!
Using a Forstner Bit
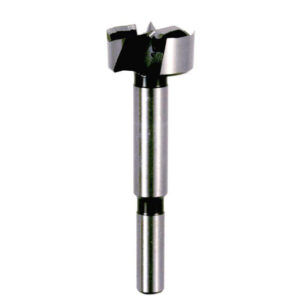
- If you need to make a hole ½” to 1” in diameter, we have a set of Forstner bits in varying diameters (½”, ⅝”, ¾”, ⅞” and 1”).
- Forstner bits create clean, crisp holes and are great for making flat-bottomed holes and for drilling vertically into angled sides of material.
- Forstner bits are inserted into the drill press in the same way as normal drill bits, as outlined in the Inserting the Drill Bit section.
Using a Hole Saw
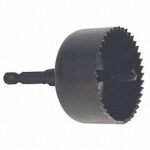
- If you need to make a hole 1¼” to 2⅛” in diameter, we have a set of hole saws in varying diameters (1¼”, 1½”, 1¾” and 2⅛”).
- A hole saw is a circular saw blade that attaches to the drill press, and cuts (rather than drills) a hole through wood.
- The hole saw makes fairly rough cuts as compared to conventional drill bits and Forstner bits. You will probably need to sand down your hole after you cut it.
- To set up a hole saw, remove the hex nut from the hole saw bit, place the saw blade (in the diameter of your choice) over the bit with the teeth facing towards the tip of the bit, and put the nut back on tightly over it.
- Once the saw blade of your choice has been attached to your hole saw bit, the bit is inserted into the drill press in the same way as normal drill bits, as outlined in the Inserting the Drill Bit section.
Inserting the Drill Bit
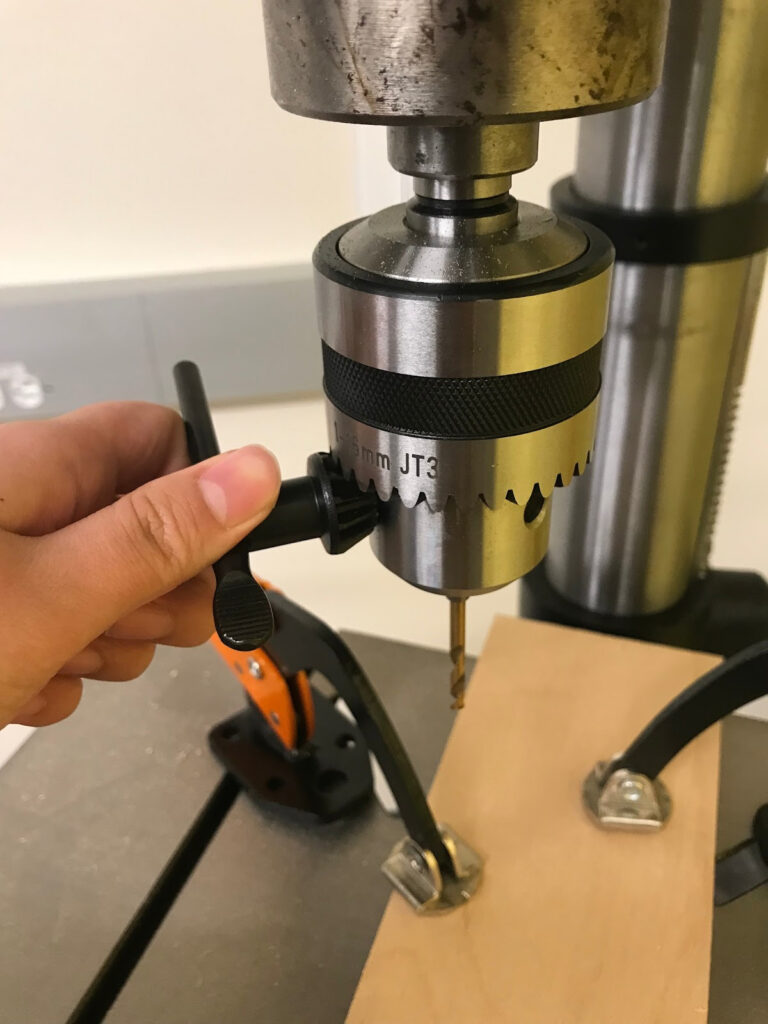
- Make sure the drill press is turned off and has come to a complete stop before you insert a drill bit.
- Loosen the chuck by turning the chuck key to the left (counterclockwise) and remove the existing drill bit if there is one. Be careful touching recently used drill bits-they can get hot.
- Insert the shank of the new drill bit into the center of the chuck and tighten it by hand by turning it to the right (clockwise) until the chuck tightly grasps the shank. You never want to tighten the chuck jaws on the flutes of a twist drill bit-make sure the jaws are on the shank just above the flutes.
- Check to see if your bit is properly aligned by turning the drill press on (without lowering the bit). If your bit appears to be wobbling as it spins, it is not seated properly in the chuck. If this is the case, turn the drill press off and repeat steps 1-3 until the bit appears vertical and unwavering when the machine is on.
- Once your bit is properly aligned, turn the machine off.
- Once the machine is off, use the chuck key, found hanging on the back of the drill press, to finish tightening the chuck by turning the chuck key a ¼ to ½ turn, until you meet resistance.
Drilling with the Drill Press
- Place your workpiece onto the work table.
- Adjust the height of the table so it is at an appropriate height for your workpiece and for the depth of the hole you are drilling. The tip of the bit should only be about ½”-1” above the material when the head assembly is in its full up position.
- With the machine turned off, lower the drill bit using the downfeed handle to ensure that the drill bit is aligned with where you want to drill a hole.
- Return the head assembly to its full up position.
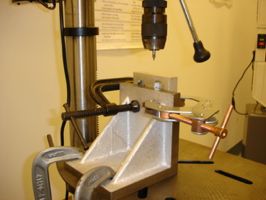
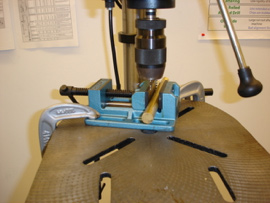
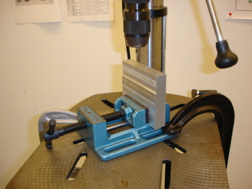
- Once you are sure the bit is aligned with where you want to drill, secure your workpiece on the table either by using clamps or a vise. If you are using clamps, clamp your piece to the table in two places. If you only use one clamp, the place where your piece is clamped will become a pivot point, and the piece will spin dangerously once you begin drilling. DO NOT hold the workpiece down with your hands while drilling. Please see “Examples of Well Secured Workpieces” at the end of this training document for examples.
- Turn the machine on.
- Slowly lower the drill into your workpiece. The harder the material, the slower you should lower the drill bit in. Once you’ve made an initial dent in the material, ease up on your pressure slightly.
- If a problem arises while the bit is in your material (i.e. the bit breaks, comes loose from the chuck, etc.), turn the machine off and, by hand, spin the chuck in the opposite direction of drilling to release the bit from the material. If you are unsure of why/how your problem arose, ask an Explorer!
- As the drill breaks through the material, ease up even more on pressure to avoid damaged tools or workplaces.
- Once you have drilled through your material, or have drilled to the desired depth, raise the head assembly to its full up position while the drill is still on.
- Once the head assembly is in its full up position and clear of your workpiece, turn the drill off and wait for the chuck to come to a complete stop before removing the workpiece or making any adjustments.
- If the hole you drilled is to your liking and/or you are finished using the drill press remove your drill bit by loosening the chuck with the chuck key a ¼-½ turn (this time turning it counterclockwise) and then continue to loosen the chuck by hand (still counterclockwise) until the drill bit comes free.
- Put away the drill bit you used.
- Brush all the dust off the machine and sweep the floor. You can either use the shop vac or a broom and dustpan to do this.
Tips and Troubleshooting
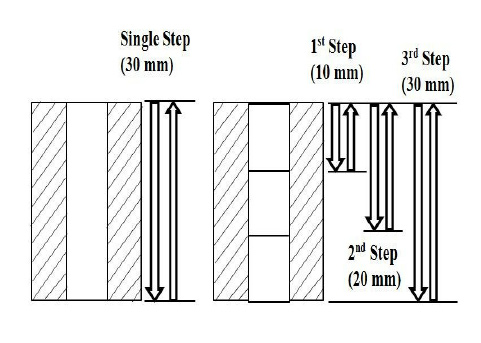
- If you are drilling through thick or dense material, or if you are using a bit with a wide diameter, you might want to consider “pecking”. That is, instead of pushing the bit through in a single pass, you can drill some of your hole, pull up the downfeed handle to clear some material, and then push down the downfeed handle once more and resume drilling in the same hole. See below:
- Put the drill bits back where you found them, in the correct size so others can find the correct drill bit size. Similarly, put one bit away before you get another one out, so that you do not mix them up.
- For thin pieces of wood, put another block of wood under it and drill through both. This will prevent blowout/splintering on the back of your workpiece.
- If you want to drill through acrylic, put tape over the area you want to drill and go slowly. This will prevent the acrylic from shattering.
- Mark the spot where you want to drill the hole with a pen or pencil, that way you can be sure you are drilling in the correct spot.
- If your bit doesn’t spin straight, take it out and re-center it in the chuck.
Examples of Well Secured Workpieces