If you want to train yourself on our angle grinders, you will need to have a thorough understanding of what is covered in this user guide. A staff member can give you a credential allowing you to use the angle grinders independently if you can demonstrate an understanding of the process. This includes:
- How to hold an angle grinder
- How to change out discs
This document will walk you through the basics of angle grinding. Text in black explains certain concepts.
Text inside blue boxes are steps you should actively take to guide you through this process.
What is an angle grinder?
An angle grinder is a power tool with a rotating abrasive disc used to grind, polish, or cut metal and other materials.
Safety Considerations
Angle Grinding Policies
- Only flap discs are allowed in our metalshop. This is because other types of discs can break or explode if used improperly.
- Removing any safety guards on the angle grinder is strictly prohibited.
Angle Grinder Anatomy
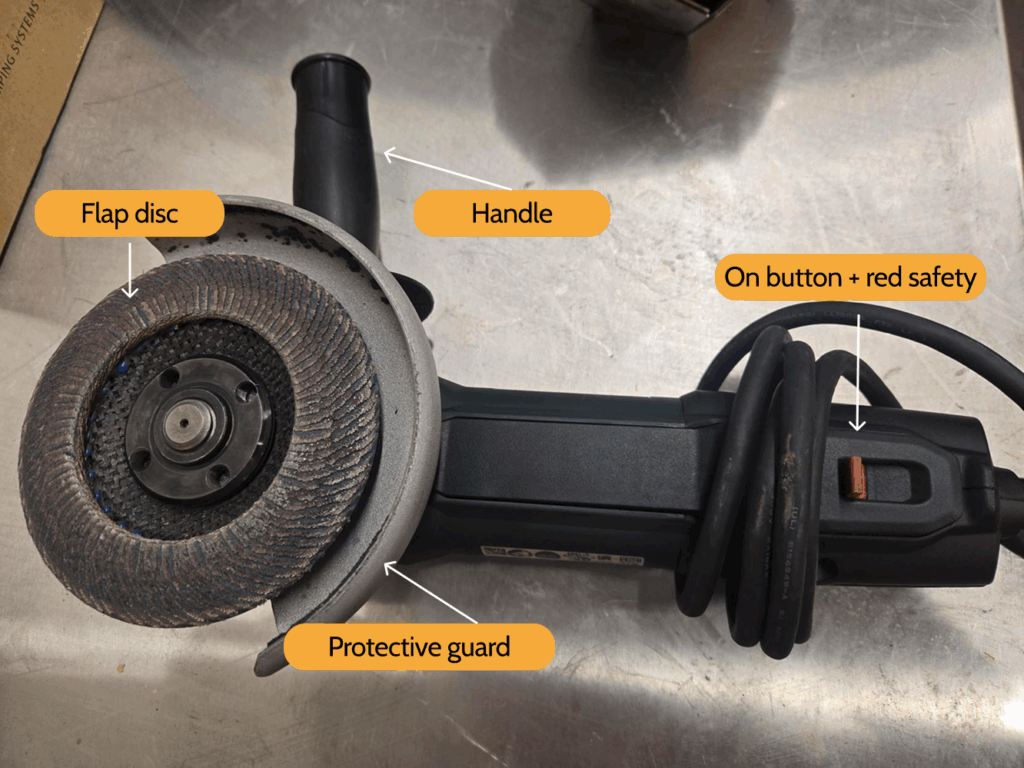
- Flap disc: There are multiple types of discs that you can use on an angle grinder. We only allow flap discs, which have flaps of sandpaper attached to their outer rim.
- Protective guard: This guard protects you from sparks. You may NEVER remove the guard on our angle grinders.
- Handle: Hold the handle with your left hand.
Running the angle grinder
- Workpiece clamping
- Make sure your piece is clamped securely. You will be applying a lot of force to your piece, and it might go flying otherwise. Use whatever clamps you think are applicable. Feel free to use the welding ones or the C-clamps.
- Angle it so the sparks are away from you.
- Sparks will go perpendicular to your welding disc.
- Hold the handle with your left hand, and put your right hand over the switches.
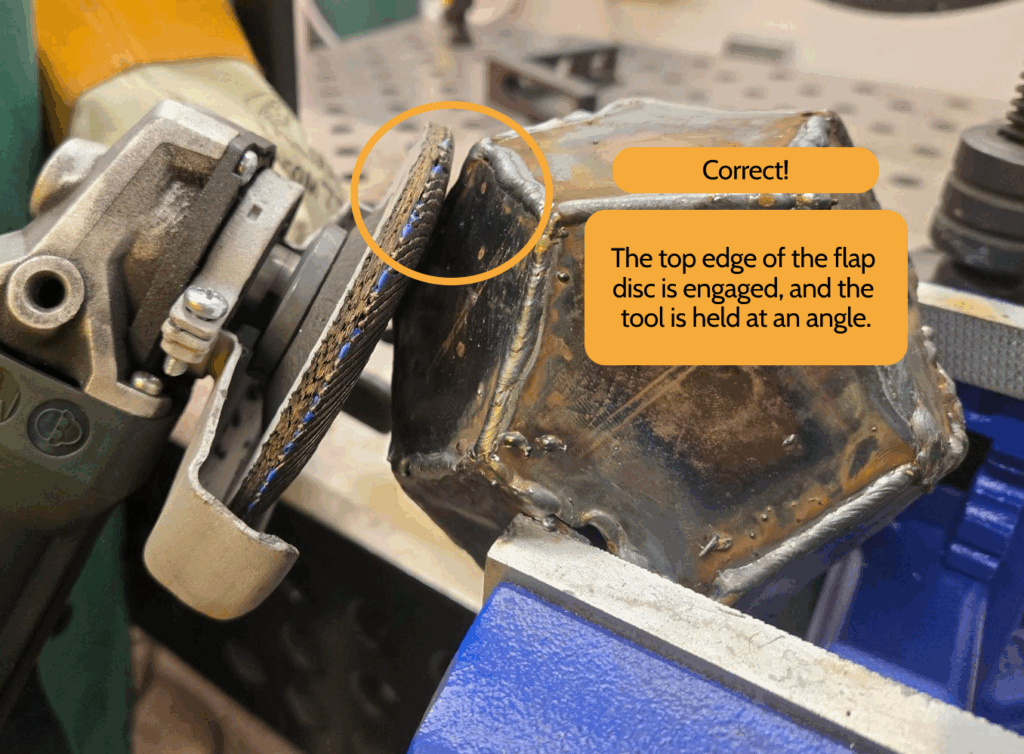
- Holding your angle grinder: You want to engage only the top part of the flap disc. See the photos below.
- To turn the angle grinder on, you need to press both the red switch and the black switch. In small up and down motions, move the angle grinder against your part.


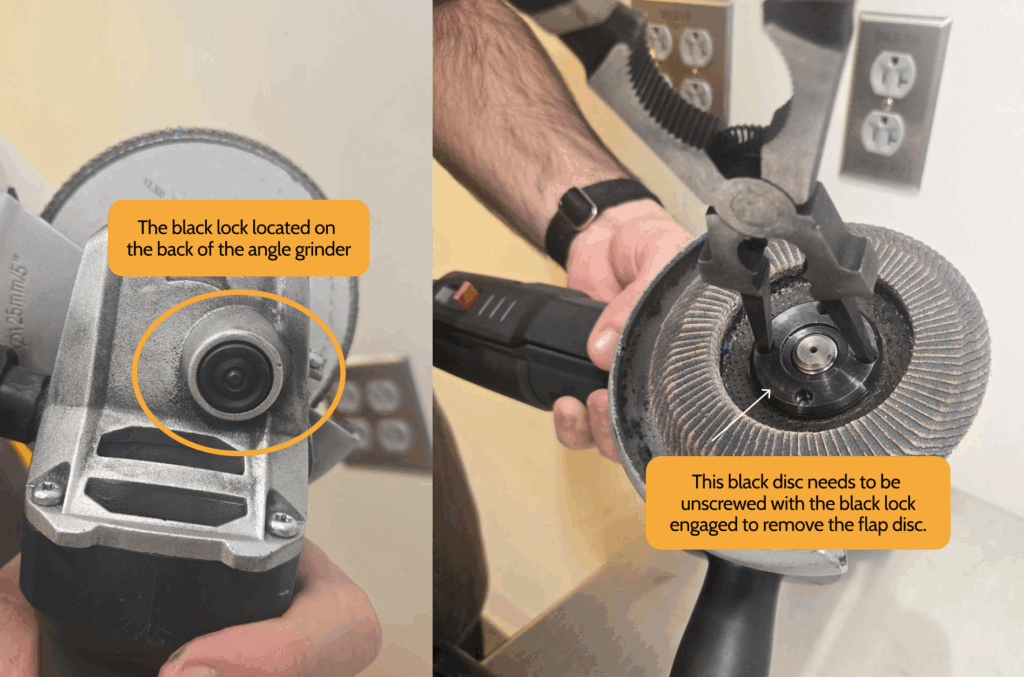
Changing out flap discs
- Unplug the angle grinder.
- Engage the lock on the back of the angle grinder. You may need to rotate the disc slightly for the button to press so the angle grinder locks properly.
- With the lock engaged, use a pair of MIG pliers in the holes at the front of the flap disc. This metal disc, with four holes in it, screws onto the angle grinder, pinning the flap disc in place.
- Replace the old flap disc with a new one.
- With the lock engaged, screw the metal disc on top of your flap disc. Make sure everything is screwed on tightly.
To get checked off on the angle grinders, ask a supervisor to watch you while you angle grind! They will ask you to clamp down a part, grind down part of it, and then to demonstrate changing out the flap disc.