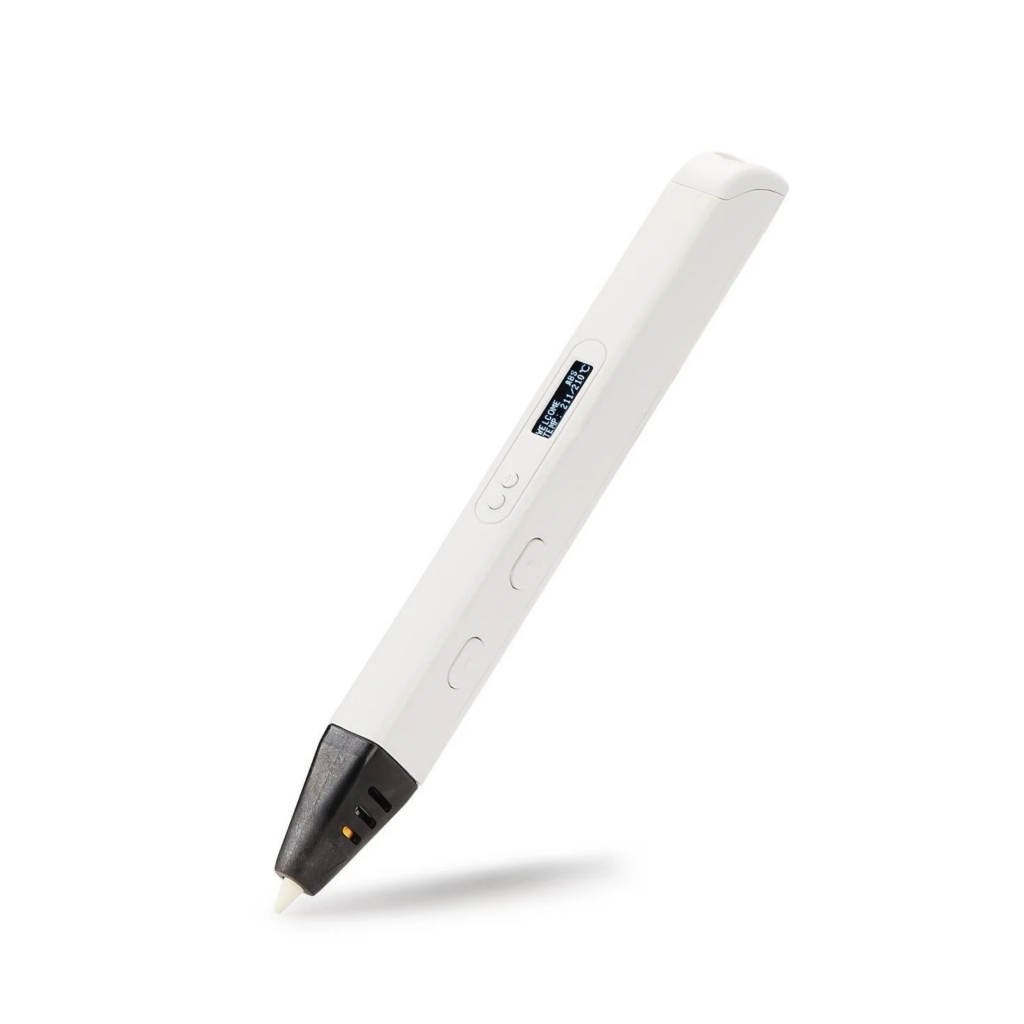
3D pens are an easy-to-use, intuitive, alternative to 3D Printing. 3D printing is usually a design-intensive and lengthy process. 3D pens, on the other hand, do not require any CAD design software, and using them is a relatively quick process. However, the simplicity and speed of a 3D pen come at the cost of precision, which vastly limits its use compared to a 3D printer. The lack of precision makes it very difficult to create any sort of mechanism with a 3D pen that you might make with a printer.
Nevertheless, the 3D pen has its uses which include:
- Fixing 3D printed parts
- Making decorations
- Creating simple components.
MYNT3D – 3D Pen Pro

Fixing 3D Printed Parts
The most effective use of the 3D pen is fixing 3D printed parts that have broken. If a part has broken into separate pieces, it can be rejoined using the 3D pen. While the first instinct may be to use the pen like a hot glue gun, this will prove ineffective as the PLA cools before the parts can be put together. The best way to join parts together would be to sandwich the parts together in your intended orientation and then trace the 3D pen around the seam where the pieces come together. PLA welds to PLA which results in a very strong connection.
Making Decorations
Another use of the 3D Pen is decorating. The PLA used by the pen comes in many different colors, and switching the colors is a simple process that can be completed in under a minute. Decorations can be 3D or 2D. For 3D designs, while it is possible to build up off the drawing surface without supports, it is more precise to make multiple 2D designs and then join them together to make something 3D.
Creating Simple Components
The 3D pen can also be used to manufacture simple components. There is no hard limit to what the 3D pen can be used to design, and with practice and patience, it can be used to design rather complex components. However, the design will never be as refined as traditional 3D Printing techniques.
Red Vest Tips
Here are some things to keep in mind while using the 3D pen:
- Make sure to give the PLA ample time to cool as it is malleable for some time after coming out of the pen, touching the print too soon could result in deformation. However, this can be useful in some use cases.
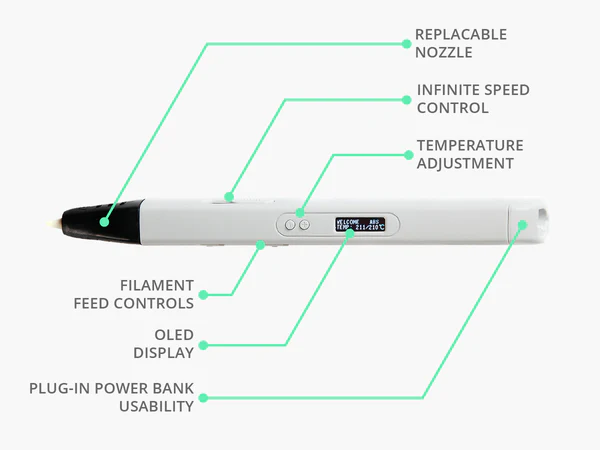
- The pen has a speed control slider, when making something more precise lower speed is recommended. Also, if you are trying to print off the drawing surface slow speed is a necessity.
- The tip of the 3D pen is hot so it can be used to reshape slight imperfections. Achieving precision with the 3D pen is very difficult and, in some cases, impossible, as such it should not be thought of as a replacement for a 3D printer.
Using the Pen

Powering the Pen
Connect the power adapter to the MYNT3D Pen Pro and plug it into a power outlet. The pen will start to heat up, and an indicator light will illuminate, indicating that it’s receiving power and heating the internal components.
Loading Filament
Wait for the pen to heat up to the desired temperature. The specific temperature will depend on the type of filament you’re using, so refer to the filament manufacturer’s instructions for the appropriate temperature. Once the pen reaches the desired temperature, you can start loading the filament.
A) Cut the filament into manageable pieces
B) Press and hold the load filament button until the pen’s indicator light changes to indicate the filament loading mode.
C) Insert the filament into the filament input hole located at the top of the pen. Gently push the filament until you feel resistance and it begins to feed into the pen. Keep pressing the button until you see the melted filament start to extrude from the pen’s nozzle.
D) Release the load filament button. The pen will stop extruding the filament once you release the button. This indicates that the filament is loaded and ready for use.
Adjusting Speed and Temperature
The MYNT3D Pen Pro offers adjustable speed and temperature settings, allowing you to control the flow and consistency of the filament.
Do not turn the temperature all the way up
Creating with the Pen
Now that your MYNT3D Pen Pro is loaded with filament and the temperature and speed settings are adjusted, you can start creating your 3D designs. Hold the pen like you would hold a regular pen or pencil, and gently press the extrusion button to start the filament flow.
A) Move the pen in the desired direction while keeping a steady hand. The melted filament will quickly solidify, allowing you to create structures and shapes in three dimensions.
B) You can experiment with different techniques, such as drawing on a flat surface and then lifting the design to create freestanding structures or drawing directly in the air to create intricate designs.
C) If you need to change the filament color or type, repeat the filament loading process described in Step 2.
Finishing and Cooling
Once you have finished your design or need to take a break, it’s important to let the filament cool down and solidify before handling the object. Set the MYNT3D Pen Pro aside on a heat-resistant surface and allow the filament to cool. Avoid touching the hot nozzle during this time.