

What Is a Balance?
A balance is an instrument used to measure the mass of a sample. Laboratory balances are typically both highly accurate and precise. To increase their precision, some laboratory balances are designed with an enclosed measuring pan to avoid the influence of dust and air currents. They may also include vibration resistance, data transfer, automation, and capacity range options. Laboratory balances are sometimes divided into two types: precision and analytical. Precision balances have a higher capacity (largest readable load) and lower readability (smallest displayable increment of mass) than analytical balances.
Models in the Wet Lab Makerspace
| Model | Capacity | Readability |
|---|---|---|
| MS8001TS | 8.2 kg | 0.1 g |
| ME503T | 520 g | 0.001 g |
| ME204T | 220 g | 0.001 g |
| ME1002T | 1200 g | 0.01 g |
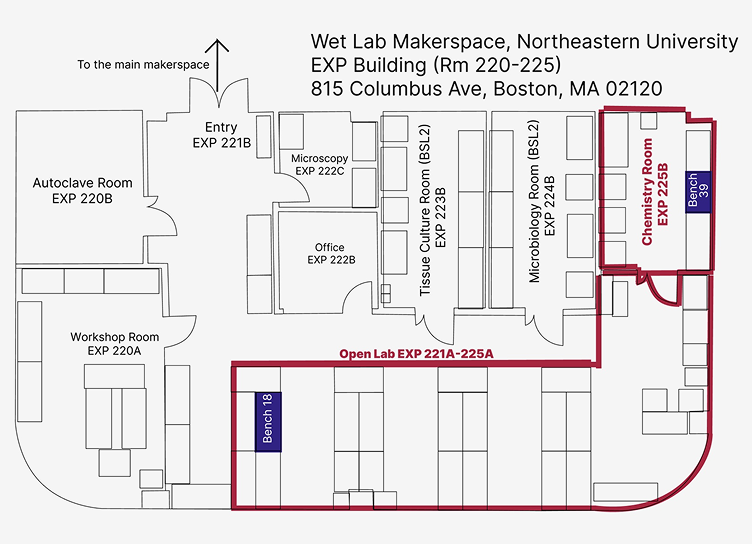
They are located in the Chemistry Room (EXP 225B) and in the Open Lab (EXP 221A–225A). Most weighing consumables (e.g., weigh boats) are stored in Bench 39.
Safety Considerations
Parts of the Balance
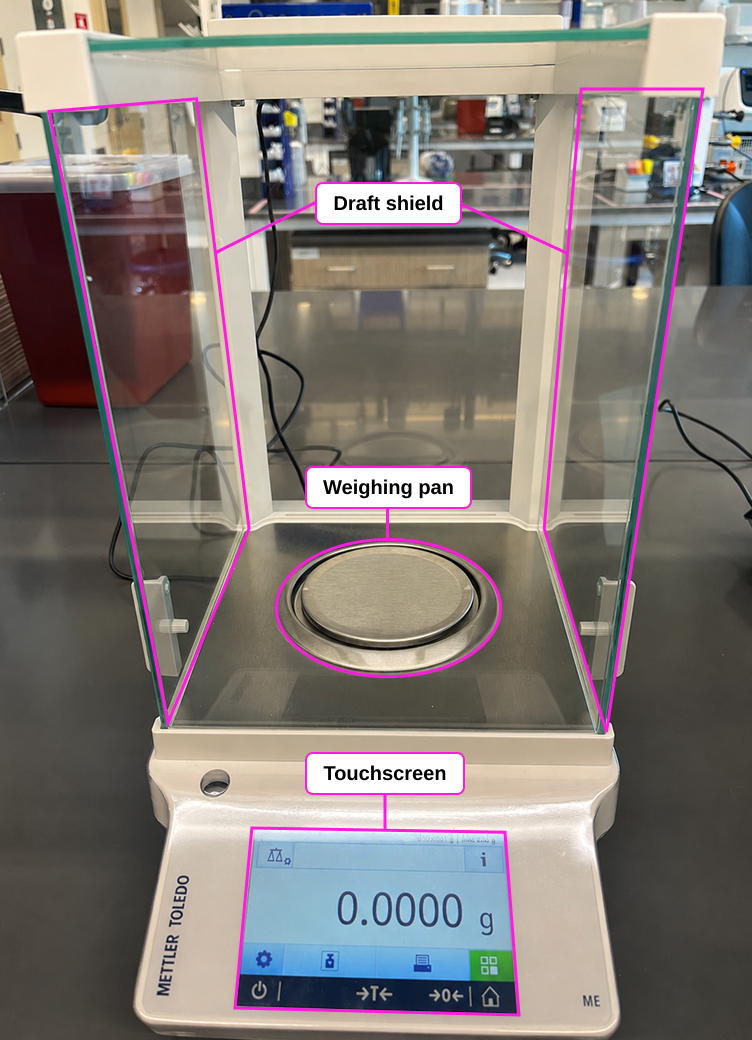
- Draft shield: A protective enclosure around the weighing pan to increase precision by reducing the influence of dust and air currents. Not all balances have a draft shield, but those that do will equilibrate faster and measure more accurately when the shield is closed.
- Weighing pan: The surface where the object is placed to be measured. This must be kept clean to measure accurately. Avoid bumping or jarring the weighing pan.
- Touchscreen: Used to operate the instrument, adjust settings, and view the measurement.
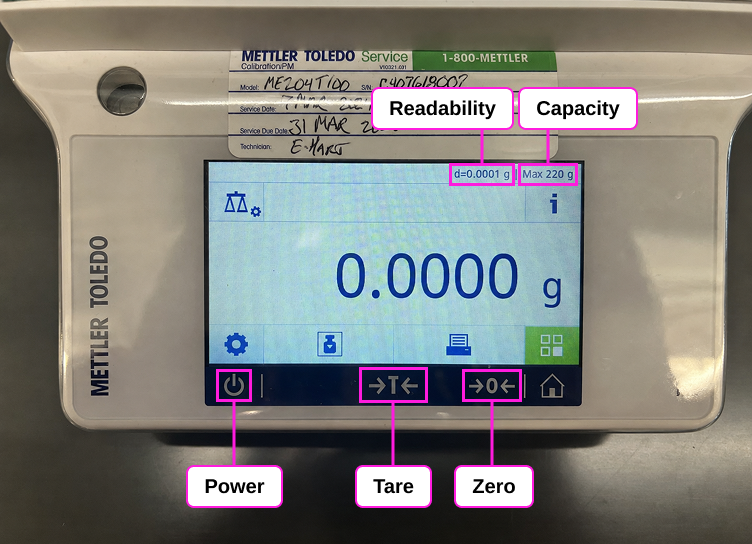
- Readability: The smallest mass the balance can display (the number of digits following the decimal point).
- Capacity: The maximum mass the balance can measure.
- Operation keys:
- Power button: Turns the instrument on. The balance powers down automatically after a period of inactivity.
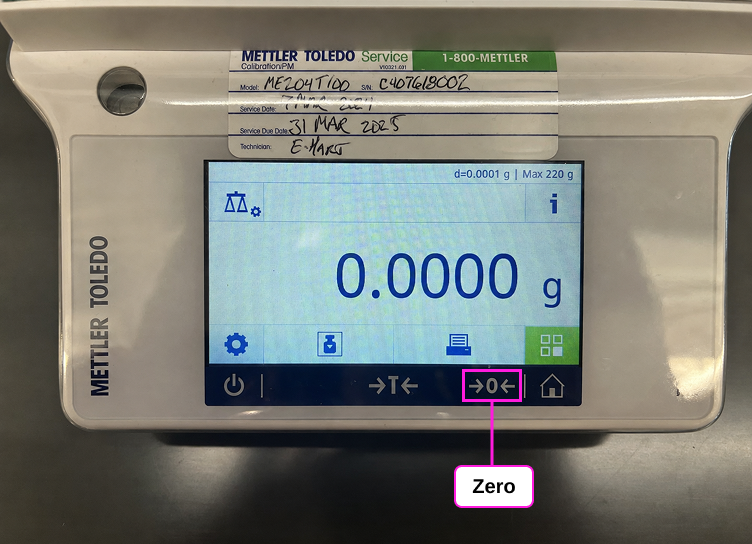
- Zero button (0): Resets the zero point of the balance when the weighing pan is empty.
- Power button: Turns the instrument on. The balance powers down automatically after a period of inactivity.
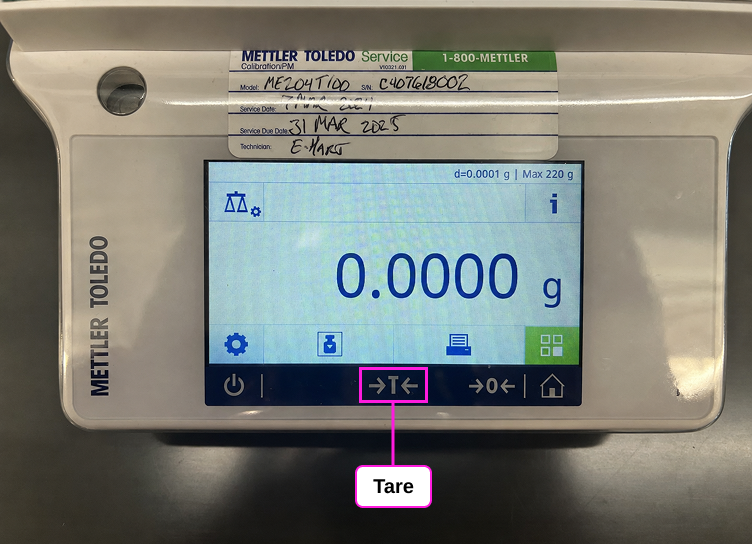
- Tare button (T): Subtracts the weight of the item on the weighing pan from further measurements.
- Zero button (0): Resets the zero point of the balance when the weighing pan is empty.
- Tare button (T): Subtracts the weight of the item on the weighing pan from further measurements.
- Zero button (0): Resets the zero point of the balance when the weighing pan is empty.
Tips for Success
- Do not move the balances on the benchtop.
- Allow time for the balance to equilibrate (approach a stable reading) before taring, zeroing, or recording a measurement. Do not repeatedly press the Tare or Zero buttons.
- If the balance is on Standby (displays time and date), single-press the Power button to turn it on.
- If the balance is Off (screen is blank), long-press the Power button to turn it on.
- On balances with a draft shield, closing the draft shield will allow the balance to equilibrate more effectively.
- Always contain your sample in a weigh boat or other container.
- Use a clean, dry spatula and weigh boat to scoop from chemical stock containers.
- Do not exceed the maximum weight capacity of the balance to prevent damage or inaccuracies.
- Please clean any spills on the interior or exterior of the balance and the benchtop:
- Brush away gently if possible.
- If liquid is required, begin with DI water on a Kimwipe.
- If a solvent is required, use as little 70% ethanol as possible to clean the spill.
- Handle the balances gently.
Operating Instructions
1. Turn the Device On
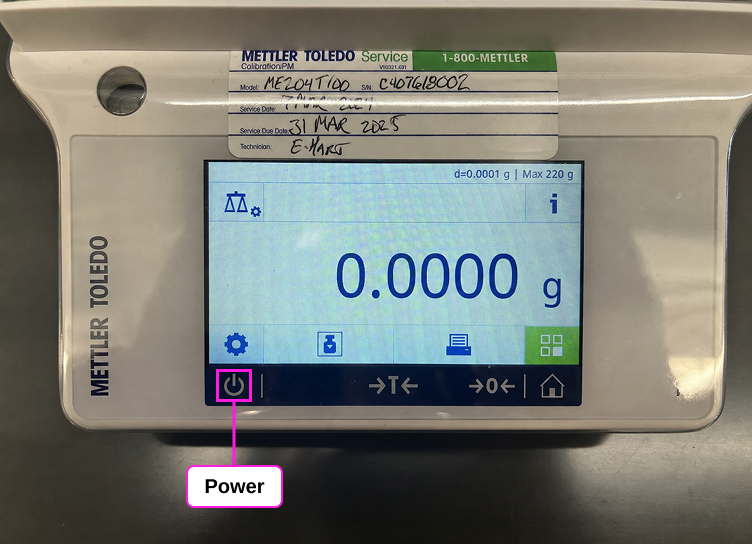
To begin using the balance, touch the Power button in the lower-left corner of the touchscreen.
2. Zero the Balance
Touch the 0 button to zero out the scale.
3. Choose an Appropriate Weighing Container
- Weighing containers (e.g., weigh boats and papers) are stored in the drawer beneath the balances.
- Use only clean, dry weighing containers.
- Use a fresh weighing container for each reagent.
4. Tare
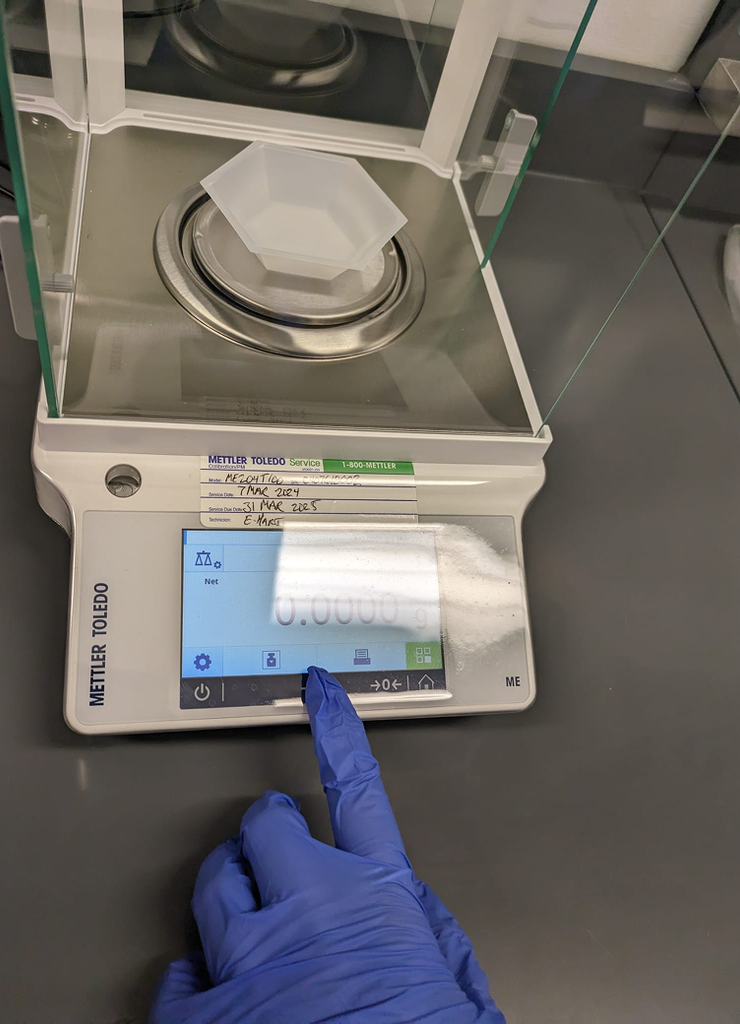
The Tare button (T) temporarily zeroes the balance, removing the mass of your weighing container from further readings.
5. Load Your Sample
Scoop a small amount of your sample with a clean, dry spatula and carefully place it in the weigh boat. Always use a different spatula and weigh boat for each reagent to avoid contaminating stock containers.
6. Adjust to the Required Weight
Close the draft shield, if available, to allow the weight to equilibrate. Adjust the amount of sample as needed. To avoid contamination of chemical stocks, return excess material to the original container only if the weigh boat and spatula were completely clean and dry, and you are certain the chemical is uncontaminated. Never return material to the stock container if it has spilled onto the bench or balance pan.
7. Clean Up
Remove the sample and weigh boat from the balance pan. Clean the balance pan and surrounding area. If the interior of the balance can be cleaned with a dry brush, that is best. If liquid is necessary, begin with DI water and a Kimwipe, then dry thoroughly to prevent contamination and corrosion. Clean with 70% ethanol or 10% bleach (followed by DI water) only when necessary.
8. Power Off
Press the Power button again to turn off the balance. The screen will go blank when the instrument is completely off.